 FREE 1 to 3-Day Delivery on Orders $149+ Details
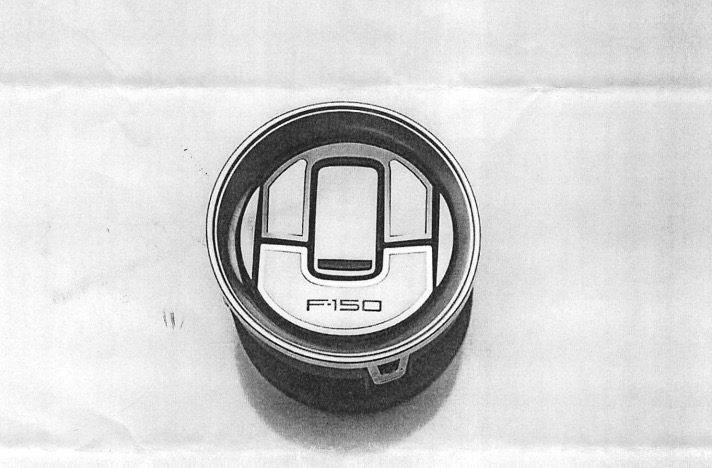
How to Install A/C Deluxe Vent Trim Covers Etched - 20 Piece Set - on your 2010-2014 Ford F-150
Includes:
1 - Adhesive Promoter Pen
Introduction:
In the next few paragraphs we will explain to you what you will need to know and do for a successful application of ACC Stainless Steel Accessories. It is important to understand that almost all stainless steel peel and stick accessories need to be pre-shaped by hand in order to achieve a nice long term installation. We realize that all parts are differnt from each other but as far as the installations of these parts they all will need to follow the same set of general instructions.
Liner info:
Your new accessories will come to you with a protective surface liner. Leave this liner in place until the installation is complete to prevent finger prints and or possible scratches during installation. This liner is required to remain on the part until you are instructed to remove it.
1. The first thing that needs to be done in any peel and stick application is surface preparation. It is important that you examine the surface to determine if any kid of special treatments have ever been used. Such as wax/silicone treatments and/or polymer surface preps. Take a strip of masking tape and press it very firmly to make it adhere to the surface. Then peel it off to see how difficult it is to remove. If your masking tape is removed extremely easy and/or does not stick at all then you will need to perform a special surface preparation. In most cases like this you will need to make a solution of a straight detergent (Johnson's Baby Shampoo or Palmolive Dish Soap) and water. Mix a 32oz bottle with about five table spoons of soap detergent. Once you have the solution made, wash the surface scrubbing quite vigorously to remove any surface contaminates.
2. When this is done you can proceed to the regular preparation. This is done by scrubbing the surface with alcohol and wiping it dry. At this point you will need to test the surface again to see if you have achieved a tack. Apply a new strip of masking tape to the surface. If it adheres you have done a good job, if it doesn't then you must perform the wash again and again if necessary until you have achieved a nice tack. Once a tack has been achieved swipe the entire surface to be mounted with the adhesive promoter you will receive with any of our stainless steel kits. This promoter is not a cleaner, but an adhesive accelerator. When used on a nice, clean, and well prepared surface, this chemical will create a very reliable bondable surface.
3. Now that all preparations have been made, the next step will be to apply the accessory. In almost all cases it will be very necessary to pre-shape the stainless part so that it conforms to the surface you are mounting it to, perfectly. This is done by gently shaping the part by hand a little at a time so that when the part is placed in position it matches the surface without having to apply pressure anywhere on the part to make it fit the shape of the surface. In other words, it will look like it has been installed perfectly, before you actually peel and stick it. If you take your time when forming the part you will never have any problems with the part popping off in the future.
4. Now that you have a good surface prep and your part or parts have been hand shaped to match the surface you can peel the red release liner from the back of the part. Keep in mind that the adhesive is very aggressive and it will not allow you to reposition it once it has made contact with the surface. So go slow and sure. once all holes and perimeters are lined up, set the part in place pressing firmly along the entire surface to bond the part and then remove the protective liner. The bond will become permanent after twenty-four hours.
STAINLESS STEEL CARE AND MAINTENANCE
In the next few paragraphs we will be covering a few important topics about highly polished stainless steel and how to care for it. American Car Craft only uses 304 #8 Machine Polished Stainless Steel in variable thicknesses ranging from 24ga to 16ga depending on the product. First and foremost your attention must be brought to the protection of the surfaces. Under any normal circumstances your stainless accessories will be subject to driving contaminates; sand particles, dirt, road grime, dust, oil, and water stains. Each of these has its own method of cleaning in order to not damage the surface. We will go through each of them one by one. We will break down the most common cleaning procedures into three basic parts. It is important to know that #8 polished stainless has a perfect machined finish. This finish cannot be matched by hand polishing. Although stainless steel, like regular steel, is absolutely able to be polished, the difference between a machined finish and a hand finish is very noticeable. So in order to maintain the original finish you must first learn how to prevent it from being damaged.
GENERAL CLEANING:
The most signification problems that will compromise the stainless finish are dirt and/or sand particles. The best and most effective way to deal with these types of contaminates is to remove them from the stainless' surface with air. At home an air compressor will be an invaluable tool to blow away any dirt and sand you may have picked up during your travels. Blow away all dirst before cleaning, this will prevent any possibility of you picking up a particle and dragging it across your accessory. This can also be done very effectively using a can of compressed air such as a computer keyboard cleaner. Now that you have removed any and all loose particles you can proceed to cleaning with an increased level of confidence that your accessories are safe.
The process for cleaning the surface is a very strict yet easy procedure that you must train yourself to follow at all times. It is absolutely necessary that you learn not to wipe the surface in a back and forth motion. Wiping the surface in this way will increase the chance that you might pick up a particle or contaminate that you may have missed and drag it into the surface causing a scratch. Additionally rubbing in a back and forth motion will also create swirls and streaks in the surface which over time will build up to an unsightly finish on your accessory. In order to avoid this possibility you must train yourself to swipe the surface in one direction at a time. We recommend that the main cleaning product should be a foamy glass cleaner such as "SPRAYWAY" or "DIRTEX". These products are commonly available at Lowes, Home Depot or your local grocery store. These particular cleaners are great because they will dissolve any oils and finger prints and generally wipe away streak free.
Never spray the cleaner directly to the product when performing a general cleaning. Instead spray the cleaner directly to a Bounty paper towel or microfiber cloth. Microfiber is the #1 choice for any and all cleaning and waxing due to its non-abrasive nature. The only downfall about the micro fiber is that they are a little expensive and can become contaminated so for an initial cleaning we recommend that you use a Bounty paper towel because they are soft, strong, and relatively cheap. Spray the bounty towel directly with your cleaner and wipe the surface in one direction, fold the towel and wipe again. Avoid wiping the surface in a back and forth motion. When the towel is full, throw it away and grab another. Remember that the bounty towel is relatively cheap and your accessories are expensive. The micro fiber cloth will be an indispensable tool when dusting and applying waxes.
We highly recommend applying a wax glaze because it offers a beautiful sheen and also prevents dust from sticking to the surface of your stainless accessory. It is absolutely imperative that wax be applied to a clean "dirt free" surface. Only an instant quick wax such as "Meguiar's Quik Wax" or "ACC's Meta Glaze" should be used for this. These types of waxes wipe on and wipe off leaving a nice brilliant shiny clean end result. The micro fiber cloth is great as a general surface duster and dry cleaner when contaminates are not an issue.
REMOVAL OF WATER STAINS:
The most common stubborn water stain is caused by calcium in the water that dries into the metal. They cannot be simply wiped away. To deal with this, follow these steps.
A. Calcium is a mineral that can be softened and removed by a common chemical called "CLR" (calcium/lime and rust remover) this chemical can be found in your local grocery store. Apply a small amount to a bounty towel and apply it directly to the stains. Allow the chemical to saturate the stain, do not start wiping it.
B. After a few minutes, wipe the area with your bounty towel in a single direction manner until the stain has been removed.
C. The CLR will leave a slimy residue. Remove this residue with your glass cleaner. As always remember to wipe the surface in one direction.
REMOVAL OF FINGERPRINTS AND OILY STAINS:
Most fingerprints and oil deposits can be cleaned away using the general cleaning instructions, however sometimes there are more stubborn oily deposits that will need a more direct approach. In this situation, spray your foamy glass cleaner directly to the deposit and allow the cleaner to saturate the stain for a few minutes. This should allow you to remove the stain by wiping it a couple of times gently in one direction with your Bounty towel. In a more aggresisive stain there are chemical solvents that can be used such as the "3M" adhesive remover or a general wax and silicone remover that can be found at your local auto parts store. These chemicals will not damage the stainless, however the same careful procedure must be followed so that you don't damage the surface in the process of cleaning the metal.
IMPORTANT TECH TIP TO REMEMBER:
The surface of this type of stainless steel must be cared for just as you would care for the paint on your car. The metal is not a harder chrome finish but a relatively soft surface just like your paint. Keeping this in mind and following all the cautions and procedure listed above will result in your enjoyment of these products for years and years to come.
SHIPPING & RETURN POLICIES
Warranty
All items are warranted to be free from defects in materials and workmanship at the time of shipment to you. Your purchase will be backed by a limited warranty. AGO will not honor warranty requests due to shipping damage, improper handling or instaiiation, neglect, accidents, or competition use. Warranty claims apply only to parts made from Stainless steel. All parts are to be installed at the customer's risk. Parts may or may not meet individual state driving laws. It is the customer's responsibility to determine if he/she can use the parts on the vehicle in their state or district. Warranty is only valid to the original purchaser and it is not transferable. All items are made for street or show use. Warranty is void if any item is used for racing.
Defects I Returns / Exchanges
If you have an item(s) that is defective you must inform the company you purchased the item(s) from immediately. (Even though ACC's name is on the label, ACC may have drop shipped your order for one of many distributors.) (Please verify where you made your purchase before calling) If a customer is unsatisfied with the product, feel free to contact the company where the item was originally purchased, for their return policies. Company's policies vary, so be sure to follow the procedures provided.
If an item{s) was purchased directly from American Car Craft, please call ACC immediately to obtain a Return Goods Authorization Number (RGA#). ACC requires the RGA# to be displayed on the outside of the package.
ACC will not give credit without an RGA number, provided by ACC.
SEE FORM BELOW - AND PLACE IN PACKAGE.
If an item is defective contact ACC immediately to file a claim, no claims will be allowed after seven (7) days. If a customer is unsatisfied with an item(s) and would like to return it to ACC. it must be returned in like-new condition, with all ACC packaging and shipping insurance to cover the value of the product. Shipping charges are non-refundable and return shipping is the responsibility of the customer.
RETURNS:
While American Gar Graft does accept returns, we only accept returns within thirty (30) days of purchase. We expect our distributors to follow procedure. Before returning a product to American Gar Graft, Distributors must call ACC to obtain Return Goods Authorization number (RGA#). ACC requires the RGA# to be displayed on the outside of the package along with a RGA form enclosed in the package. Effective 6/07/2013: If a package is received without RGA # it will either be refused or returned at Distributor or Gustomer Expense, without exception. (Please see RGA form).
Returns on drop ship orders: Distributor must supply the customer with a RGA form and follow the procedure above.
ACC charges a 15% re-stock fee for all returned orders, accept for manufacturer defects. In which case the part will be exchanged or an in-house credit will be issued. American Car Craft reserves the right to refuse business to anyone for any reason.
SHIPPING DAMAGE:
All parts shipped from American Gar Graft are insured for the full amount of the purchase. Delivery of the products in good condition is the responsibility of the carrier. If you receive an item(s) that is damaged or missing merchandise, immediately notify the Shipping Garrier and the Gompany that the item was purchased from. (Even though AGG's name is on the label. AGG may have drop shipped your order for one of its many distributors.) (Please verify where you made your purchase before calling)
EXPORT VEHICLE FITMENT
Most vehicle manufacturers make changes to vehicles for export out of the US that we have no way of knowing about. These changes may affect the fitment of AGG accessories. Since AGG does not have access to these vehicles, we cannot be held responsible for proper fitment In these situations. If your vehicle or your customers vehicle was manufactured for export, please be aware that we cannot guarantee fitment and all shipping charges are the responsibility of the customer. AGG is not responsible for any fitment issues that may arise and will not offer any type of refund of the part outside of our normal return policy or shipping costs. Failure to contact the shipping carrier within 5 days may result in the claim being denied. Keep all shipping materials (box, packing, instructions etc.) intact until an inspection can be made by the carrier.
ACC packaging has passed the UPS packaging standard tests.
Ship to:
Returns Department
American Car Craft
18924 Sakera Rd
Hudson. FL 34667
Be sure you have a RGA # before sending your return
Return Goods Authorization RGA#
Customer Name
Address
Phone #
American Car Craft LLC
Ph. 727-861-1500
Fax 727-861-1520
www.americancarcraft.com
