FREE 1 to 3-Day Delivery on Orders $149+ Details
How to Install Tuff Country 2 in. EZ-Install Leveling Kit on your Sierra
Installation Time
1 hours
Tools Required
- Torque wrench
- Standard socket set
- Standard wrench set
- Metric socket set
- Metric wrench set
- Tape measure
- Hydraulic floor jacks
Congratulations on your selection to purchase a Tuff Country EZ-Ride Suspension System. We at Tuff Country EZ-Ride Suspension are proud to offer a high quality product at the industries most competitive pricing. Thank you for your confidence in us and our product.
If you desire to return your vehicle to stock, it is the customers responsibility to save all stock hardware and components.
The Tuff Country EZ-Ride Suspension product safety label that is included in your kit box must be installed inside the cab in plain view of all occupants.
Important customer information:
Tuff Country EZ-Ride Suspension highly recommends that a qualified or a certified mechanic performs this installation.
It is the responsibility of the customer/installer to wear safety glasses at all times when performing this installation.
It is the customers/installers responsibility to read and understand all steps before installation begins. If you have any questions or concerns, please contact our technical department @ (801) 280-2777. Also, the OEM manual should be used as a reference guide.
This vehicles reaction and handling characteristics may differ from standard cars and/or trucks. Modifications to improve and/or enhance off road performance may raise the intended center of gravity. Extreme caution must be utilized when encountering driving conditions which may cause vehicle imbalance or loss of control. DRIVE SAFELY! Avoid abrupt maneuvers: such as sudden sharp turns which could cause a roll over, resulting in serious injury or death.
It is the customers responsibility to make sure that a re-torque is performed on all hardware associated with this suspension system after the first 100 miles of installation. It is also the customers responsibility to do a complete re-torque after every 3000 miles or after every off road use.
After the original installation, Tuff Country EZ-Ride Suspension also recommends having the alignment checked every 6 months to ensure proper tracking, proper wear on tires and front end components. Tuff Country EZ-Ride Suspension takes no responsibility for abuse, improper installation or improper suspension maintenance.
Important information that needs to be read before installation begins:
The design of this kit is to be used with a tire size of 285/70/R17. Any tires that are bigger than this size are NOT a guaranteed fit without needing to trim fenders.
Before installation begins, Tuff Country EZ-Ride Suspension highly recommends that the installer performs a test drive on the vehicle. During the test drive, check to see if there are any uncommon sounds or vibrations. If uncommon sounds or vibrations occur on the test drive, uncommon sounds or vibrations will be enhanced once the suspension system has been installed. Tuff Country EZ-Ride Suspension highly recommends notifying the customer prior to installation to inform the customer of these issues if they exist.
Make sure to use loctite on all new and stock hardware associated with the installation of this suspension system.
Special note: Before installation begins, it is the customers/installers responsibility to make sure that all parts are on hand. If any parts are missing, please feel free to call one of our customer service representatives @ (801) 280-2777.
Please follow instructions carefully:
Before installation begins, measure from the center of the hub, to the bottom of the fender well, and record measurements below.
Pre-installation measurements:
Driver side front:_________________________________
Passenger side front:_____________________________
Driver side rear:__________________________________
Passenger side rear:______________________________
At the end of the installation take the same measurements and compare to the pre-installation measurements.
Post-installation measurements:
Driver side front:_________________________________
Passenger side front:_____________________________
Driver side rear:_________________________________
Passenger side rear:______________________________
Front end installation:
1. To begin installation, block the rear tires of the vehicle so that the vehicle is stable and can’t roll backwards. Safely lift the front of the vehicle and support the vehicle with a pair of jack stands. Place a jack stand on both the driver and the passenger side. Next, remove the front wheels and tires from both sides.
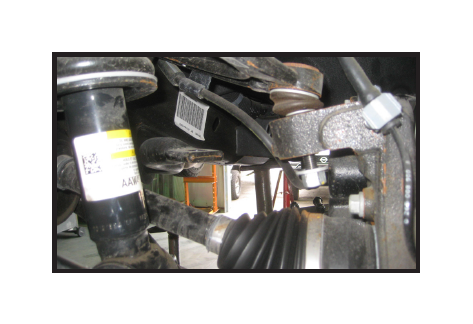
2. Working on the driver side, remove the swaybar endlink and save all hardware. Repeat on the passenger side.
3. Working on the driver side, remove the bolts attaching the lower strut to the lower control arm, discard bolts and repeat on passenger side.
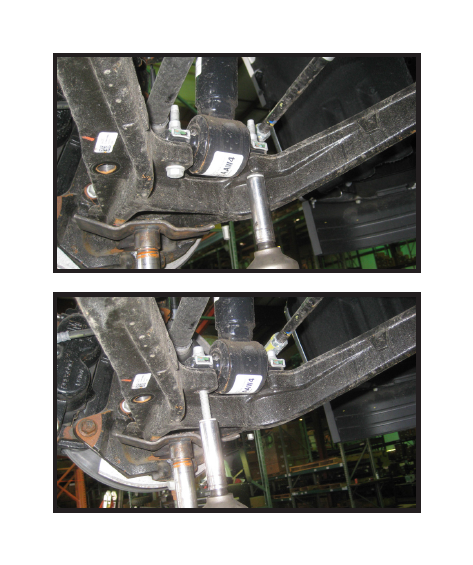
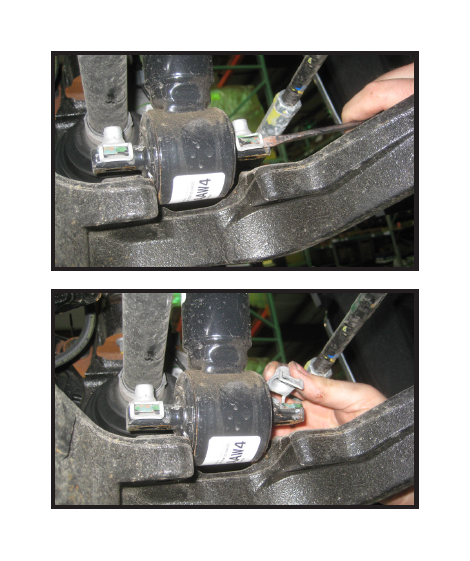
4. On both sides of the vehicle, remove the nut clips from the lower strut mounts and discard.
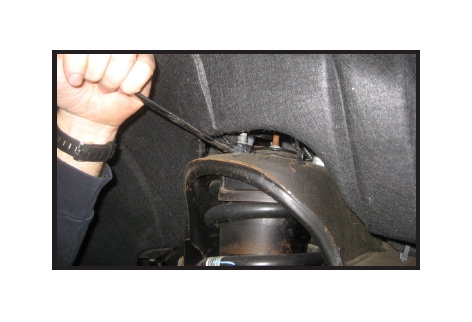
5. Working on the driver side upper strut mount, loosen the 3 nuts. It is not necessary to completely remove them. Repeat on passenger side
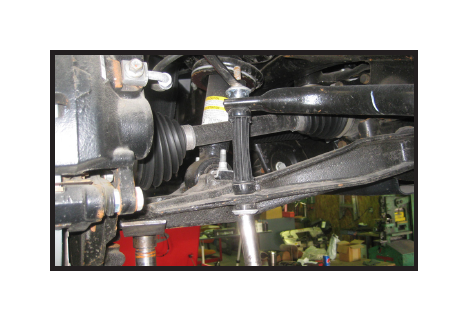
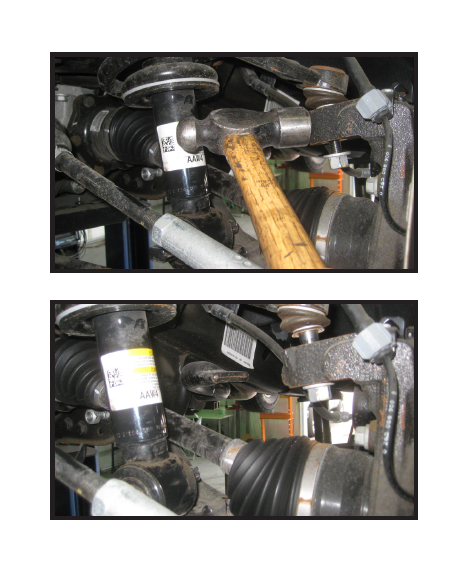
6. Working on the driver side, loosen, but DO NOT remove the upper control arm nut. Using a hammer, carefully hit the steering knuckle to break the ball joint taper free. Repeat on passenger side.
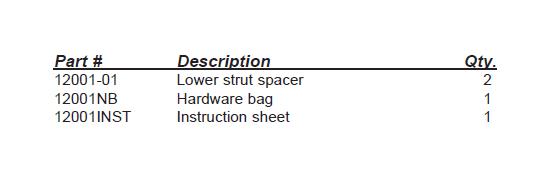
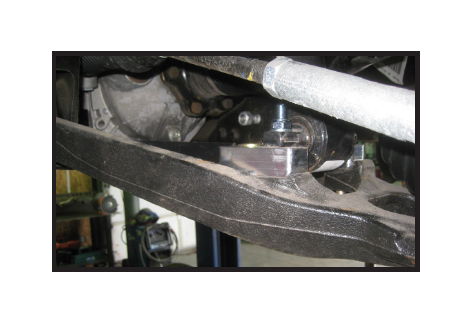
7. You should now have enough space between the lower strut mount to install the new 12001-01 spacer. Install on both sides of the vehicle.
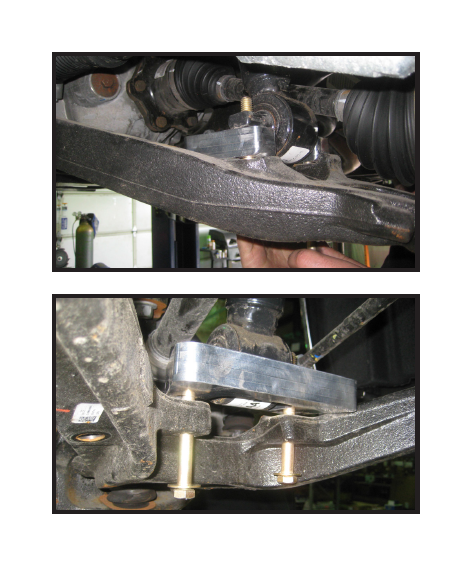
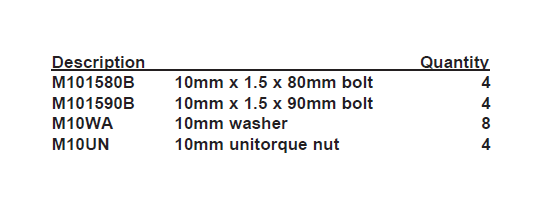
8. Locate (4) 10mm x 1.5 x 80mm bolts if your lower control arm is made of steel, and (4) 10mm x 1.5 x 90mm bolts if your lower control arms are made of aluminum. Also locate (8) 10mm washers and (4) 10mm unitorque nuts. Install the new hardware to secure the lower strut mount with the newly installed 12001-01 spacers. Torque to 35 ft lbs.
9. Move back to the upper ball joints and tighten. Torque to 37 ft lbs.
10. Tighten the upper strut mounting nuts that were loosened in step # 5. Torque to 37 ft lbs.
11. Re-install the sway bar endlinks. Torque to 17 ft lbs.
12. Re-install tires and wheels.
Congratulations! Install complete. Check and double check to make sure all steps were performed completely and correctly.