


Installation Time
(approx) a Day
Difficulty Level:
Mechanical expertise or professional installation required.
Installation Guides
No guide available for this part yet.
 FREE 1 to 3-Day Delivery on Orders $149+ Details

$1,049.95 kit
CONFIRM THIS FITS YOUR VEHICLE!
Saved - View your saved items
We're sorry. We couldn't save this product at this time.
or use

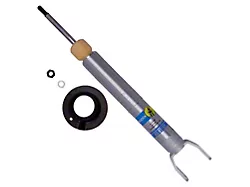
Bilstein B8 5100 Series Front Shock for 0 to 2.80-Inch Lift (09-18 4WD RAM 1500 w/o Air Ride)
 500+
500+
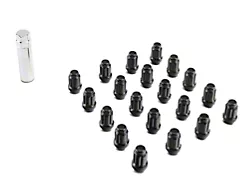
Black 6-Spline Lug Nut Kit; 14mm x 1.50; Set of 20 (12-18 RAM 1500)
 247
247

Magnaflow Direct-Fit Replacement Muffler Delete (09-18 5.7L RAM 1500 w/ Factory Dual Exhaust)
 227
227
Features, Description, Reviews, Q&A, Specs & Installation
| Brand | ReadyLIFT |
| Lift Height | 4.00 Inch |
| Lift Kit Type | Suspension Lift |
| Lift Kit Max Tire Size | 35 Inch |
| Brand of Shocks | Bilstein |
| Shock Style | Non-Reservoir |
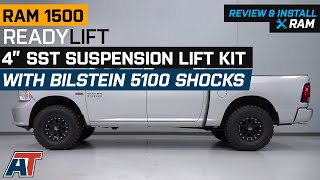
Higher Ground Clearance. Save your truck’s chassis by installing this ReadyLIFT 4-Inch SST Suspension Lift Kit with Bilstein 5100 Shocks. With this kit, your truck will be able to have an extra 4-inch front lift and an additional 2-inch rear lift. With the higher ground clearance, you’ll be able to confidently drive over bumpy trails without getting your underbody getting damaged.
Bilstein 5100 Shocks. To deliver a comfortable off-road ride, this suspension lift kit is equipped with Bilstein 5100 shocks. These components exhibit excellent damping capabilities, ensuring every shock and vibration is absorbed.
Upper Control Arms. For better wheel travel, this suspension lift kit comes with upper control arms. Every time you hit a bump on the road, the control arms will help keep your tires in contact with the ground.
Bolt-On Installation. Setting up this suspension lift requires a bolt-on process and doesn’t require any modifications. However, to ensure proper installation, you need to possess a moderate to a high level of mechanical expertise.
Warranty. For your assurance, this suspension lift kit is backed by ReadyLIFT’s no-hassle product warranty. If your purchased kit consists of any defective parts, ReadyLIFT will repair or replace them. For more warranty information, you may visit their official website.
Application. This ReadyLIFT 4-Inch SST Suspension Lift Kit with Bilstein 5100 Shocks is made to fit 2009-2018 4WD RAM 1500 models without Air Ride, excluding EcoDiesels.
Shop All 3 to 5 Inch Truck Lift Kits
Shop All Truck Parts And Accessories
Shop All Truck Lift Kits
ReadyLIFT 69-1041
CA Residents:  WARNING: Cancer and Reproductive Harm - www.P65Warnings.ca.gov
Installation Info
Installation Time
(approx) a Day
Difficulty Level:
Mechanical expertise or professional installation required.
Installation Guides
No guide available for this part yet.
What's in the Box
Tech Guides:
Sponsored
