FREE 1 to 3-Day Delivery on Orders $149+ Details
How to Install Raptor Series 6 in. Oval Wheel to Wheel Side Step Bars - Polished Stainless on your Dodge Ram
Torque Specifications:
For Rocker Panel Mount Installations
M8 through M12 bolts and nuts are set to 15-20 ft lbs.
Note: When installing the brackets and bars, all hardware must be left loose until all the items are attached.
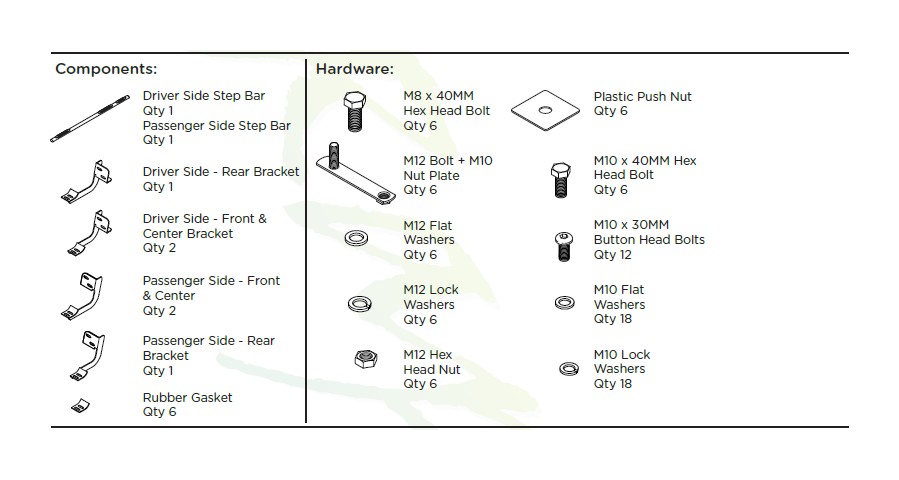
1.Remove all contents from the package and check stainless steel tubes for any damage. Also, verify that all components and hardware listed above are included before you begin installation.
2. Locate factory holes in six (6) places underneath body mount.
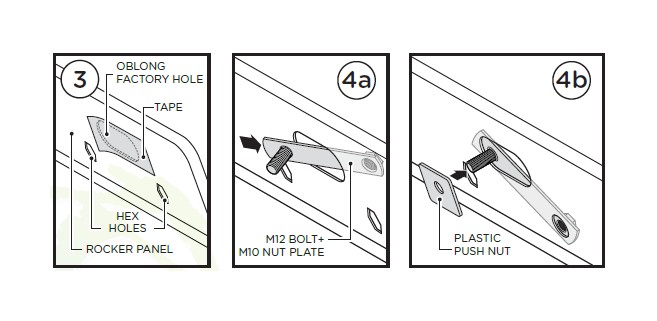
3. Remove the Tape covering the factory oblong hole in the rocker panel located above the two (2) hex holes.
4. Place the Plastic Push Nut onto the stud of the M12 Bolt M10 Nut Plate (4b). Then, slide the M12 Bolt M10 Nut Plate into the hole in the rocker panel as shown (4a).
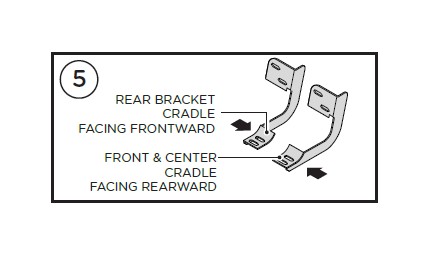
5. Front & Center Bracket Cradle face to the rear of truck and Rear Bracket Cradle truck.
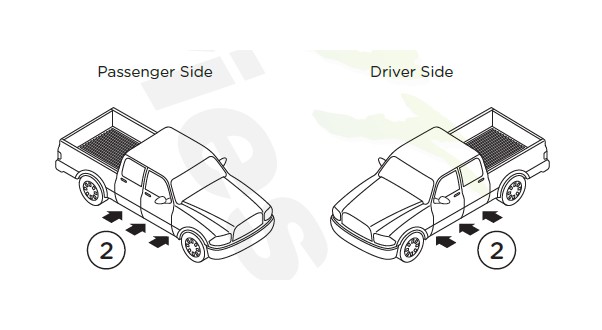
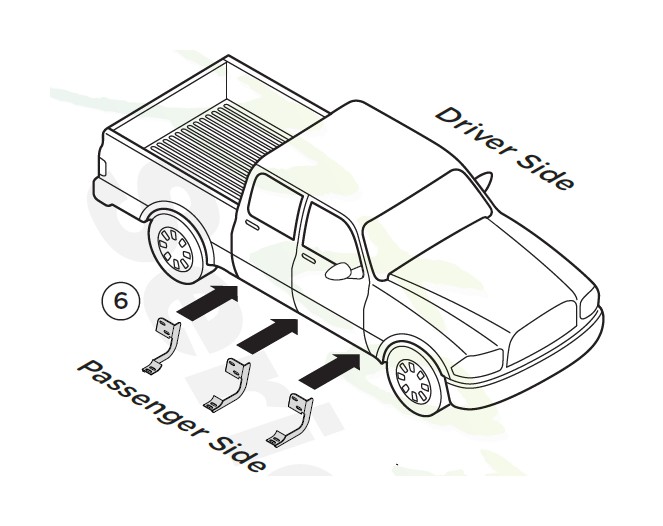
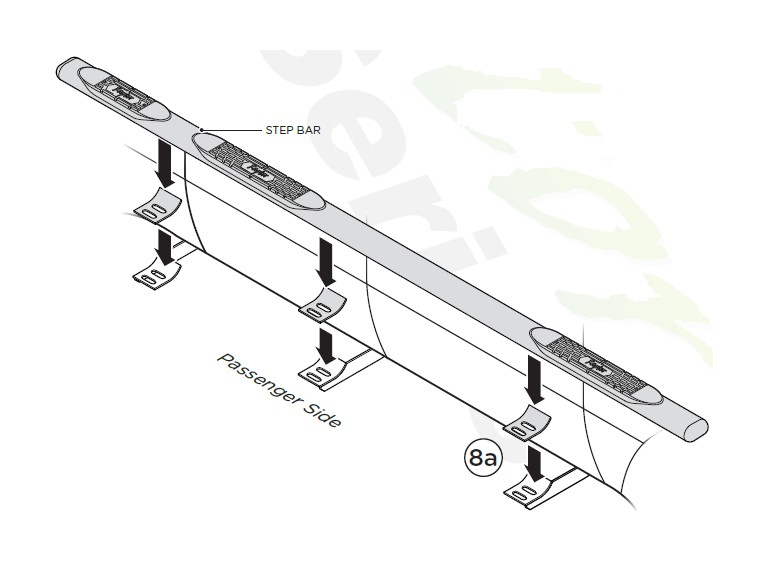
6. Begin installation on passenger side. Position Front Bracket, Center Bracket and Rear Bracket as shown along passenger side.
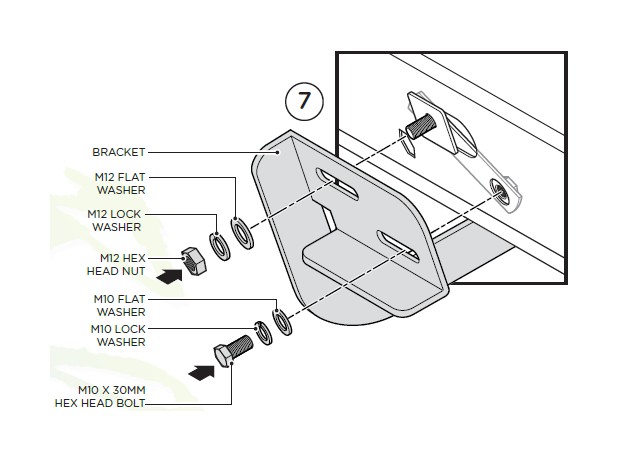
7. Line up each bracket to the 12 Bolt M10 Nut Plate located in the rocker panel.
Fasten the Bracket onto the M12 Bolt using one (1) M12 Flat Washer, one (1) M12 Lock Washer and one (1) M12 Hex Head Nut.
Fasten the Bracket to the threaded nut using one (1) M10 Flat Washer, one (1) M10 Lock Washer and one (1) M10 x 30MM Hex Head Bolt.
If threaded inserts already exist in rocker panel holes, use (1) M8 Flat Washer, one (1) M8 Lock Washer and one (1) M8 x 40MM Hex Head Bolt.
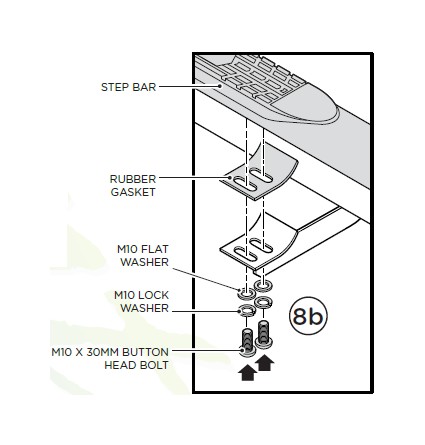
8. Place the Rubber Gaskets onto each Bracket Cradle (8a.) Then, place the Step Bar onto the Brackets and fasten using two (2) M10 Flat Wash-ers, two (2) M10 Lock Washers and two (2) M10 x 30MM Button Head Bolts (8b).
Tighten until the split lock washer is flat against bracket and snug. DO NOT over tighten and strip the threaded insert in the tube.
Repeat these steps for driver side installation. When all hardware is in place, everything must be tightened. See Page 1 for Torque Specifications.
ADDENDUM
Dodge Ram Trucks Built After June 2015
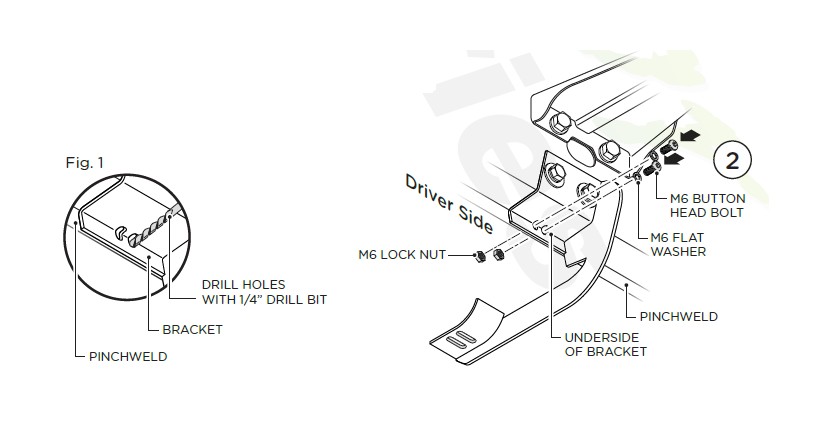
With Driver Front Support Brace
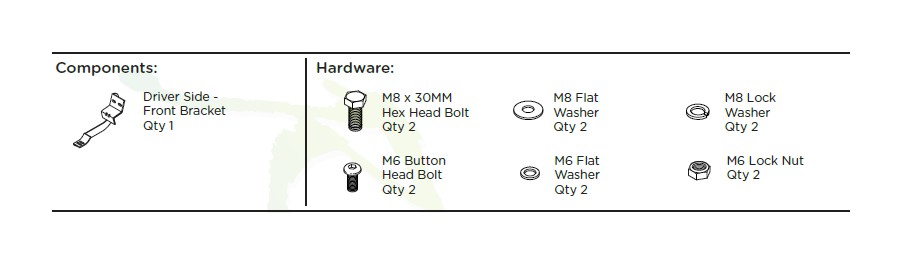
1. Align two (2) oblong holes of Bracket with two (2) hex holes on Rocker Panel. Fasten the Bracket to the Rocker Panel using one (1) M8 x 30MM Hex Head Bolt, one (1) M8 Flat Washer and one (1) M8 Lock Washer per hole.
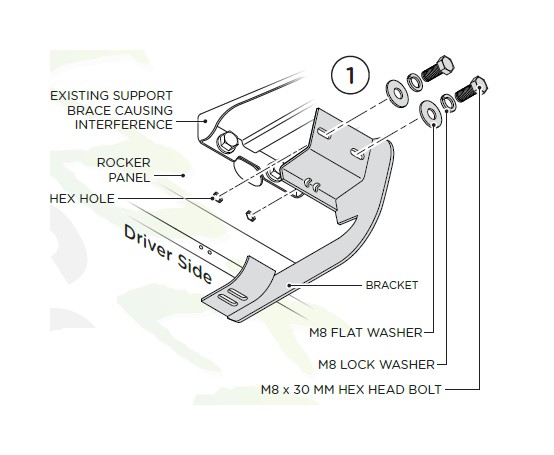
2. Locate two (2) holes on underside of Bracket and secure the Bracket to the Pinchweld using one (1) M6 Button Head Bolt, one (1) M6 Flat Washer and one (1) M6 Lock nut per hole.
NOTE: If no holes are present in the Pinchweld to accomodate the Button Head Bolts, you must drill two (2) holes into Pinchweld using a 1/4" drill bit (see Fig. 1).