FREE 1 to 3-Day Delivery on Orders $149+ Details
How to Install AEM Electronics Boost Control Solenoid Kit (97-17 All) on your Ford F-150
The model 30-2400 Boost Control Solenoid is specially modified for use as a boost control solenoid in high boost automotive systems. The kit includes all the necessary fittings to plumb your wastegate for either an internal or external wastegate.
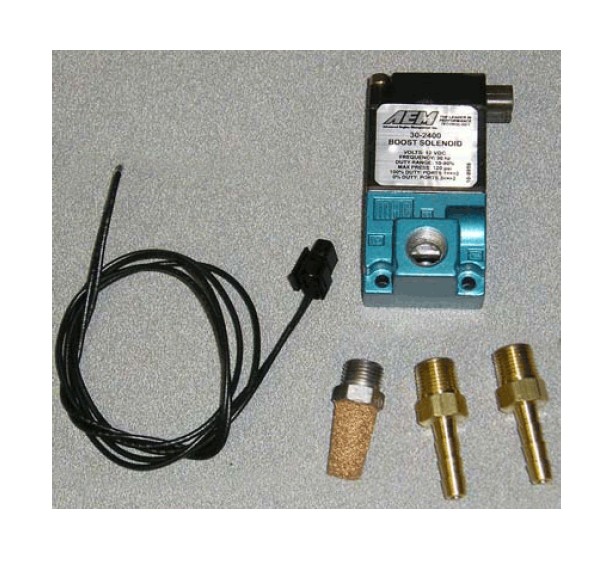
The 30-2400 Kit Contains:
1x Fast Response Solenoid
1x Mating Connector Assembly
1x 1/8” NPT Sintered Muffler
2x 1/8” NPT to 3/16” Hose Barb Adapters
Operating Voltage: 12VDC
Operating Frequency: 31hz
Duty Range: 10 to 90%
Max Pressure: 120 PSI
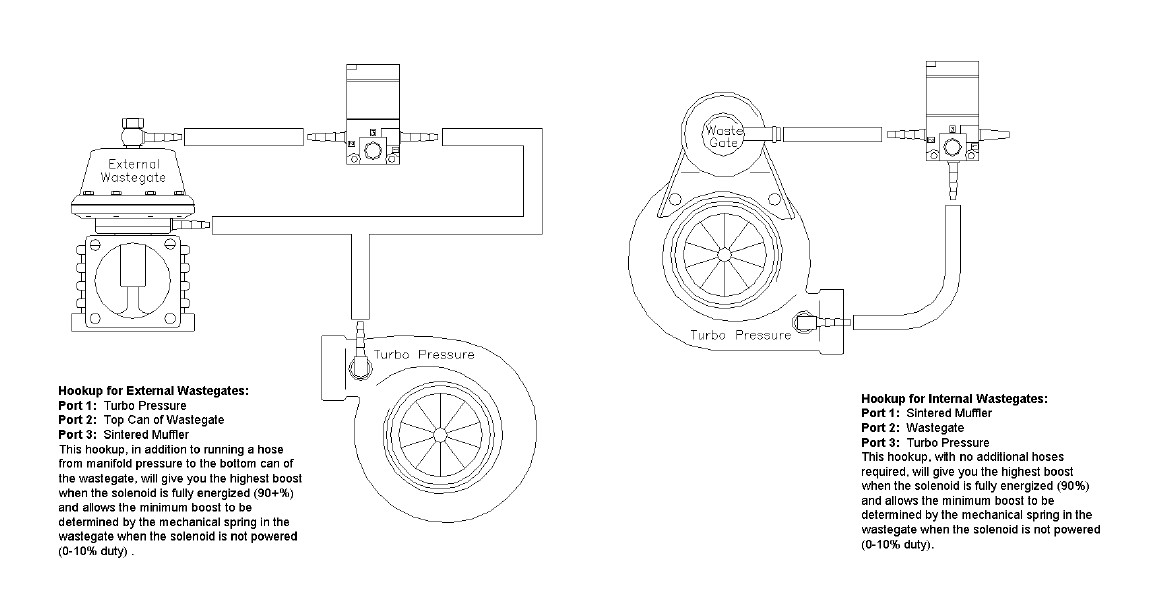
Electrical Connection: Polarity is unimportant. Hook one wire to switched 12 Volts and the other to the AEM EMS’s PW2 output or the driving devices boost control line. NOTE: on the SRT4 EMS 30-1510 PW2 outputs 12V. Hook up one wire to PW2 and one wire to ground. If you are not sure please refer to your EMS instructions/pin out sheet and verified the polarity output on PW2. When energized, ports 1 & 2 are connected, when de-energized, ports 2 & 3 are connected. The port numbers are clearly noted on the solenoid body.