 FREE 1 to 3-Day Delivery on Orders $149+ Details
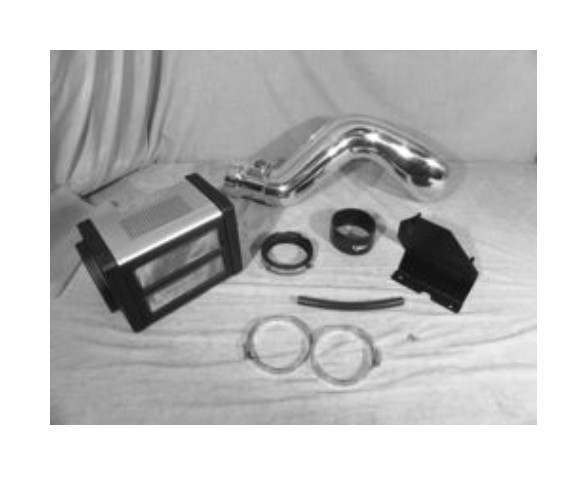
How to Install Injen Power-Flow Cold Air Intake w/ Power-Flow Box - Polished on your Sierra
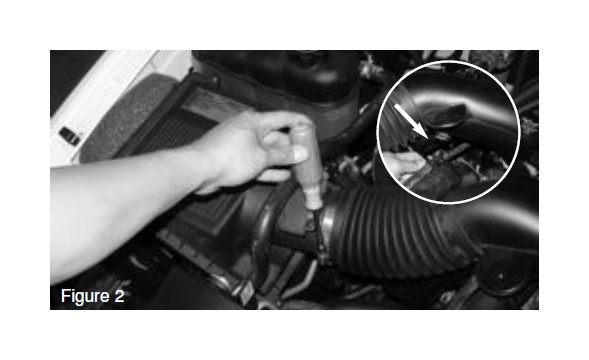
Carefully lift and pull up engine cover and remove. Disconnect crank case line from intake tube.

Loosen clamp on air box using 8mm nut driver. With pliers, remove clip holding in stock intake tube to radiator hose.
Loosen clamp on throttle body and remove stock intake tube.

Loosen the 2 screws holding in MAF sensor using torx bit/screwdriver.
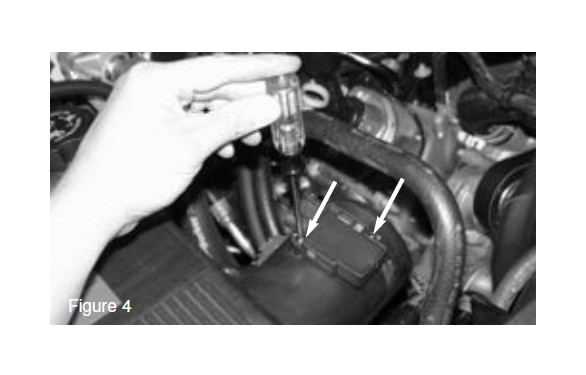
Carefully pull out MAF sensor, and set aside.

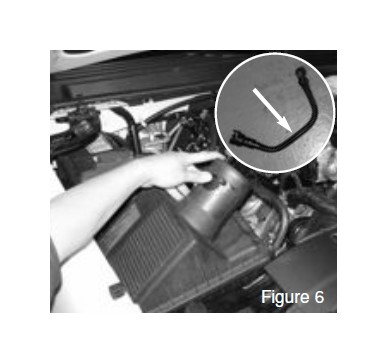
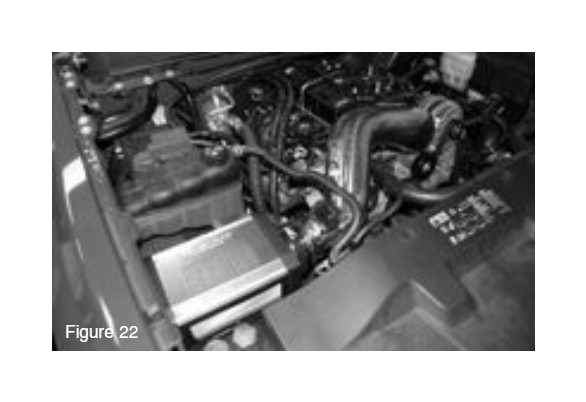
Carefully lift and pull out stock air box and remove out of vehicle. Disconnect crank case hard line from engine and remove.
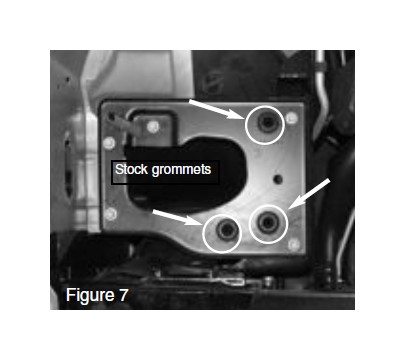
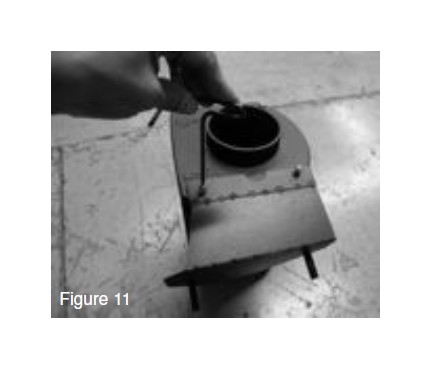
The air intake box mounting tray as it looks stock after everything has been pulled out. The grommet will continue to be used for this installation.
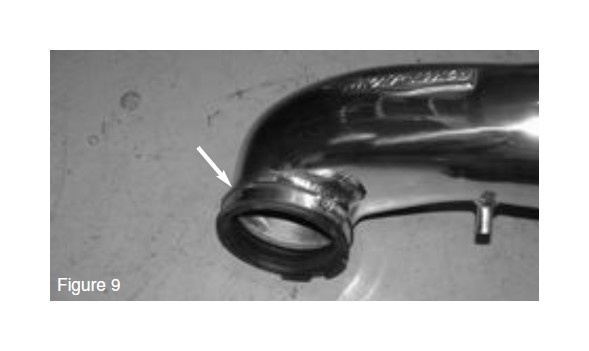
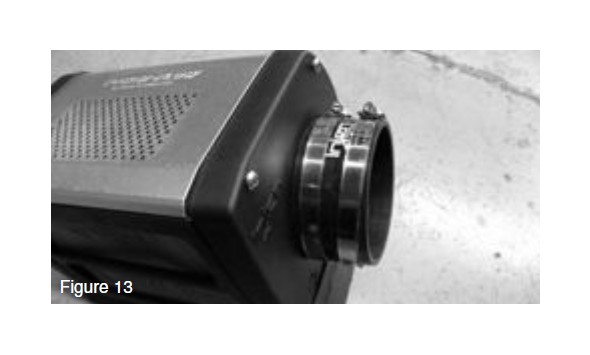
Press the new male/female coupler over the intake throttle body ring as shown above until the coupler sits snug over the ring.
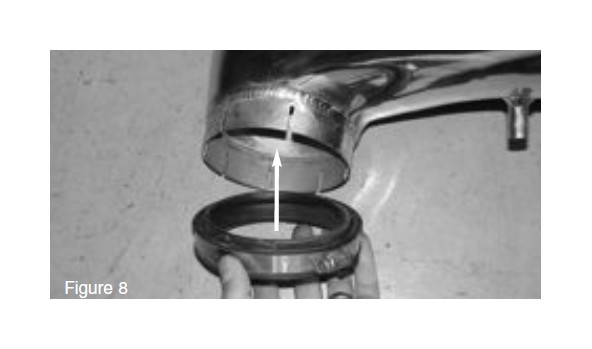
The male/female rubber coupler is now pressed flush over the throttle body ring.
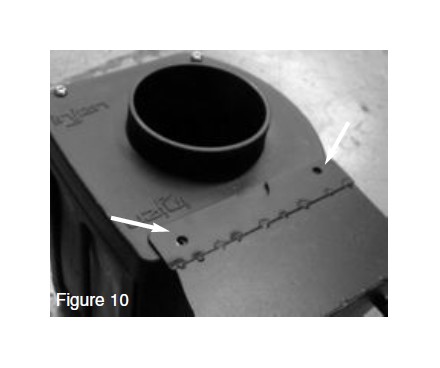
Unscrew the two side 6mm screws shown above. This is where the mounting plate will be attached. Once the screws have been removed continue to line up the mounting plate to the box.
The plate is attached and the screws are inserted into the velocity stack base for fastening.
The mounting plate is now attached and the screws have been fastened tight.

Attach 4” staight hose with clamps provided over the Power-box velocity stack inlet.
Press the new provided 10mm hose over the engine crank case port.
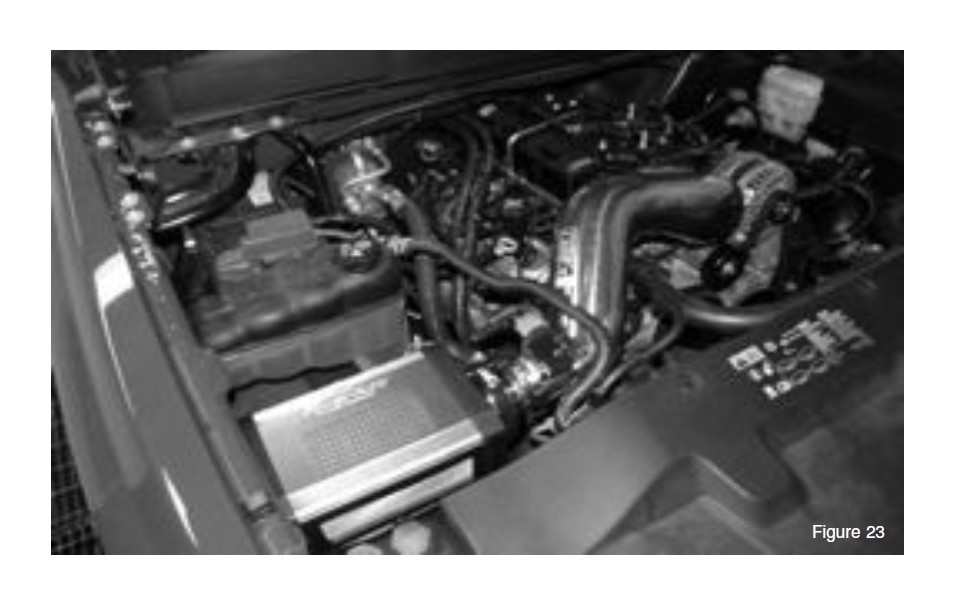
Lower the assembled Power-flow box into the engine compartment. The two prongs located underneath the mounting plate will be pressed into the stock grommets located on the air box mounting tray. (View step 7)

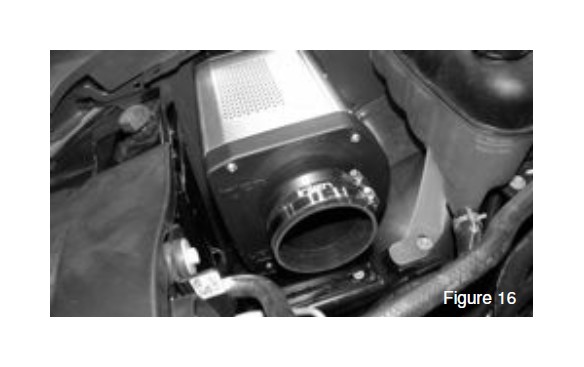
The Power-box is now seated and sitting flush on the stock mounting plate and grommets.
Take the cast intake and position tube to the step-hose on the power-flow box. Do not tighten the clamp at this point.
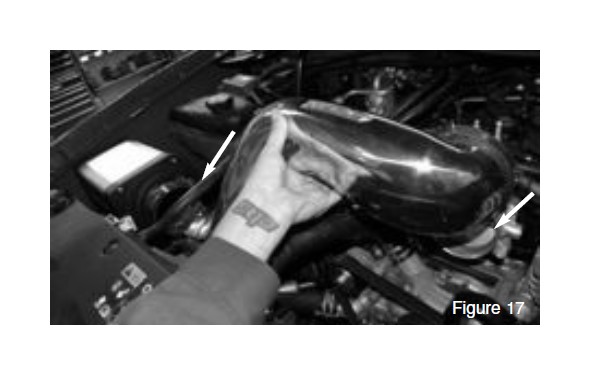
Prior to pressing the intake ring and coupler over the throttle body, rub or place a dab of light oil inside of the coupler wall. The oil will allow the rubber coupler to slide over the throttle body as its being pressed in. Position and tighten all clamps using 8mm nut driver.
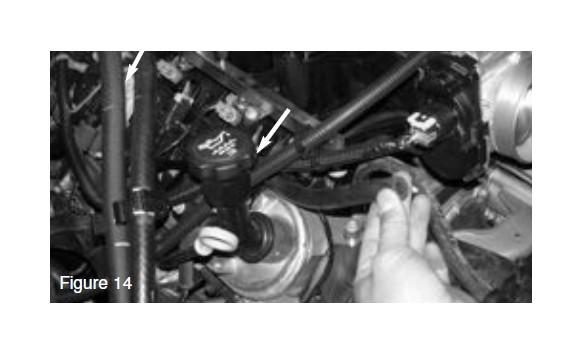
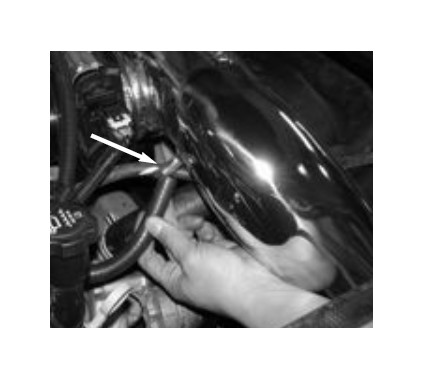
A) Insert the MAF sensor to cast intake adaptor. Secure using the M4 button head screws provided and tighten using 2.5mm allen key.
B)Connect MAF sensor harness.

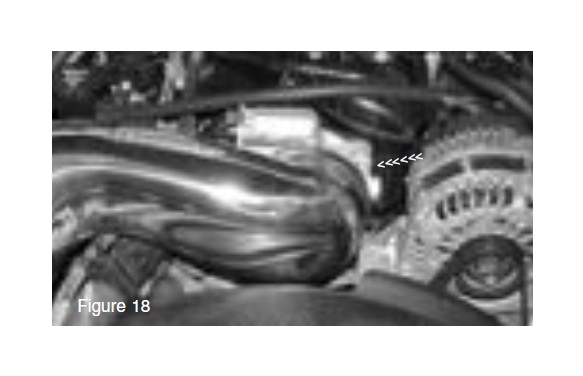
Remove the factory crank case vent tube

Press the Injen 9”-10mm vacuum crank case line over the cast tube vacuum port and the port on the valve cover
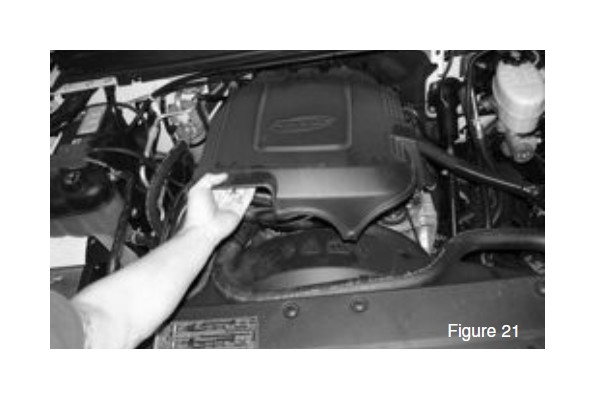
Re-install engine cover and secure.
Congratulations! You have just completed the installation of the Power-flow intake system. Periodically, check the fitment of the entire intake system to avoid damage to the engine and intake system.
You have purchased the Worlds first tuned intake system available anywhere. The Power-Flow intake system features Injen’s patent pending MR Technology used to tune the intake and Power-Flow box. With Power-Flow, calibrating of the MAF sensor is not required because the intake system comes tuned for use. Use only Injen replacement filters. The use of any other filter will change the air/fuel ratio that can cause damage to your engine.
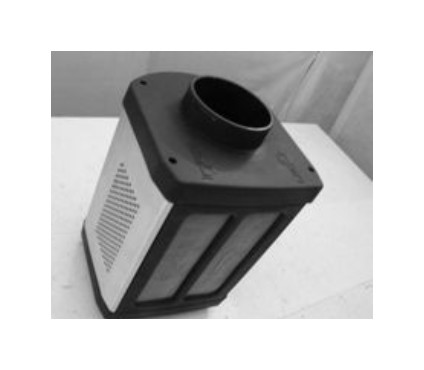
Assembly and disassembly instructions for the Power Box for the purpose of cleaning screens and filter.
Here are the four-m6 x 20mm bolts that will be removed from the velocity stack base located on the corners of the base.
Unbolt the four- m6 x 20mm screws from the velocity stack base located to the center of the base Now separate the base from the velocity stack.
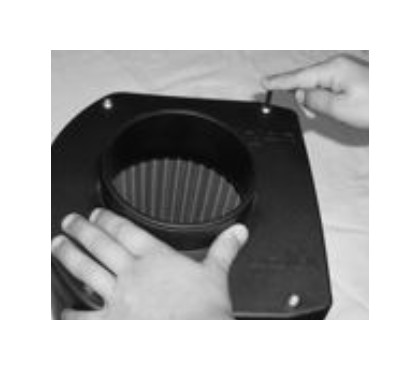
The four m6 x m20 bolts have been removed from the top of the velocity stack,
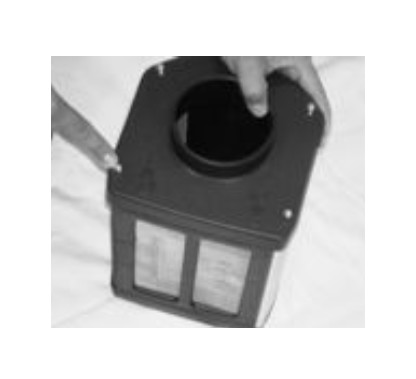
Pull the velocity stack base with the filter that is attached to the velocity stack.
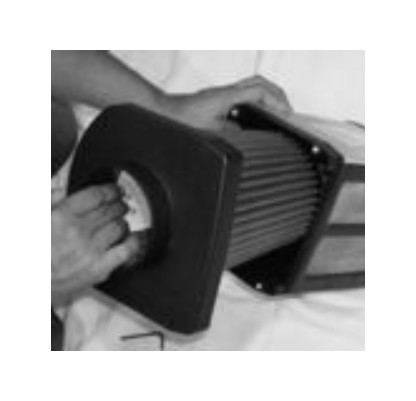
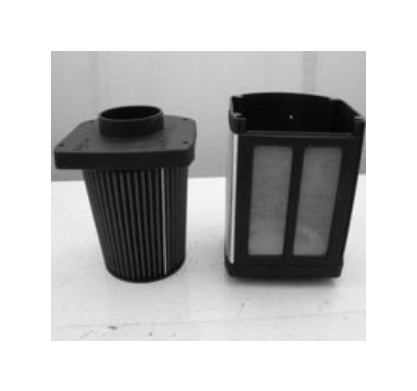
The velocity stack with filter is now out of the power box body.
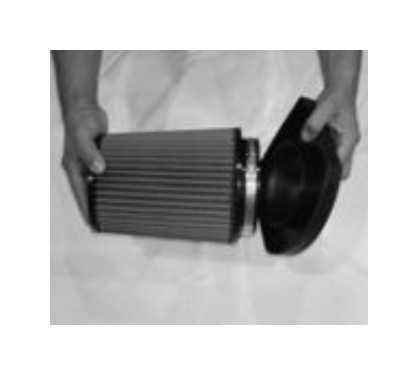
Loosen the clamp on the filter neck in order to separate the filter from the velocity stack.
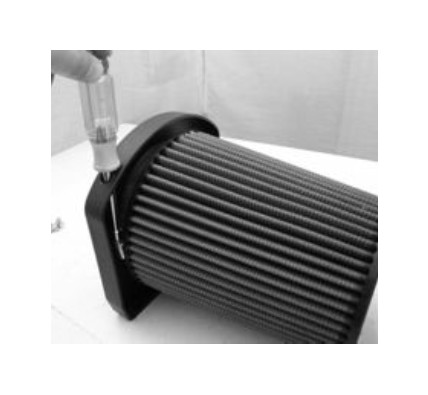
Once you have loosened the filter neck clamp, continue to pull the filter from the velocity stack,
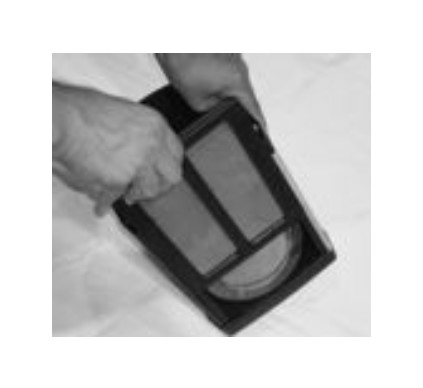
The rectangular pre-filter screen is now slipped out of the channel along the body of the power box.
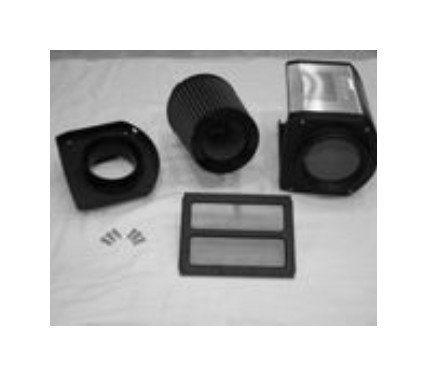
Here is a group shot of the components that goes into the power-box. The filter and screens can now be cleaned with a simple shop-vac.
1. Upon completion of the installation, reconnect the negative battery terminal before you start the engine.
2. Align the entire intake system for the best possible fit. Once the intake has been properly fitted continue to tighten all nuts, bolts and clamps.
3. Periodically, recheck the alignment of the intake system and make sure there is proper clearance around and along the length of the intake. Failure to follow proper maintenance procedures may cause
damage to the intake and will void the warranty.
4. Start the engine and listen carefully for any odd noises, rattles and/or air leaks prior to taking it for a test drive. If any problems arise go back and check the vacuum lines, hoses and clamps that maybe causing leaks or rattles and correct the problem.
5. Check the filter for excessive dirt build up. Clean or replace the filter with an original Injen filter (can be bought on-line at "injenonline.com"). Congratulations! You have just completed the installation of the best intake system sold on the market. Enjoy the added power and performance of your new intake system.


