Talk to a Ranger Sales Tech
1-888-706-1096
M-F 8:30A-11P, Sat-Sun 8:30A-9P
$20K Sweeps! 10 Chances to Win! Enter Daily >

Roush Cold Air Intake (19-23 Ranger)

Item FR2222
Verify parts fit and get product recommendations.
Ranger Sales Techs: Connect Now M-F 8:30A-11P, Sat-Sun 8:30A-9P
$0.00
Our Price

$399.99 (kit)

FREE Shipping Market Price $459.99 You Save 13% ($60.00) Up to 10% off for Military & First Responders! See Details

Will this fit your Vehicle?

Select a different vehicle Help?
Update or Change Vehicle
Ship to: Ashburn - 20149
Sorry, please enter a valid US or CA postal code
We're sorry, zip can't be updated at this time.
Recommended Install Shops
How It Works
Install Shops are available near Ashburn - 20149

Add Local Shop Installation

Total cost of service $175.00
    Create a list
    Add to New List

    Saved - View your saved items

    We're sorry. We couldn't save this product at this time.

    or use

      Product Videos

      Noah: Hey, guys. It's Noah with American Trucks. And what I have here in front of me is the Roush Cold Air Intake for the '19 and newer Ranger. This intake is perfect for the Ranger owner who's looking for a top-tier performance upgrade that doesn't stray too terribly far from stock. The main goal with the cold air Intake is deleting all the restrictions factory intake tubes come with. Now, Roush's cold air intake flows more air than the factory one which will increase the throttle response as well as horsepower and torque. Without any restrictions, silencers, or baffles, air is free to move into your engine faster resulting in a happier motor and an overall more enjoyable driving experience.Now, the included air box top works as a nice shield and a nice barrier to cover the filter and intake inlet from the heat and the elements. Now, the filter included is oiled or it can be run dry so right out of the box you're protected from smaller particulates floating around the engine bay. Now, this filter is also reusable so when this guy gets dirty you can just wash it and put it right back on. Now, it also has 21% more surface area than the stock filter which is going to give you some improved filtration efficiency.The intake is constructed from injection-molded heavy-duty black plastic. It's lightweight, it's cheaper to buy than something constructed from metal, and sturdy enough to resist cracking or warping because of engine bay heat. The plastic is also known to dissipate heat faster than metal so this should help keep those intake air temperatures down and prevent heat soak which is especially important on a performance-oriented build. And then lastly, the filter itself is backed by a 90-day warranty so you're protected from any manufacturing defects.So, let's talk price. Roush's cold air intake comes in right around the $450 mark and that puts it towards the top of the price range but not super far away from the price of most intakes available on the site. Automotive grade plastic is a cheaper option than an aluminum intake but it will be just fine under the hood and again it's going to help keep those intake temps down. Now, considering the Roush name and the quality you get for the price, I'd say that this is a very solid option when you're shopping for intakes for your truck.So, the install is going to fall at one out of three wrenches of difficulty. It's going to be an easy job for just about anybody and you can count on spending about an hour on it all. All the parts you need for the install are included in the kit like the boots, the clamps, any kind of fittings like that. This is a simple bolt-on job. It doesn't require any fabrication or tuning. Now, without further ado, here's an actual AT customer who took the time to show you how to do it.Adam: Okay. I'll go over the tools that I used in the installation of the cold air intake. We used a ratchet. I used a quarter drive. You can use whichever ratchet you have. I used a 7-millimeter socket to take off the OEM parts. I used an 8-millimeter socket to put on the Roush parts. I did use an extension. I happen to have a wobble extension but that's not required. Any extension will work to help you get at some of the bolts that you need to get at. I used a pair of scissors to cut the seal. Once I had that laid out I cut the excess off. I used a trim removal tool to remove the coolant line and I used a screwdriver to help me break the tape on the cold air sensor as well as take off the yellow PVC sensor.Hello, my name is Adam. Today, we're going to be installing a cold air intake for a 2019 and up Ford Ranger with the 2.3-liter EcoBoost. I have a 2021 Ford Ranger Lariat Tremor that we'll be installing this on. Okay. We're going to go ahead and get started with the OEM air box removal. There's a few things that we've got to do. We've got to remove the air temperature sensor. We've got to remove the PVC fitting. There's a hose clamp at the top and a hose clamp all the way at the bottom. There's a coolant sensor, we just had to remove this with a trim tool here. And then there's the three clips in the back and we should be able to get all this out.So first, we'll start with the sensors. The air temperature sensor, there's a little piece of tape on this one. If you just break that tape you can peel this back and then there's just a push-in on the sensor connector and pull back and we get that released. The PVC sensor or the PVC tube here, we want to pull this little lever up, and then we can get this out. I'm using a screwdriver, it's a little easier on the fingers. You don't have to, just want to make sure you don't pry too hard and break anything. It should be pretty smooth. And then we'll go ahead and pull this off. Okay. Now that we have those removed, what we'll do is we'll go ahead and loosen these hose clamps. First, we'll start at the top one. That's just a 7-millimeter socket.Okay. Once we get that good and loose, we'll move to the bottom one here. And again, just a 7-millimeter socket and we'll just get that in there. I find a normal weld socket works instead of a deep weld. Better for this, so I'll go ahead and get that loose. Okay, that's good and loose. So., next thing we'll do here quickly is just remove this coolant line with the trim tool. There is just a little clip here, get under it, pry it up there, and we'll get this off the box so it's not in our way. Okay. Now that we have that out of the way we'll go ahead and remove the clean air tube on this one. Just kind of work this loose. Don't want to put too much pressure on it and we want to be cognizant of other things in the area so we don't knock something around. While I'm taking this apart here, I noticed there's one more piece we have to get off here which is this coolant line. Go ahead and use the trim tool on that again and pry that off so now that's free.All right. Now, let's work the bottom of this hose off. All right. We got that off so we'll set this off to the side, and now we'll take the lid of the box off with just removing these three clips in the back. They just push forward, take the box lid off and you notice these tabs here so you got to push it towards the driver's seat of the truck there. Now we have that off we'll move that out of the way. Remove the filter and that's it as far as the removal process so we'll go ahead and get started with putting the new components together and go ahead and get that installed.Okay. Before I get started and I take off any parts, I like to make sure that I received everything that I was expecting to receive. So I have the inventory here and we'll quickly inventory what came in the box. We have the air box lid which is here, we have the lid foam seal which is here, we have the MAF tube which is here, we have the clean air tube which is here, we have the air filter which is here, and then in the hardware kit we have the three bolts to mount the MAF tube, we have the PVC insert, and then we have hose clamps for each side of this and we have a hose clamp on the filter. So it looks like we have all the parts we need so now we can go ahead and get started.Okay. The next step is we're going to go ahead and assemble the new air box. And first thing we need to do is on the air box that we removed we need to take the air temperature sensor out which you push and twist counterclockwise and then that just comes out. All right. And now we're ready to install this in the MAF tube. From there, we're just going to put in and once we get it to work in there we're going to go ahead and turn that clockwise which is going to go ahead and lock that in. That's good. Now we're ready to install the MAF tube into the air box lid. And the key here is that you need the sensor to be up. So, we do that and we line up the three holes here and now we're ready to put our bolts in.So one interesting thing here the directions call for a 10-millimeter socket but it's actually an 8-millimeter socket. So, just note that. I am using an extension, a wobble extension, that's not necessary that just happens to be what I have. So, I'll go ahead and get these three started. And when I'm starting them I like to take it off the wrench and it makes it a little easier to maneuver in the hand. And this one could be a little tricky. You might have it fall down a couple of times. So what I'm going to do is I'm going to put it in here and I'm going to hold the box up so that the bolt is retained and then I'll show you what that looks like once I get it in there. Okay, so now I've got that getting started in there, and from here I'm just going to snug these up by hand first. All right.All right. I have all those snugged up by hand now so I'll just go ahead and put the ratchet on and just give them just a little bit more tight. You definitely don't want to over-tighten this. It doesn't take much here to hold this in. Okay. Now that I've got that how I want it, I'm going to go ahead and flip this over. And next thing I'm going to do is install the filter. Now, the filter has a hose clamp here. I'm going to go ahead and set that in a position where I can work on it. The filter is going to go in at this angle with the long part facing up as I have the box here. So, go ahead and work this filter on the MAF tube here. Move the clamp out of the way. One thing you could do, it's a personal preference if you want to, is get this a little more snugged before you start so it's not moving around on you.Okay. So now I have the filter all the way, let me get it a little bit more over here, have that all the way flush on the tube, and I'm ready to tighten the hose clamp here. So, these hose clamps are again just an 8-millimeter socket so I'll go ahead and get that tightened. And the main thing that you want to check for with this is that the clamp is over the MAF tube so it's clamping it together and not just clamping on the tube itself. Move that just a little bit more. All right. Now, when I'm good with where I want it I'll go ahead and just snug that up. Again, with all this, you know, you want to make sure that you're not over-tightening. It doesn't take a lot of force to get that on there so we'll just kind of get that in there. Go ahead and just check that and make sure everything is good and tight there. Okay, that is, go ahead and inspect it to make sure it's how I want it.The last thing I'm going to do is install the PVC connector and the clean air tube. So, this shorter end is the end that goes in the tube here so let's go ahead and get that worked in. It's going to be a little tight but you just got to kind of work through it there. All right. We almost got it. Just keep working that around until we get it. You can also twist it if you want which could be easier. Okay. We got that where we want it now so we're going to go ahead and the last thing we're going to do is install the hose clamps. We're just going to get those over the fitting so that when we put the hose on they're there and in place.So, the bottom one is snug enough. This one as we can tell is pretty loose so what we'll go ahead and do here is tighten this up just a little bit so we have less wrenching to do when we're on the truck itself. So, we'll go ahead and do that. Again, these are 8-millimeter sockets on these hose clamps. Once we get it on the truck we'll make sure that we position the hose clamp in a way that the end here that's coming out is not interrupting anything.Okay. Now we don't want to get this to where it's going to be a problem to slide this over what we're working on so I think that's good enough for now. It's got a little bit of tension on it there which is good. It'll keep it from moving around too much. Okay, next step is to install this foam seal around the air box here so we're just going to peel off the sticky back and we're going to get this started. So, I'm going to start at the top here. It doesn't particularly say which way you need to start and just kind of pulling this back and sticking it down. Now you don't need to cut this you can just work around the corner as you go so that's what I'm doing here.And I'm just continuing to work this down the edge, and another corner here, and the last corner. Peeling that back as I go. And when I get to the end here where it's touching, I'm going to go ahead and cut this with a pair of scissors. All right. And then I'll just go ahead and make sure that that fits down against that. Go ahead and stick that down. Make sure that I've got a good stick here.Now, this is going to be clamped down on the cover so not too worried about it coming off but just make sure I have that. Okay, I have that set. That's looking good and now I'm ready to move on to installation.Okay, we're ready to go ahead and install the new cold air flow filter here. So, what we're going to go ahead and do is get the cover on first. So, you go to mine this coolant tube in the back here. You want to kind of get this in and get it under this coolant tube. It's a little bit of a tricky operation because you want to get it fully seated on this side so it sits in nicely. So you just kind of work this coolant tube out of your way here and get this slipped behind it. And we want to make sure that that's fully seated on this side. Okay. And then we're going to put these three clips on in the back. All right. Okay, I'm going to go ahead and get the clean air tube installed. I'm going to start on the bottom here first. So, I'll just slide that over, work that into position. Kind of helps on the box if you're installing it down here if you hold it up with one hand and push it down with the other. Make sure I get that where I want it. Let me get it just a little bit further down there, okay, where I want it.And now what I'll do is go ahead and work this top part on and then I'll recheck everything before I mess with the hose clamps. Okay, get that going. Keep kind of just shimmying that on, working that on until I get it where I want it here. All right. I think I got that where I want it so move back down the bottom here and make sure that's still...everything is good and I got that how I want it. I do. Now I'm going to take my 8-millimeter here and work on my hose clamps. I'm going to loosen this hose clamp a little bit. I want to get it over this lip here. All right. Now that I got it just past that lip, I'm going to go ahead and tighten this down. Again, move the hose clamp where it's easier for you to work on it. And this tail end here is not going to impede anything.Okay. I'm going to go ahead and just get that snug down. Again, I'm going to check, make sure everything is how I want it there. And I actually am going to loosen this back up and move this bottom down just a little bit, you know. Now anything that you see that you want to make a small fix on now is the time to do it. So there's nothing wrong with loosening it back up and repositioning it a little bit. It's better to do it now and get it how you want it. All right. There we go. I'm a lot more happy about that. So let me go ahead and again snug this back up here. Okay. Feeling good about that. That's looking good.Now what I'm going to do is it's a little easier to get in the bottom here without the extension so I'm going to remove the extension here. And put my socket back on. Again, I'm using my 8-millimeter socket on this. Just going to check again feeling with my hands to make sure the tube is all the way down where I want it. Pull this up. Okay, this is feeling good on this one. Now there's no lift on this one you've got to get under but you want to get the hose clamp relatively. You want to make sure that it's on the plastic piece you're trying to hold the hose on. I'm just going to loosen this up a little bit so I can get the hose clamp really positioned where I want it here. Put that down some, loosen it up just a little bit more.All right. There we go. Now I can really move that where I want it. And again, I'm positioning it close to the bottom of the tube but not to where it's off the tube. And again it needs to make sure that I'm clamping it to the piece that I'm sliding the tube over which is the key to what I'm doing here. So now I'm going to tighten this up. And it can be a little difficult at first with a socket when you don't have enough resistance there to make the wrench trip over and you've got to keep taking it off but just work through it. Stay patient and you'll get it.All right. Now, we've got some lead on that. So, again, I'm just going to go ahead and get this snug. Definitely don't want to overdo it. Almost there. Looks like I'm turning this a lot but the wrench doesn't move very far in each rotation so it's really not. Okay. I got that where I want it. Double-check this one. I definitely got this one where I want it so now I'm going to go ahead and connect the PVC tube back. So, I'm just going to get this on this tube, push it all the way and you hear that click. It might not hurt it. It clicks when you push it over. That's engaged. I just push this now. We're locked in there in between and I have the air flow sensor here or the cold air sensor and I'll just go ahead and put this back on. With that, that is set where it needs to be.I removed this earlier for this coolant sensor here. I'm going to go ahead and just push this back in. And if you remember, this was on the back. This doesn't go into anything on this particular tube but again, as I'm looking at this, this is hanging out of the way. It's not in danger of contacting anything that I'm particularly worried about. So that's fine. Because I was messing around my coolant tube here, I'll just check that. Do a quick check over everything. Everything looks good.Noah: That was the Roush Cold Air Intake for the 2019 and newer Ranger. Now this intake is available on our site along with tons of other upgrades for your truck. For all things Ranger, keep it right here at americantrucks.com.

      Product Information

      Features, Description, Reviews, Q&A, Specs & Installation

      Features & Specs

      • Boosts Performance Numbers
      • Enhances Throttle Response
      • High Efficiency, Superior Flow Dry Air Filter
      • Rugged, Injection-Molded Thermoplastic Construction
      • Black Finish
      • No ECU Tuning Required
      • Ninety-Day Limited Warranty
      • Trouble-Free Installation
      • CARB-Certified Under E.O. D-418-38
      • Fits All 2019-2023 Ford Ranger Models

      Description

      Practical Performance Boost. One of the most practical methods of boosting performance is by installing a cold air intake. If you’re looking for an intake for your Ranger, you couldn’t do better than the Roush Cold Air Intake. This air intake is designed to fit perfectly into your truck’s engine bay, providing an OE look that’s only given away by the advanced dry air filter. In fact, this intake even allows you to reuse your factory snorkel. More importantly, this component is designed to deliver large amounts of clean cold air to your engine, ensuring total fuel combustion and boosting power and torque.

      No ECU Tuning Required. This cold air intake is engineered to provide improved performance numbers via its free-flowing design and high-flow air filter. It does not require an ECU re-tune, as it works with your factory tune. That being said, an ECU re-tune in the future will always be beneficial to your truck as this will optimize performance benefits.

      High Efficiency, Superior Flow Dry Air Filter Included. This cold air intake includes an advanced dry air filter. Specifically, this air filter features 21% more surface area compared to stock for improved filtration efficiency. Furthermore, this design does not compromise air flow, ensuring your engine constantly receives cold air. Moreover, this air filter is designed for easy cleaning, making it completely reusable. This way, you get to save the cost of regular filter replacement.

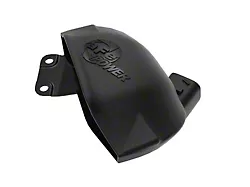
      Rugged Build Quality. This cold air intake features an air box computer designed to match the form of your stock air box lid providing an OE-grade fit. This air box lid is then injection-molded using rugged thermoplastic and features a clear sight window, allowing you to monitor the condition of the air filter without disassembly. The air inlet tube on the other hand is designed and constructed with minimal bends, eliminating turbulence. Finally, this assembly features a black finish for bold under-the-hood looks.

      Trouble-Free Install Procedure. This cold air intake is installed into your Ranger’s factory air system location without the need for modifications. Additionally, all necessary hardware is included, and installation is completed with just standard hand tools.

      Includes a 90-Day Limited Warranty. This Roush Cold Air Intake includes a 90-day limited warranty against factory defects. Please visit the manufacturer’s website for more details.

      CARB Certified. This Roush Performance Cold Air Intake is CARB certified for the Ranger under CARB E.O. D-418-38. This makes this air system completely street legal.

      Application. The Roush Cold Air Intake fits all 2019-2023 Ford Ranger models.

      Fitment:

      Roush 422178

      CA Residents: WARNING: Cancer and Reproductive Harm - www.P65Warnings.ca.gov

      Installation & What's in the Box

      Installation Info

      What's in the Box

      • (1) Air Box Lid
      • (1) Dry Air Filter
      • (1) Air Inlet Tube
      • (1) Air Box Lid Foam Seal
      • (1) MAF Tube to MAP Sensor Insert
      • (1) ROUSH Air Box Badge
      • (1) Fitting
      • (2) Clamps
      • (3) Mounting
      4.7

      Customer Reviews (500+)

        Questions & Answers

        10 More Questions