FREE 1 to 3-Day Delivery on Orders $149+ Details
How to Install Weathertech No Drill Rear MudFlaps - Black on your Ram

Shop Parts in this Guide
Supplementary Instructions to be used along with instructions MF112 and MF114, Dodge Ram Pickup’s 2011 .
During the model year 2011, Dodge changed the design of a plastic trim piece on the front and rear fenders of the Ram Pickup in the location where the MudFlap mounts. The new plastic pieces are indicated below. Also included with these instructions, is parts kit (CC).
The front and rear plastic pieces are shown below. These pieces will need to be removed for a proper fit (pictures 1 & 2).
Parts Kit (CC)
(1) T20 Torx Bit
(2) Spacers
1. Start by thoroughly washing your vehicle. Take care to remove all dirt, debris, and stains from each fender in the areas corresponding to where the MudFlaps will be installed.
2. Park the vehicle on level ground with the wheels turned fully to the left. Begin with the driver’s side MudFlap installation.
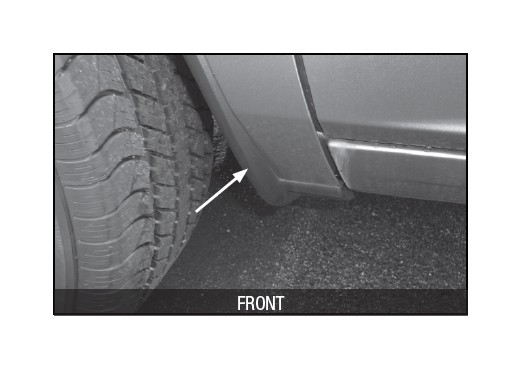
3. Pieces shown need to be removed for a proper fit.
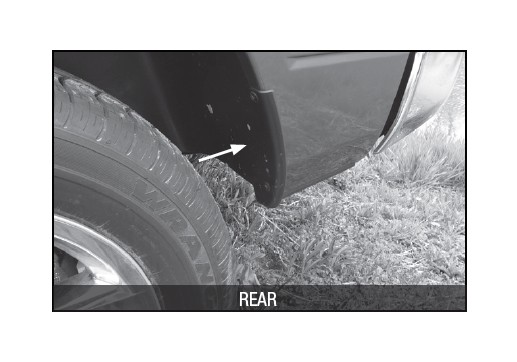
4. Pieces shown need to be removed for a proper fit.
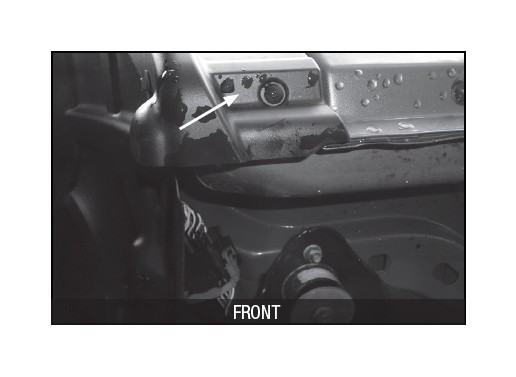
5. On the front, additional fasteners will need to removed. This fastener is a small plastic rivet with a Phillips head center core. Using a small Phillips screwdriver, carefully unscrew the center portion of the rivet. When this is removed, the rest of the rivet can be removed. Install the MudFlap following the included instructions that come with the MudFlap. Parts kit (CC) contains plastic spacers that may be used in the lower mounting hole, behind the MudFlap. The spacers included are to take up the space left by the plastic trim piece previously removed.
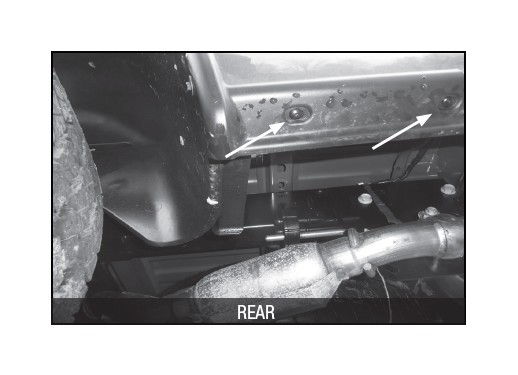
6. Locate the (2) additional fasteners, on the rear, that will need to be removed. These fasteners are 2-piece plastic rivets. Included in the parts kit is a T20 Torx bit. This bit is to be used with a ¼" socket to remove the (2) plastic rivets. When these plastic rivets are removed, along with the (2) hex head fasteners, the plastic trim piece can be removed. The plastic spacers can be used on the lower mounting hole similar to the front flap and take up the space left by the plastic trim piece previously removed. Install the MudFlap following the included instructions that come with the MudFlap.