FREE 1 to 3-Day Delivery on Orders $149+ Details
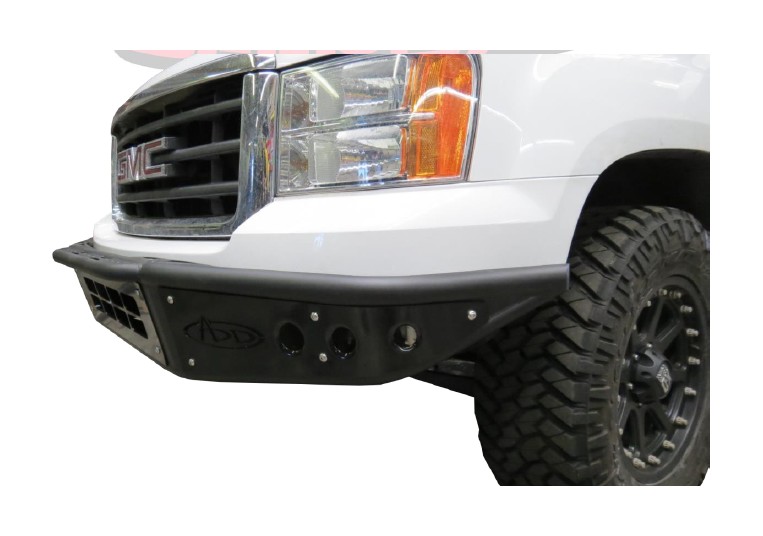
How to Install Addictive Desert Designs Venom Front Bumper (07-13 All) on your GMC Sierra
Tools Required
- 15mm Socket
- 18mm Socket
- 21mm Socket
- Ratchet
- Cut Off Wheel
- Utility Knife
PREPARATION
1. Disconnect the negative terminal on the battery. Park the vehicle on level ground and set the emergency brake.
2. We recommend reading through the installation instructions in whole before performing the work.
3. You will need the following tools:
a. 15mm Socket
b. 18mm Socket
c. 21mm Socket
d. Ratchet
e. Cut Off Wheel
f. Utility Knife
Note: this installation requires 2 people for best results
4. Included in Kit:
a. Stock Hardware is Reused
REMOVAL
1. From the bottom of the truck, remove any fog light connectors, if your truck is equipped with fog lights, and move the wiring harness out of the way.
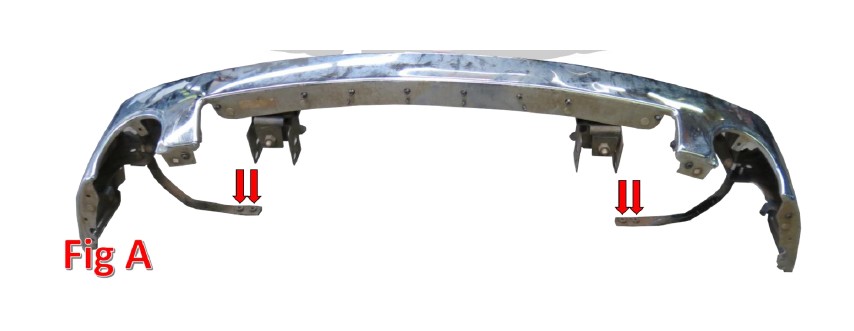
2. Using a 15mm socket, remove the outer bolts (x4) that secure the bumper supports to the truck. (Fig A)
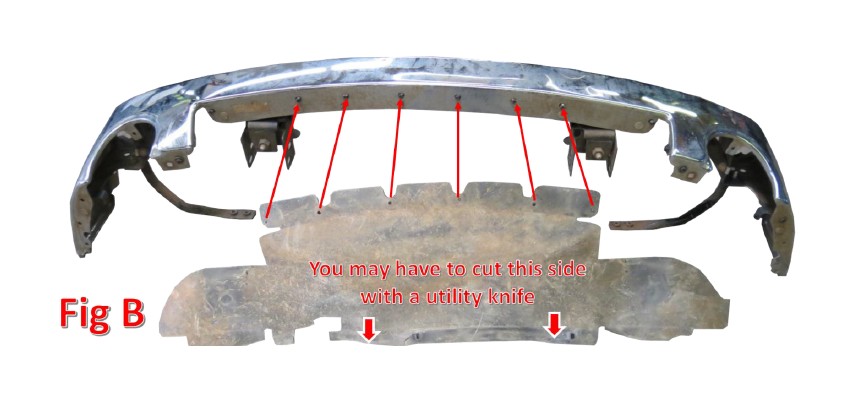
3. Remove the plastic clips holding the rubber shroud to the front bumper. Once it is disconnected from the bumper, you can try to separate it from the clips holding the backside to the truck, or cut it off with a utility knife. (Fig B)
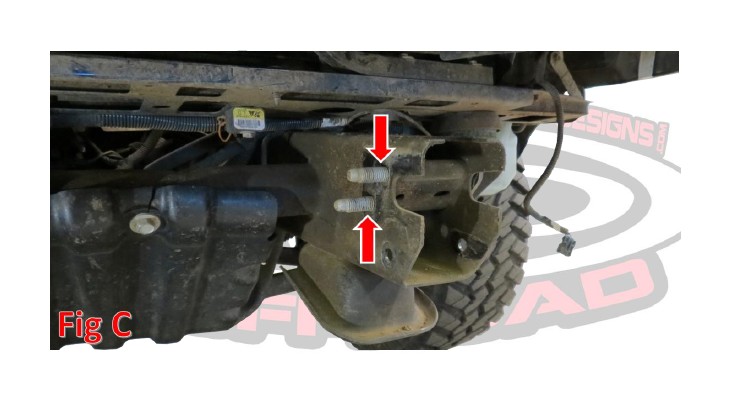
4. Using a 21mm Socket, remove the nuts (2 per side) holding the bumper to the frame. Fig C shows the locations for these bolts. Remove the OEM Bumper from the truck.
5. Trim the inner fender liners as shown in Fig D.

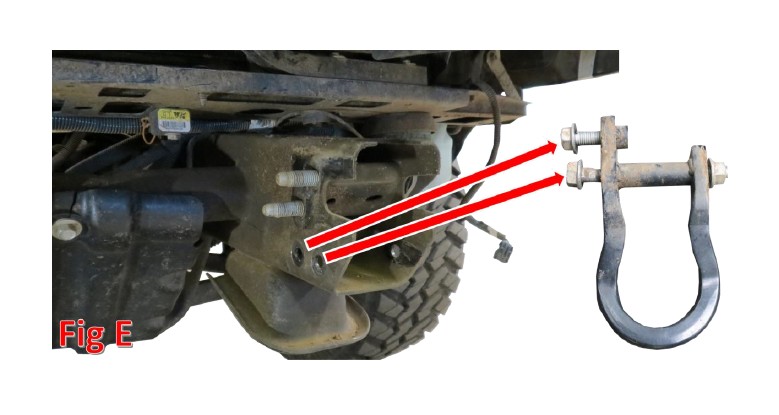
6. Remove the tow hooks. Use an 18mm socket to remove the two bolts holding each hook on. (Fig E)
7. Cut off the bell shaped metal piece that extends off the frame. There are two welds holding each one on. The red lines in Fig F represent the welds. Cut through both welds on each bell and they will fall right off.
**Make sure to paint over any exposed metal

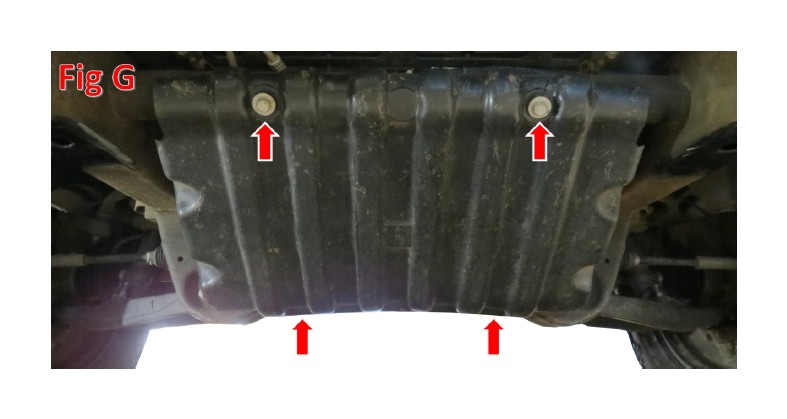
8. Remove the four bolts holding on the factory skid plate. (Fig G)
9. Prepare to install your new A.D.D. Venom Front Bumper.
INSTALLATION
1. If you have any lights to install on your bumper, now is a good time to do so. Please follow the light manufacturer’s guide for mounting/wiring information.
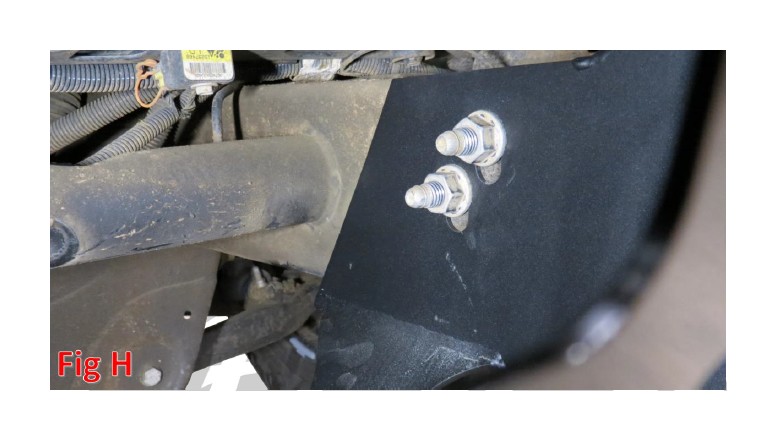
2. Hold the bumper in place and reinstall the factory hardware that was removed in Removal Step 4. (Fig H) Leave these loose for now.
3. Align the bumper so that it sits straight in relation to the grill/valance. Tighten the mounting bolts to manufacturer’s spec.
4. Stand back and enjoy your A.D.D. Venom Front Bumper.
5. Check and re-tighten if needed, all mounting bolts after 100 miles and periodically thereafter.