


Installation Time
(approx) 30 Minutes
Difficulty Level:
Simple installation for anyone.
Installation Guides
No guide available for this part yet.
 FREE 1 to 3-Day Delivery on Orders $149+ Details

$379.00 each
CONFIRM THIS FITS YOUR VEHICLE!
Saved - View your saved items
We're sorry. We couldn't save this product at this time.


AFE Silver Bullet Throttle Body Spacer (14-26 6.4L RAM 2500)
 227
227
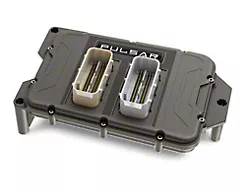
Edge Pulsar Inline Tuning Module (19-22 6.4L RAM 2500)
 21
21

MBRP Armor Lite Single Exhaust System with Polished Tip; Side Exit (14-26 6.4L RAM 2500)
500+
Features, Description, Reviews, Q&A, Specs & Installation
| Brand | S&B |
| Cold Air Intake Type | Cold Air Intake |
| Tuning Requirements | No Tune Required |
| Cold Air Intake Tube Material | Plastic |
| Cold Air Intake Filter Type | Oiled |
Performance Enhancement. The S&B Cold Air Intake with Oiled Cleanable Cotton Filter boosts engine performance by reducing air restriction and increasing airflow to the intake system. It is designed for users who want to maximize their Ram 2500’s engine efficiency and power output while maintaining protection against harmful contaminants.
Construction and Appearance. Made from durable materials, this intake system features a fully enclosed airbox with silicone edge trim for superior sealing and heat resistance. The kit includes a choice of a high-quality 8-layer cotton cleanable filter or an optional dry extendable media filter. Silicone components provide longevity and resilience against temperatures up to 400°F.
Installation. Installation is straightforward with a snap-in lid design that requires no screws, allowing quick and simple filter access. No drilling or permanent modifications are needed for an easy bolt-on upgrade.
Warranty. This product comes with a manufacturer’s warranty covering defects and performance.
Application. Specifically engineered to fit the 2019-2026 Dodge Ram 2500 equipped with the 6.4L HEMI engine, ensuring a perfect fit and optimal performance within this model range.
S&B 75-5133
CA Residents:  WARNING: Cancer and Reproductive Harm - www.P65Warnings.ca.gov
Installation Info
Installation Time
(approx) 30 Minutes
Difficulty Level:
Simple installation for anyone.
Installation Guides
No guide available for this part yet.
What's in the Box
Sponsored