Guaranteed Free Delivery by 12/24! available on most items - Details
How to Install Rough Country 2 in. Leveling Coil Spacers on your Ram
Installation Time
2 hours
Tools Required
- 7/8 Deep Well Socket
- T30 Torx Socket
- Floor Jack
- 2 Jack Stands

Shop Parts in this Guide
FRONT INSTALLATION INSTRUCTIONS
1. Place the truck on a clean level surface and set the parking brake. Chock the rear wheels and using a floor jack raise the front of the truck and support the frame rails with approved jack stands. NEVER WORK UNDER AN UNSUPPORTED VEHICLE, Using a 7/8 deep well socket remove the front wheels.
2. Remove the shock absorber, retain the stock hardware.
3. Remove the brake calipers from the spindle bracket using a 13 mm wrench. Using a pry bar to pry up the caliper, zip tie the caliper to the frame rail. Do not let the caliper hang from the hose. Remove the two bolts securing caliper bracket to the spindle. Remove the rotor.
3. Using a T30 Torx socket remove the ABS wire from the spindle as shown in Photo 1
4. Unplug the ABS wire as shown in Photo 2.

5. Using a 21 mm socket remove tie rod end from the spindle. Using a hammer lightly wrap on the spindle around the ball joint to loosen. Remove from spindle See Photo 3.
6. Using a 21 mm wrench loosen the nut on the upper control arm ball joint, but do not remove. See Photo 4.

7. Using a 16mm socket remove the hardware from the top of the sway bar links as shown, retain the stock hardware. See Photo 5.
8. Remove factory shocks using a 13mm socket for the bottom and a 18mm wrench for the top. See Photo 6.

9. Position a floor jack under the lower control arm and apply slight pressure.
10.Remove the upper control arm nut and allow the lower control arm to swing down using the floor jack. Use caution as the lower control arm will have pressure on it from the coil spring. It may ne becessary to loosen the lower control arm hardware to allow the control arm to move freely.
11.Remove the factory coil springs noting the position that they were installed from the factory.
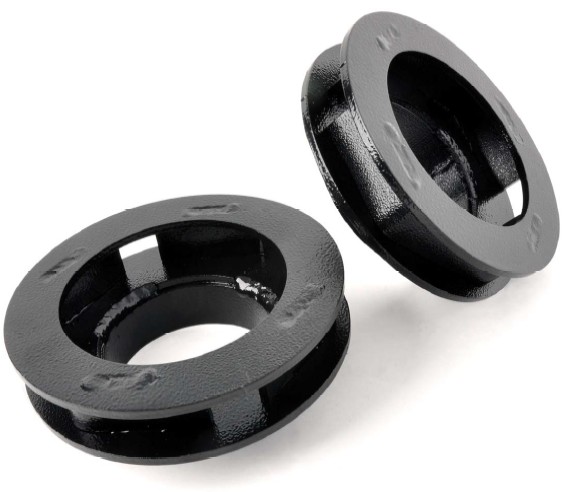
12.Install the new coil spacer on the coil spring as shown in Photo 7.
13.Install the coil spring and spacer in the factory coil pocket. See Photo 8.

14.Using a floor jack, jack up the lower control arm and swing the upper control arm down and install the ball joint on the knuckle with the stock hardware. Do not tighten at this time.
15.Reinstall the sway bar on the link with the factory hardware. Tighten using a 16mm socket.
16.Reinstall the tie rod on the knuckle with the factory hardware and tighten using a 21mm wrench.
17.Reinstall the shock absorbers on the lower control arm with the factory hardware. Tighten using a 13mm wrench. Install the shock absorber in the upper mount and tighten using a 18mm wrench.
18.Reattach the ABS wire and reinstall the wire to the spindle using a T30 torx head socket.
19.Install the tires and wheels.
20.Jack up the vehicle and remove the jack stands.
21.Lower the vehicle to the ground.
KIT CONTENTS

POST INSTALLATION INSTRUCTIONS
1. Have a qualified alignment center realign front end to factory specs.
2. Install Warning to Driver decal on sun visor.
3. Re-torque all nuts, bolts, and especially u-bolts after the first 100 miles, again after another 100 miles and then check periodically thereafter.
4. All components must be retightened after 500 miles, and every three thousand miles after installation
5. Adjust headlights to proper settings.


