FREE 1 to 3-Day Delivery on Orders $149+ Details
How to Install Putco Wheel-to-Wheel Boss Side Step Bars - Polished on your Sierra
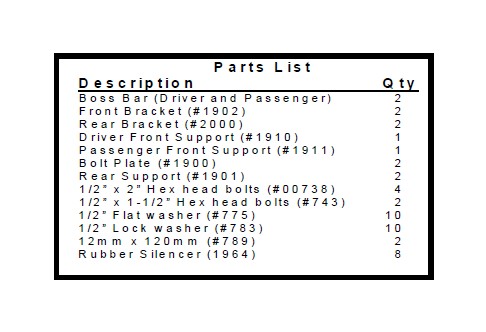
Please read all instructions before beginning installation and be sure to check to see that all part
Step 1: Remove the existing body mount bolts at the front and the rear of the cab.
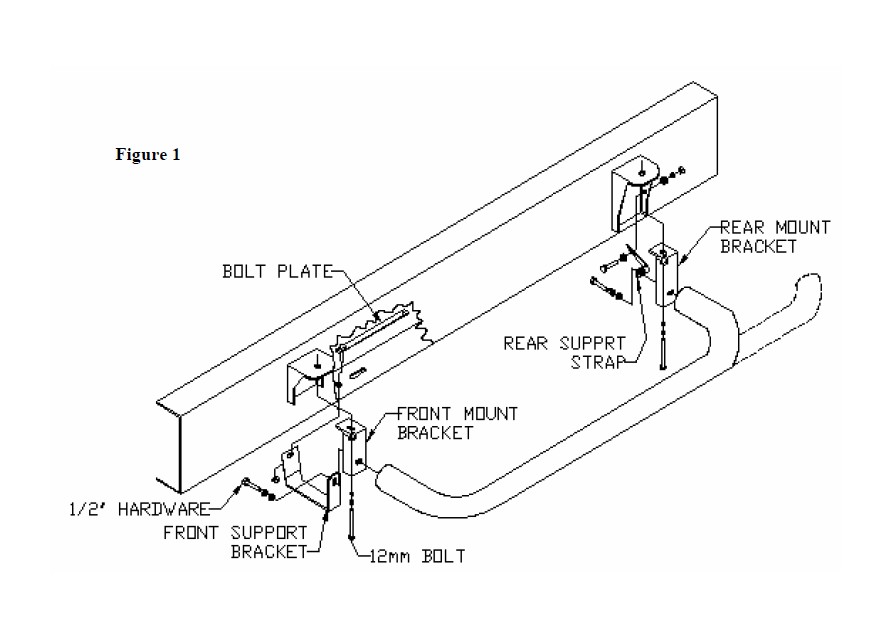
Step 2: Install the front and rear brackets, with the existing body mount bolts. Leave lose at this time.
NOTE: The front bracket is shorter than the rear bracket.
Step 3: Locate the hole on the bottom surface of the frame. It is on the bottom of the frame to the rear of the front body mount.
Step 4: Slide the bolt plate into the frame until the bolt drops through the slotted hole. You will be able to access this hole from the bottom of the frame where there is a slotted hole.
Step 5: Place rubber silencer (1964) between bolt and front support bracket. Fasten the front support bracket to the bolt protruding through the hole in the bottom of the frame.
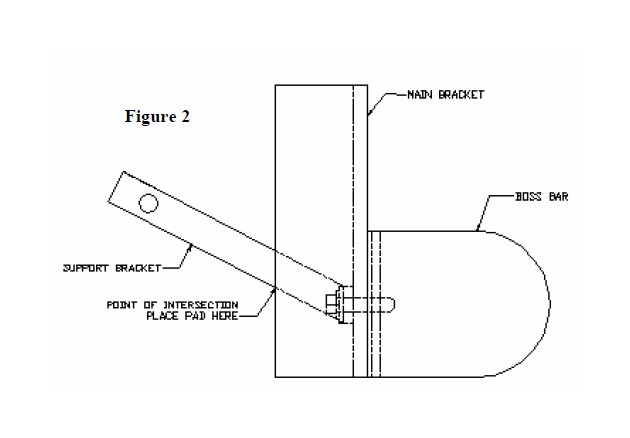
Step 6: Fasten the rear brace to the existing hole in the side of the body mount using the 1/2” x 1-1/2” hex head bolts. Stick the rubber silencer to the boss bar support bracket so that it is between the boss bar main bracket and support bracket in the in the location indicated in (see figure 2).
NOTE: On certain vehicles this hole may be larger than the bolt and/or used for the emergency brake cable. If this is the case simply drill a 9/16” hole below the factory hole so that the support bracket can be installed
Step 7: Bolt the tube to the support braces and mounting brackets using the 3/4” x 2” hex head bolts.
Step 8: Check to make sure that the Boss Bar is aligned and level. Tighten all mounting hardware to 65ft/lbs.