FREE 1 to 3-Day Delivery on Orders $149+ Details
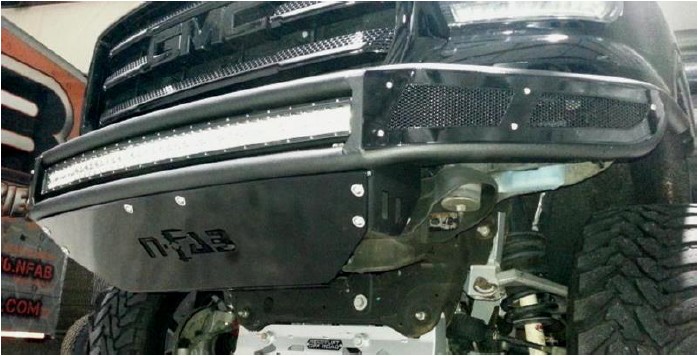
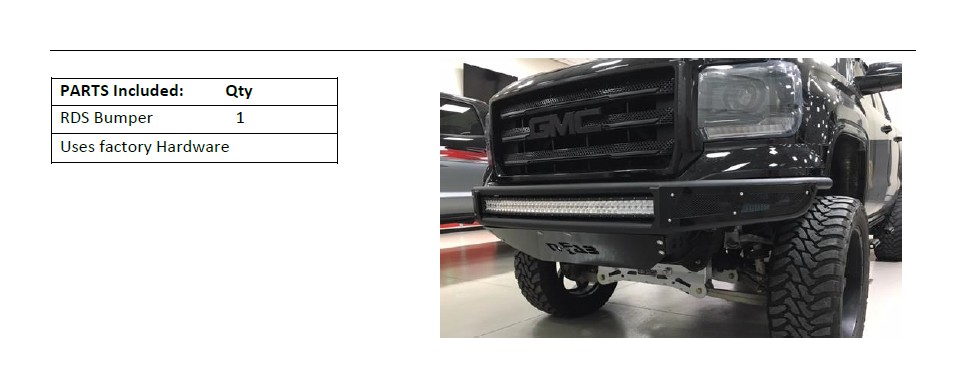
How to Install N-Fab M-RDS Radius Pre-Runner Front Bumper w/ Multi-Mount for LED Lights
Removal of Factory Bumper:
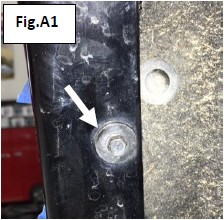
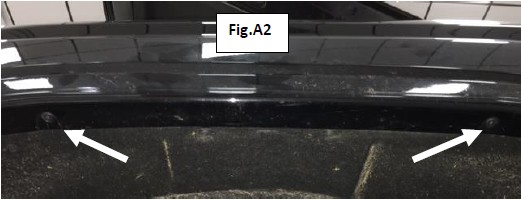
Step 1: Remove the screw holding on plastic trim piece with 7mm socket. Also, remove two screws holding on fender well with a T15 Torx bit. (both sides) (Fig.A1) (Fig.A2)
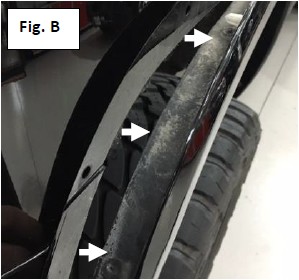
Step 2: Pull out on edge of plastic trim to release the tabs as shown. Pull in direction of arrows. (both sides) (Fig. B)
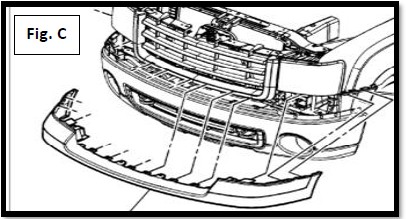
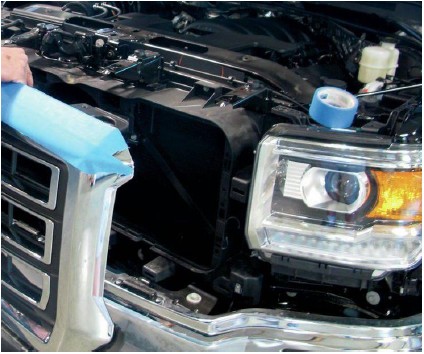
Step 3: Release six tabs on center of plastic trim below the grill. Gently pull out on the plastic trim as you release the tabs behind the grill. A flathead screwdriver works well to help pry the tabs. Set aside. (Fig. C)
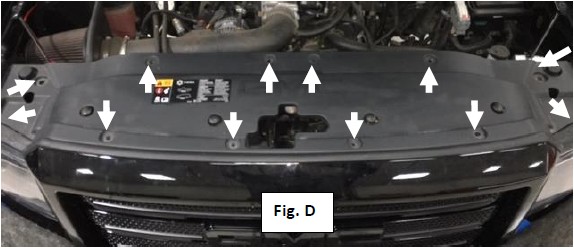
Step 4: Open hood and remove 12 plastic clips. Remove plastic shroud and gently set aside, it will be reused. (Fig. D)
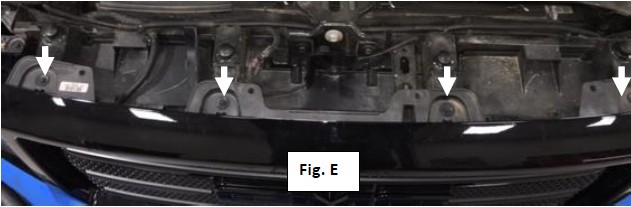
Step 5: Remove four screws on top of grill with 10mm socket. (Fig. E)
Step 6: Remove four bolts on bottom of grill with 10mm socket.

Step 7: Pull up and out (toward your body) on the top of the grill where the screws
were to release the plastic tabs. Using your thumbs to push down on the bracket
makes it easy.
Step 8: Pull out on the bottom of the grill to remove it and gently set it aside, it will be reused.
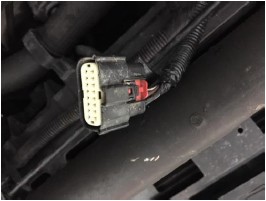
Step 9: Unplug the OEM fog light and sensor wiring harness and place it up and out of the way.
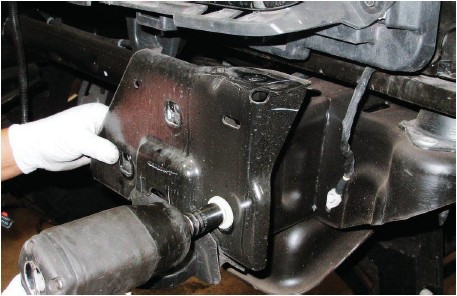
Step 10: Remove two bolts from OEM side support (in front of tires) with 15mm socket. (both sides)
Step 11: Remove four OEM bumper bolts with 18mm socket.
Step 12: Remove OEM bumper and set aside.
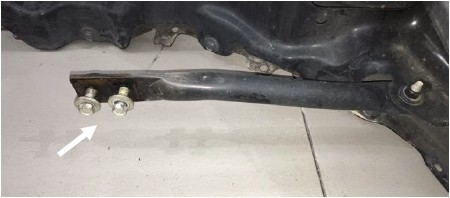
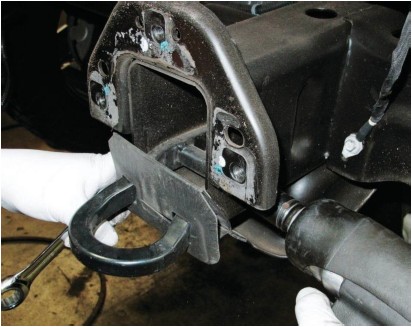
Step 13: Remove six bolts holding on OEM frame flanges to frame with 15mm socket. Set brackets aside.
Step 14: Remove two bolts holding on OEM tow hooks with 18mm socket and wrench. (both sides) Set tow hooks aside.
RDS BUMPER INSTALL:
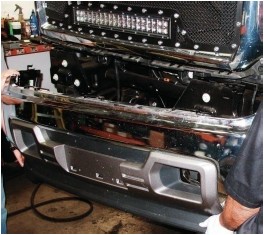
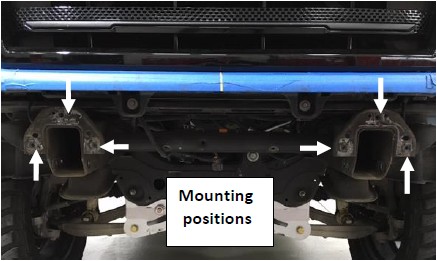
Step 15: Carefully lift RDS bumper up and align with the six factory mounting positions in the frame.
Step 16: Install bumper using the OEM hardware and hand tighten.
Step 17: After proper alignment tighten all hardware.