FREE 1 to 3-Day Delivery on Orders $149+ Details
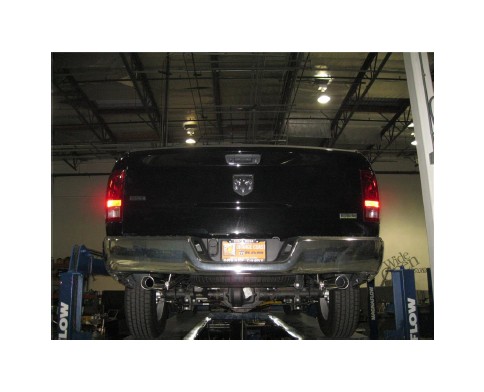
How to Install Magnaflow MF Series Cat-Back Exhaust - Split Rear Exit on your Ram

Shop Parts in this Guide
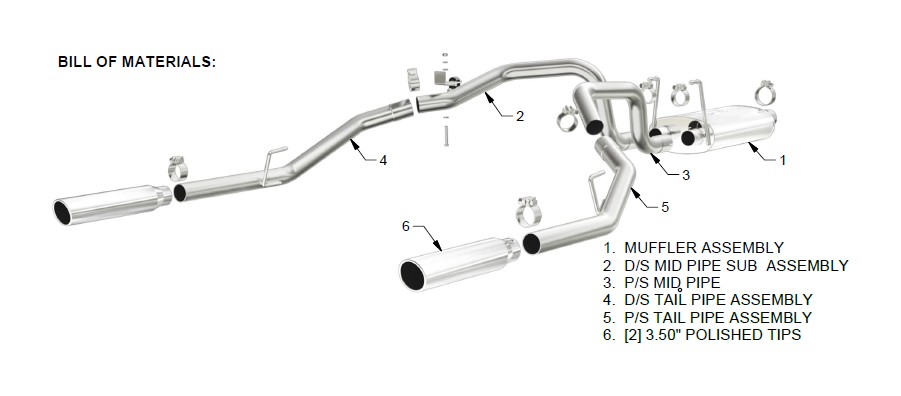
HARDWARE KIT:
1. [1] 3.00" Clamp
2. [6] 2.50" Clamps
3. [2] Hanger Insulator Rubbers
4. [1] Hanger Bracket Assembly
5. [2] 3/8" Flat Washers
6. [1] 3/8" Split Lock Washer
7. [1] 3/8" Nut
8. [1] 3/8" x 2.75" Bolt
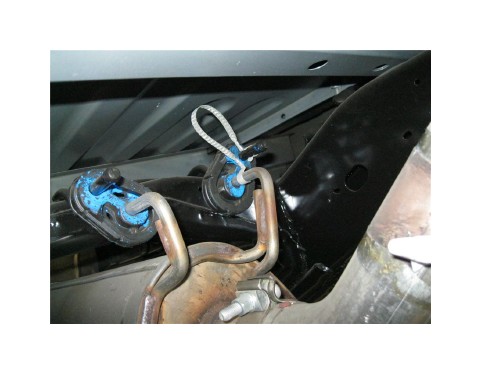
Step 1. Begin removing the OEM exhaust by unbolting the clamp attaching the tail pipe assembly. Disengage the welded hangers from the OEM rubber Insulators using a pry bar or similar tool. Remove the assembly.
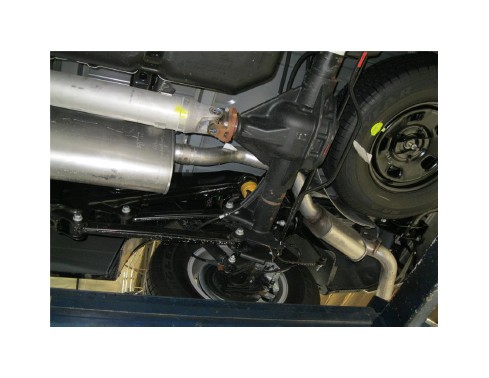
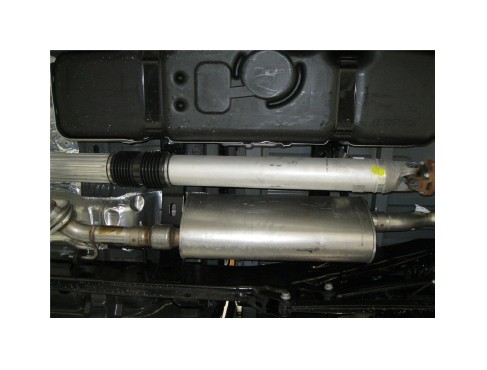
Step 2. Next unbolt the OEM clamp attaching the inlet muffler assembly to the outlet pipe of the flange coupling. Remove the welded hangers from the rubber insulators using a pry bar. Do not discard or damage the insulators as they will be needed to install your new system. There is a grounding strap that needs to be unclipped. The OEM system may now be removed.
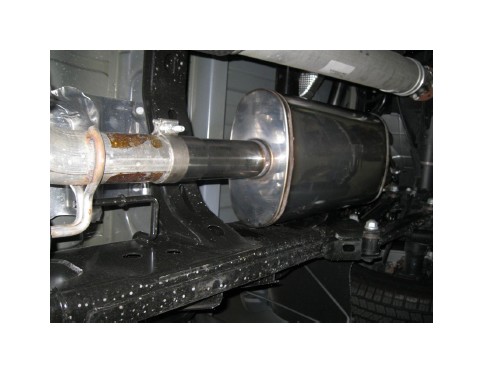
Step 3. You are now ready to install your new MAGNAFLOW system. Loosely attach the the Muffler Assembly to the OEM pipe outlet using the supplied 3.00" clamp. Be sure to line up the large notch in the pipe wiht the alignment peg. Engage the welded hanger to the OEM rubber insulator. Leave all clamps and hardware loose for final adjustment of the complete system.
Step 4. Install the supplied hanger assembly using a pre drilled hole in the drivers side sub frame and the supplied hardware. This will be used with the supplied rubber insulator to locate the new drivers side Mid Pipe Assembly hanger. Slip the inlet of both Mid Pipes over the outlet of the Muffler Assembly and loosely secure using the supplied 2.50" clamp and 15mm socket. Engage all welded hangers to the OEM rubber insulators.
Step 5. Install both Tail Pipe Assemblies in a similar fashion. Use the supplied rubber Insulator to locate the drivers side welded hanger.
Step 6. Loosely attach the polished tips using the supplied 2.50" clamps to the desired position.

Step 7. Once a final position has been chosen for the new system, evenly tighten all fasteners from front to rear using the torque specifications on page one of this document. Inspect all fasteners after 25-50 miles of operation and retighten if necessary.