FREE 1 to 3-Day Delivery on Orders $149+ Details
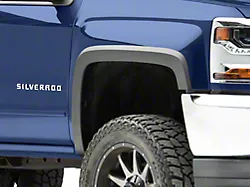
How to Install Husky Front Mud Guards (14-18 Sierra 1500) on your GMC Sierra
Installation Time
30 minutes
Tools Required
- TX 15 Torx Bit / Driver
- Drill
- 1/8” Drill Bit
- Phillips Head Screwdriver

Shop Parts in this Guide
GMC SIERRA FRONT MUD GUARD INSTALLATION INSTRUCTIONS
Tools Required
- TX 15 Torx Bit / Driver
- Drill
- 1/8” Drill Bit
- Phillips Head Screwdriver
Package Contents
- Driver & passenger side front mud guard
- Instruction sheet
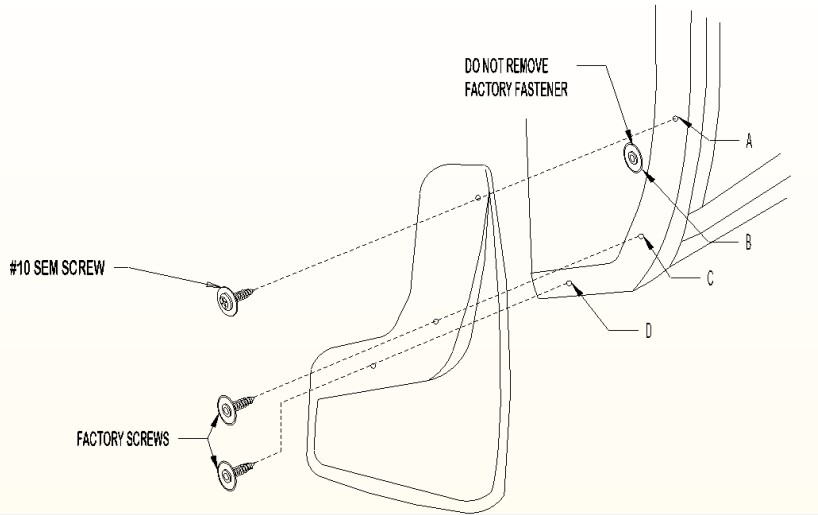
- #10 SEM Screws (Qty 2)
NOTE: Turn the front wheels all the way to the left or right for mud guard installation. However, it may be necessary to remove the wheels depending on the tools being used for installation.
Determine which mudguard you have by locating the part number molded in the mounting flange (5689 LH 5689 RH).
1. Remove existing fasteners from location C and D. (Do not remove fastener from location B)
2. Install mudguard at locations B and C using factory screws.(Check alignment before tightening)
3. Drill an 1/8” hole into the fender cladding and thru sheet metal.
4. Install mudguard with a #10 SEM screw at location A.