FREE 1 to 3-Day Delivery on Orders $149+ Details
How to Install E&G Heavy Mesh Upper Overlay Grille - Chrome (14-15 Sierra 1500 w/o All-Terrain Package) on your GMC Sierra
Installation Time
1 hours
Tools Required
- Automotive Grade Masking Tape
- Electric Drill
- 5/16" and 1/16" Drill Bits
- Razor Blade or X-Acto Knife
- Flat Blade Screwdriver
- 9mm Socket and Ratchet
- Solvent
- Glass Cleaner
- Soft, Clean Cloths
Notes to the Technician/Installer:
E&G is proud to present this package to you and reminds you that for technical information, contact technical assistance at 410-381-4900. Do not at tempt the installation of any E&G product without first reading the detailed instructions. E&G Classics will not warrant damaged parts or the vehicle due to altered installation procedures.
Important: If the factory grille on the vehicle you are working on is different from the one pictured in this instruction manual, please call technical support at 410-381-4900 before proceeding.
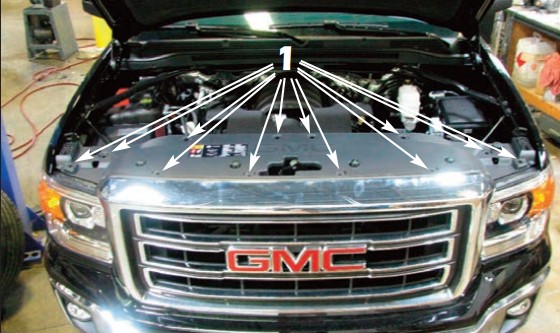
1. Open the hood and use a flat blade screwdriver to remove the factory push pins securing the radiator support panel and remove the panel.
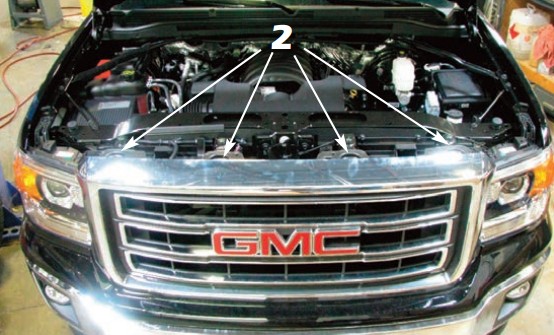
2. Remove the 10mm hex bolts from across the top of the factory grille.
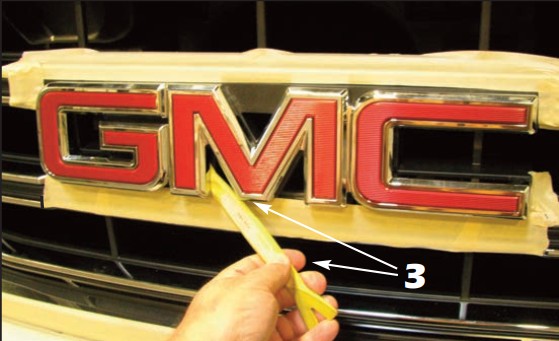
3. Apply masking tape around the factory GMC emblem and use a plastic clip removal tool to pry the emblem around the perimeter until the emblem releases (to be reinstalled at the customer’s request).
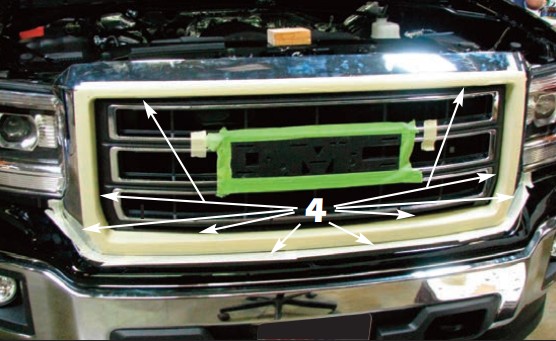
4. Once the emblem has been removed, apply masking tape to the factory chrome surround and the bumper cover under the grille.
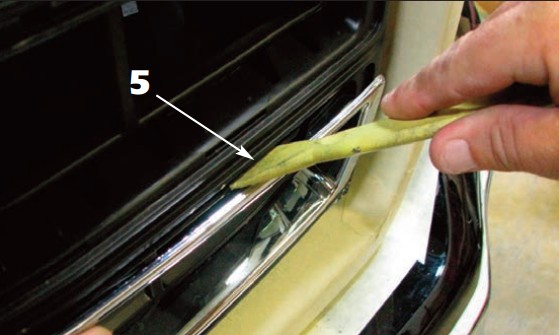
5. Remove the factory chrome inserts from the factory grille. Use a plastic clip removal tool to start the removal process.
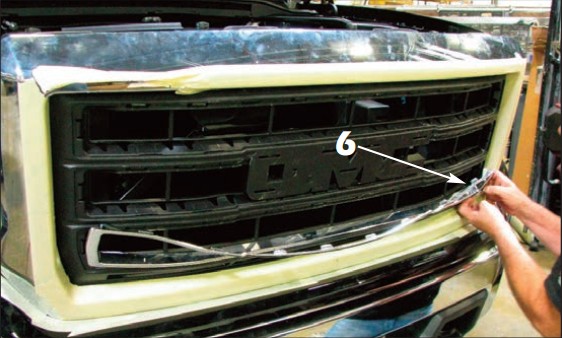
6. Pull the factory mouldings out of the mounting slots in the factory grille to remove them. This will require extra effort.
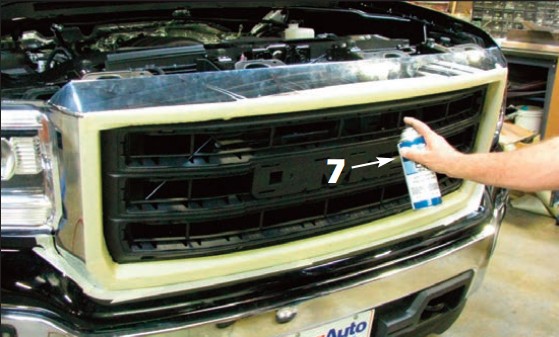
7. Apply semi-gloss black paint the any areas on the factory grille that were stressed during the chrome moulding removal. The stressed plastic will appear light gray or white.
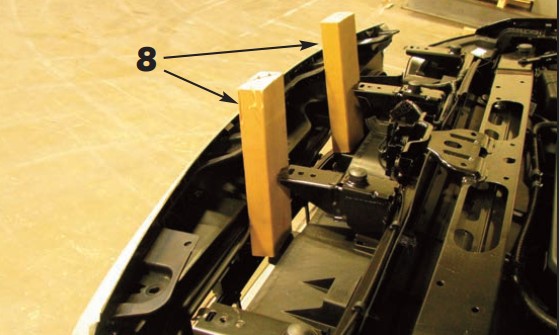
8. Cut two 12” sections of 2 x 4, lift up and pull forward on the upper portion of the factory grille and place the 2 x 4 sections where shown to allow access for hardware installation.
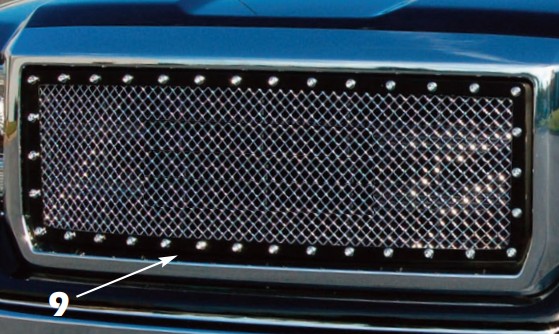
9. Install the E&G grille over the factory grille making sure all mounting studs pass through the openings in the factory grille (E-Power mesh grille shown, mesh grille similar).
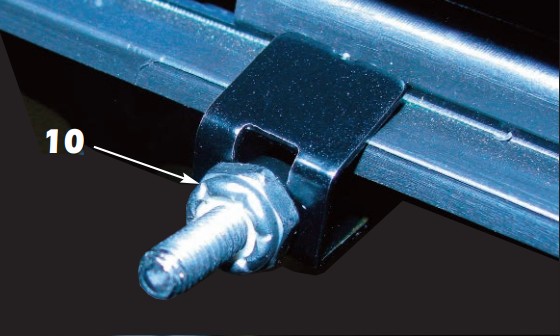
10. Install the grille upper mounting brackets using the supplied #8-32 ESNA half nuts (as shown) to all five upper mounting studs. Tighten until the E&G grille is snug against the factory grille.
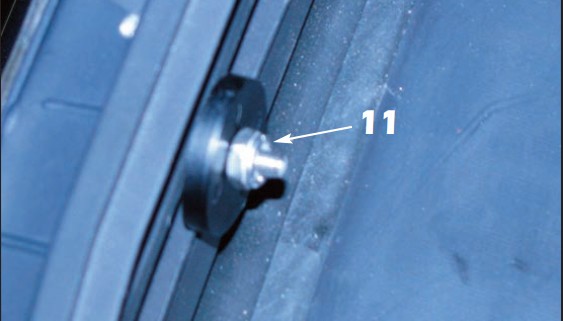
11. Install the supplied large black plastic washers across the bottom of the grille using the supplied #8-32 ESNA half nuts and tighten until the washers no longer freely rotate.
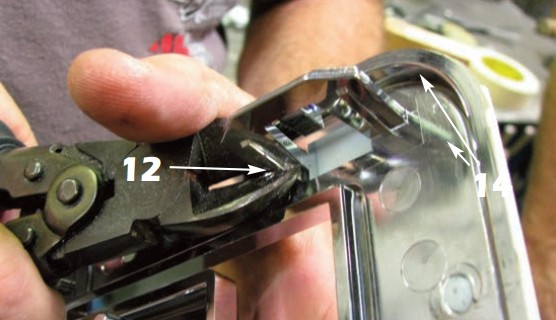
12. For customers requesting emblem reinstallation: Cut the factory mounting tabs from the back of the emblem, making sure you leave the two 3/16” diameter alignment pins in place
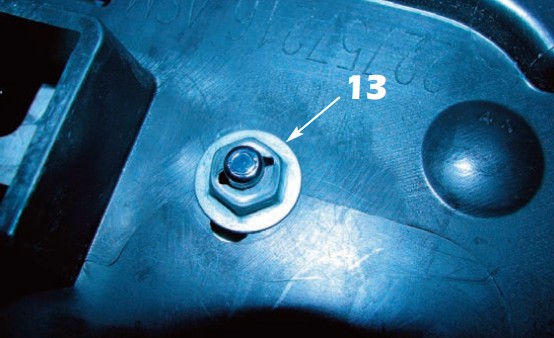
13. Align the factory emblem over the mesh grille, making sure the alignment pins pass through the factopry holes in the plastic. Install the supplied speed nuts onto the factory alignment pins on the back of the GMC emblem and once started, turn the nut an additional 1/4 to 1/2 turn to secure.
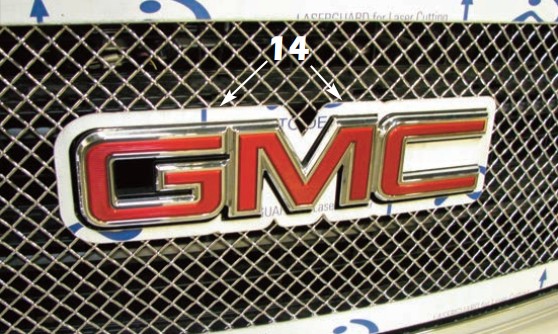
14. For customers requesting emblem reinstallation: Align the emblem surround around the factory emblem, making sure it is even and level. You might have to trim a mesh wire or two to centered it properly (mesh grille shown, E-Power similar).
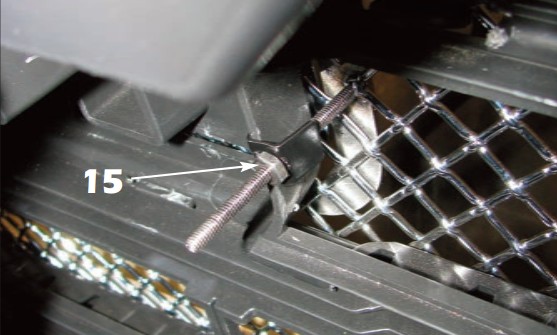
15. Install the emblem mounting bracket over the stud behind the “G” and install a #8-32 ESNA half nut and tighten (mesh grille shown, E-Power mesh grille similar).

16. Align the black nylon plastic washer over the stud behind the “C” and install a #8-32 ESNA half nut and tighten (mesh grille shown, E-Power mesh grille similar).
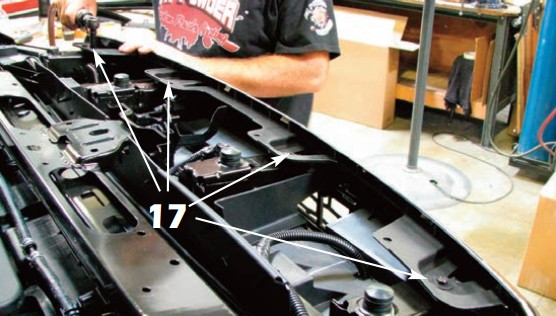
17. Reinstall the factory hardware across the top of the grille and the radiator support panel cover to finish.
18. For mesh grilles: If equipped, remove the protective cover from the grille surround and use a mild solvent and a soft, clean cloth to remove any glue residue left behind from the laser cut. Follow with alcohol or glass cleaner and a soft, clean cloth to remove any solvent residue. Not applicable on E-Power or chrome plated mesh
grilles.
E&G Classic Product Returns:
Please contact the authorized E&G Classics Dealer where you purchased our product from in regards to any workmanship or warranty claims. All items returned to E&G Classics must have a return authorization number issued by us for inspection or a defective product and or warranty issue. All merchandise sent back to E&G Classics without proper paperwork or authorization will be rejected and returned.