FREE 1 to 3-Day Delivery on Orders $149+ Details
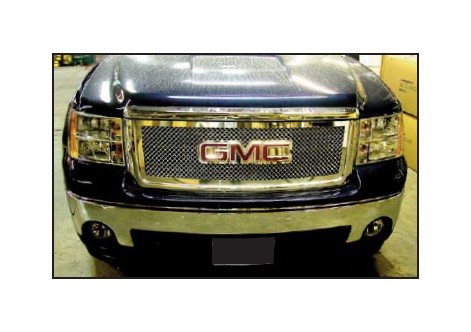
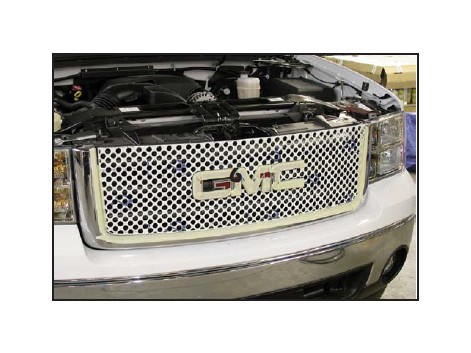
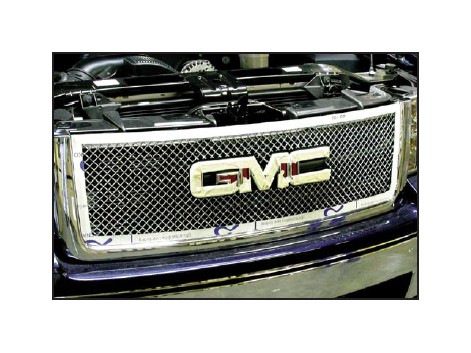
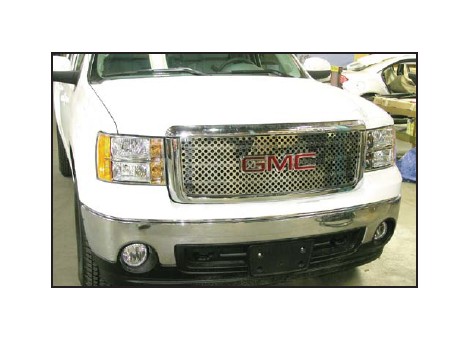
How to Install E & G Heavy Mesh Upper Overlay Grille - Chrome (07-13 Sierra 1500) on your GMC Sierra
*USE CAUTION* while handling the grille. The stainless steel edges can be very sharp.
Once the grille is installed, peel off the protective liner from the polished stainless steel. Use a mild solvent and a soft, clean cloth to remove any glue residue from the stainless steel. Use alcohol or glass cleaner and a soft, clean cloth to remove any solvent residue to finish.
1. Remove the plastic radiator support panel cover by removing the plastic push pins.
2. Thoroughly clean the factory grille and apply protective masking tape to the bottom of the chrome surround and to the top chrome surfaces of the GMC emblem.
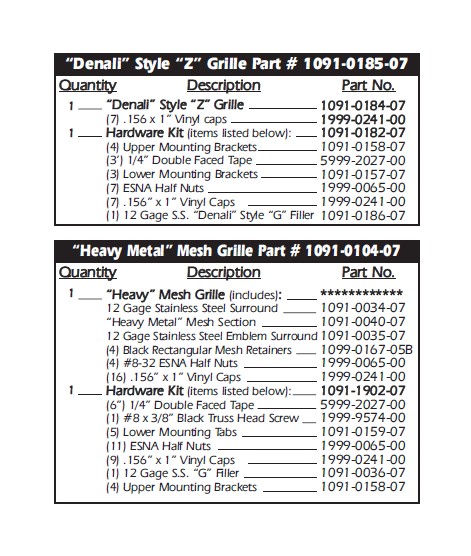
3. For “Denali” Style Grilles: Trim the closed ends from the preinstalled vinyl caps push them down over the studs. Trim the ends from seven (7) more vinyl caps and install the caps onto the mounting studs as well prior to installation.
4. For Mesh Grilles: Align the mesh section onto the back of the mesh surround. Trim the closed ends from the preinstalled vinyl caps push them down over the studs. Trim the ends from seven (7) more vinyl caps and install an additional cap onto the studs across the bottom of the grille and another one half (1/2) sleeve onto the studs across the top of the grille prior to installation.
5. For “Denali” style grilles: Carefully align the “Denali” style grille over the factory grille and GMC emblem, making sure you do not damage the chrome plated GMC emblem or the emblem base. Use masking tape to hold the grille in place while aligning the mounting brackets.
6. For “Denali” style grilles: Install the lower mounting brackets onto the studs at the bottom of the grille frame and install a #8-32 ESNA half nut onto each stud but do not completely tighten at this time. Leave the grille slightly loose to aid in masking tape removal out lined in Step 11.
7. For Mesh grilles: Carefully align the mesh grille over the factory grille and GMC emblem, making sure you do not damage the chrome plated plastic GMC emblem or the emblem base. Use masking tape to hold the grille in place while aligning the mounting brackets and tabs.
8. For Mesh grilles: Install the lower mounting tabs onto the studs at the bottom of the grille surround and install a #8-32 ESNA half nut onto each stud but do not completely tighten at this time. Leave the grille slightly loose to aid in masking tape removal outlined in Step 11.
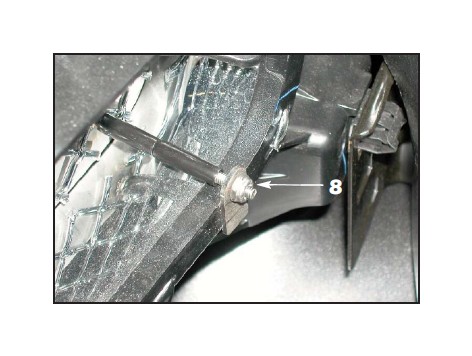
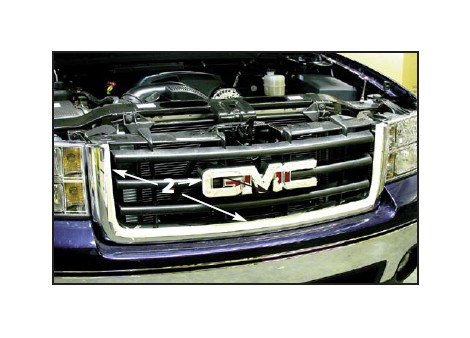
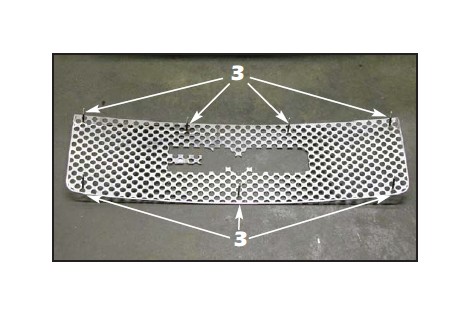
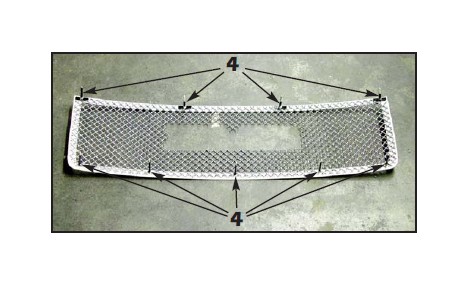
9. “Denali” and Mesh grilles: Align the upper mounting brackets so that they lock underneath the bottom edge of the factory grille fin. install a #8-32 ESNA half nut onto each stud but do not completely tighten at this time. Snug the nuts against the brackets to keep the brackets properly aligned (Mesh shown, “Denali” style grille same).
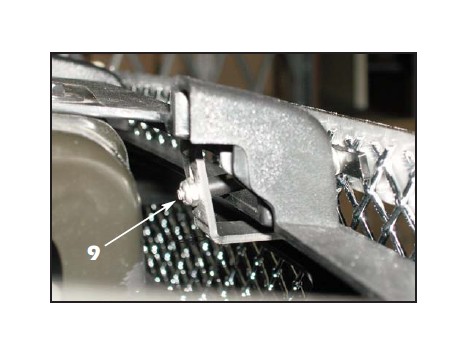
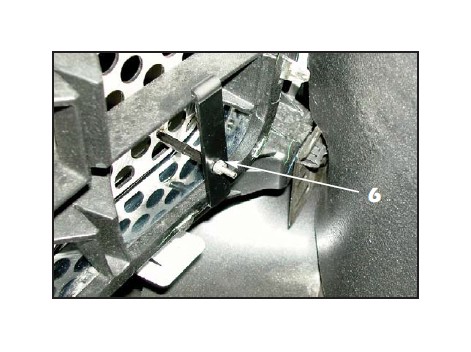
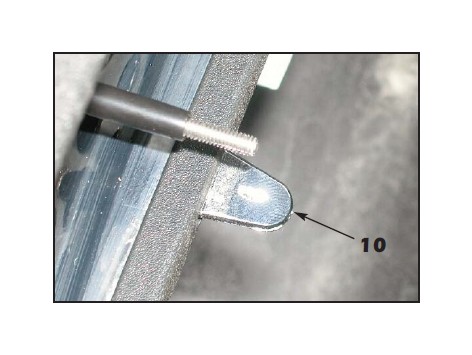
10. “Denali” and Mesh grilles: You must remove the factory center chrome tab before installing the lower center mounting bracket. The chrome tab will break off when you apply downward pressure onto it (“Denali” style shown, Mesh grille same). Once the tab has been removed, install the final lower mounting bracket.
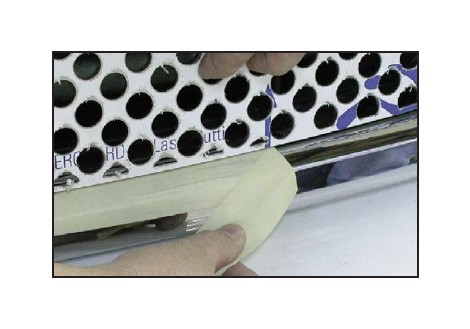
11. “Denali” style and Mesh grilles: Carefully remove the protective masking tape from around the grille frame. You can pull up or down and left to right on the E&G grille or the factory grille shell to increase the gap where the stainless steel grille meets the chrome plated factory shell. Peel back the tape over itself to help prevent the tape from breaking and getting caught behind the stainless steel frame. Once the tape is removed, tighten the mounting hardware. DO NOT OVERTIGHTEN or you will indent the grille at the stud locations!
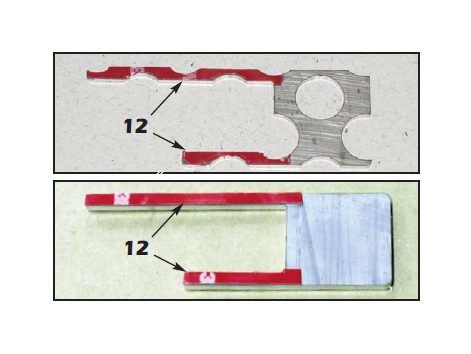
12. “Denali” style and Mesh grilles: Thoroughly clean the back of the stainless steel “G” filler and install the supplied double faced tape where shown.
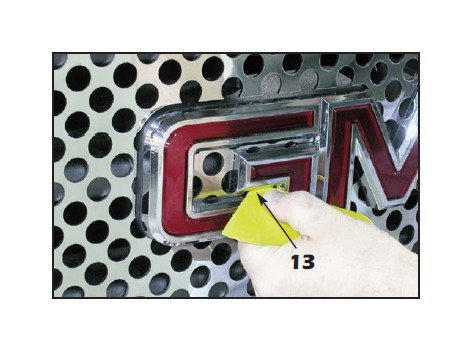
13. NOTE: E&G recommends slightly bending the bottome leg up for a tight fit against the plastic emblem base before installation. “Denali” style grilles: Once the double faced tape liner is removed, alilgn the “G” filler into place and use a plastic tool (such as a squeegee or body filler spreader) or a screwdriver wrapped in electrical tape to press the filler into place.
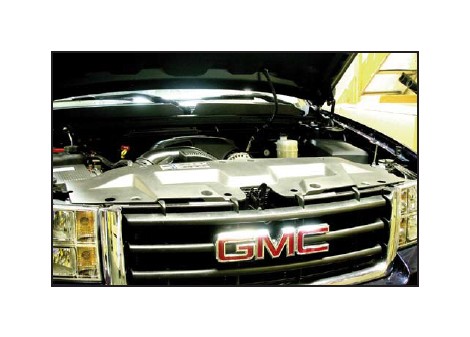
14. “Denali” style grille: reinstall the radiator support panel cover to finish. The remainder of the manual covers the final steps for the Mesh grille.
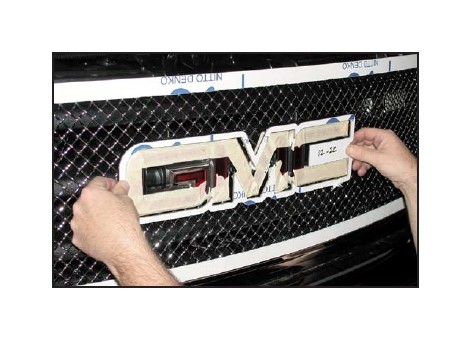
15. Align the stainless steel emblem surround into place and press firmly at the stud locations to make impressions into the factory plastic grille.
16. Use a 3/16” drill bit to drill through the marks made in the previous step.
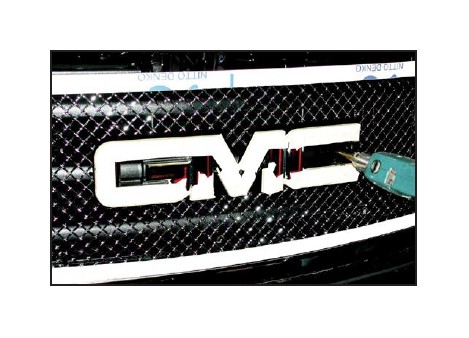
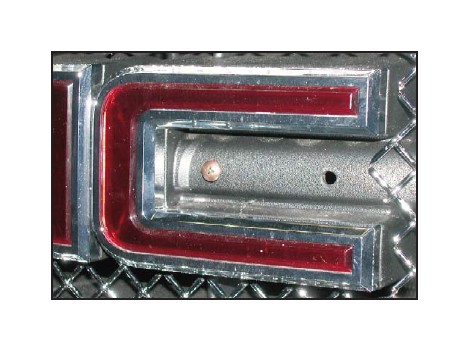
17. Drill (1/8” drill bit) and install the supplied #8 x 3/8” black truss head screw (where shown). This will keep the emblem surround from rocking in the recessed area of the “C”.
18. Install the emblem surround, making sure that the studs pass through the holes drilled in Step 16. Install the supplied #8-32 ESNA half nuts to secure (not shown).
19. “Denali” style and Mesh grilles: Thoroughly clean the back of the stainless steel “G” filler and install the supplied double faced tape where shown.
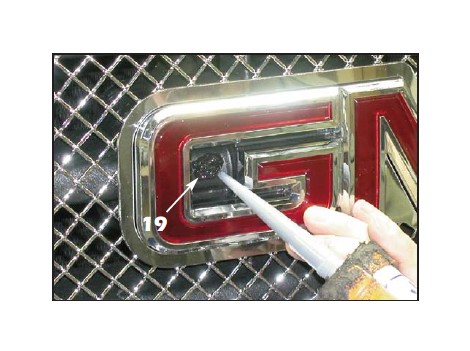
20. Once the double faced tape liner is removed, align the “G” filler into place and use a plastic tool or screwdriver wrapped in electrical tape to press the filler into place. Remove any silicone that may squeeze out around the filler.

21. Reinstall the radiator support panel cover to finish.