 FREE 1 to 3-Day Delivery on Orders $149+ Details
How to Install Airaid MXP Series Cold Air Intake w/ SynthaFlow Oiled Filter (11-13 6.0L Hybrid w/ Mechanical Cooling Fan) on your GMC Sierra
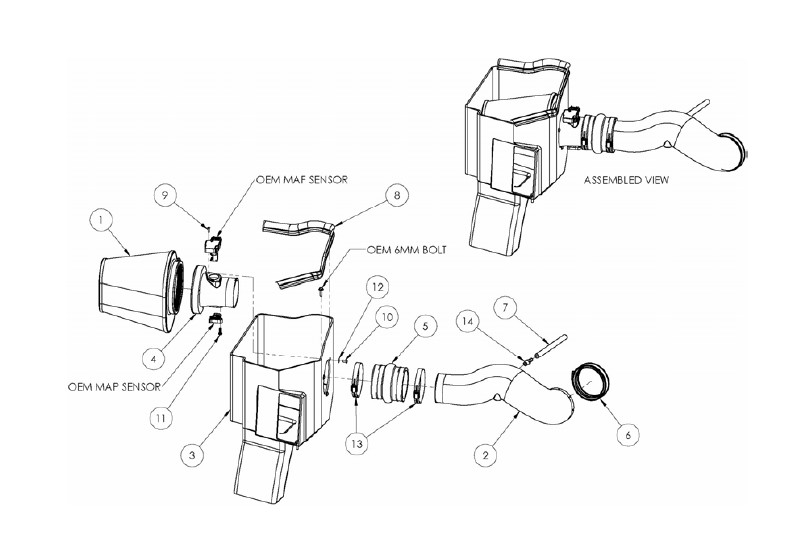
Component Identification
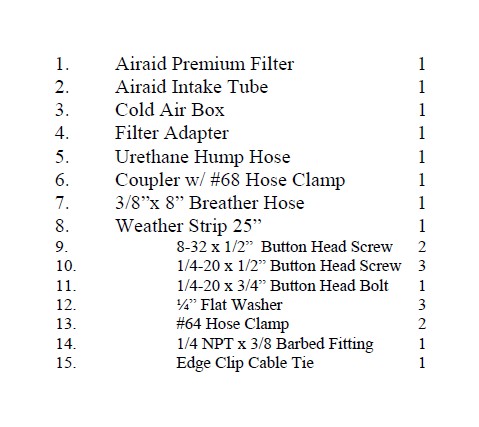
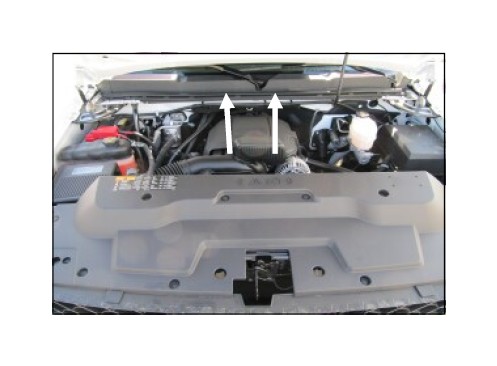
1. Disconnect the negative battery cable. Remove the engine cover by simply pulling up on it and sliding out from the vehicle.
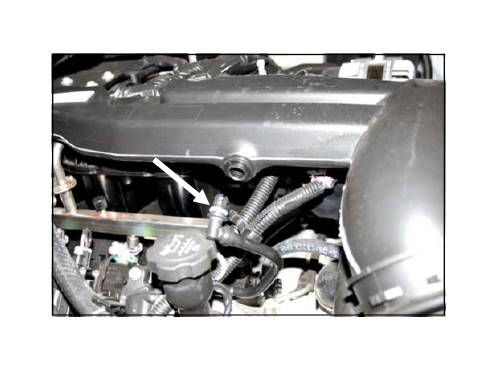
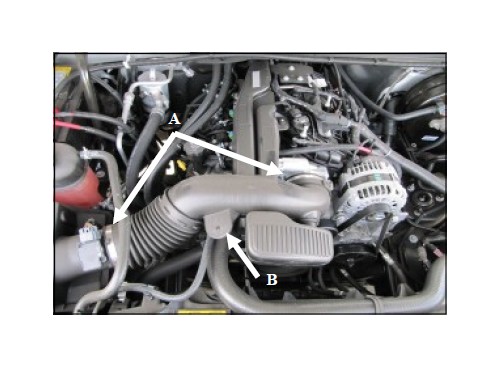
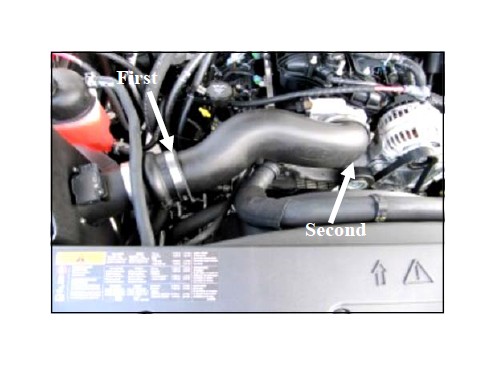
2. Pull the PCV breather line from the factory intake tube.
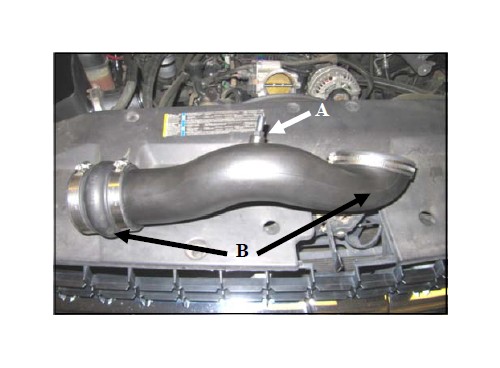
3.A.) Loosen the clamps secur ing the factor y intake tube to the throttlebody and the airbox. B.) Separate the hose anchor from the factory intake and remove the factory tube.
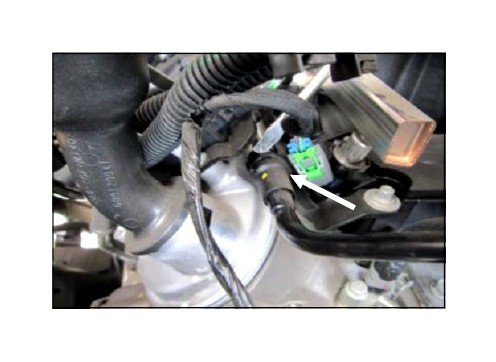
4. Remove the plastic PCV breather line from the factory hard line. A standard screwdriver works well for depressing the locking tab in the coupling.
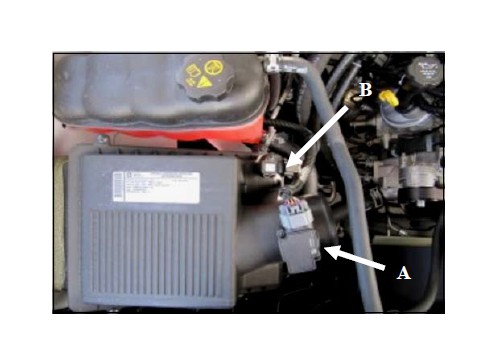
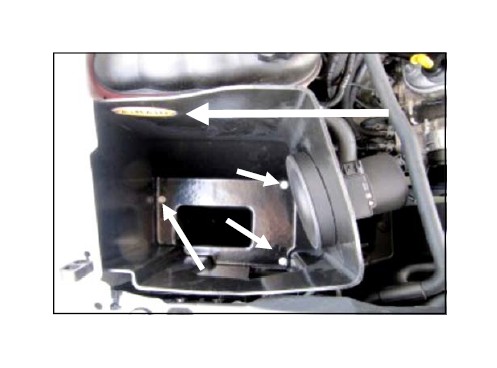
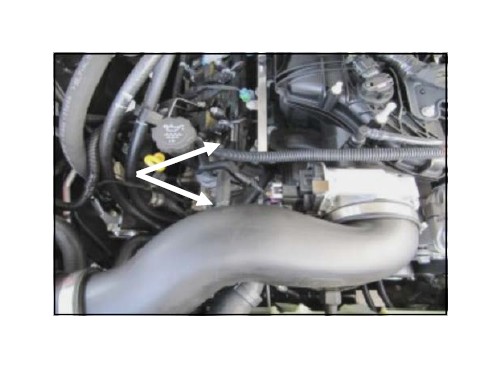
5. Disconnect the Mass Air Flow or MAF sensor ( A ) and the Manifold Absolute Pressure or MAP sensor ( B ) Remove the factory airbox from the vehicle. The airbox is secured to the vehicle with grommets and simply lifts out.
6. On 2015 Models: Remove the two 6mm bolts in the fender brace and set the bolts and brace to the side.
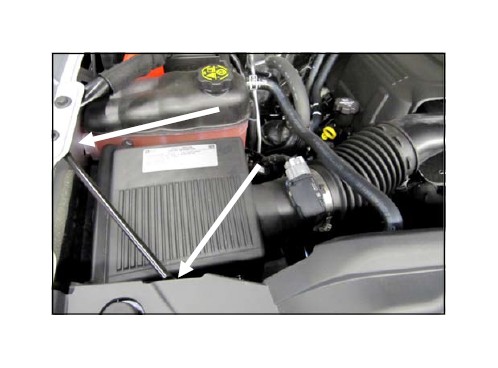
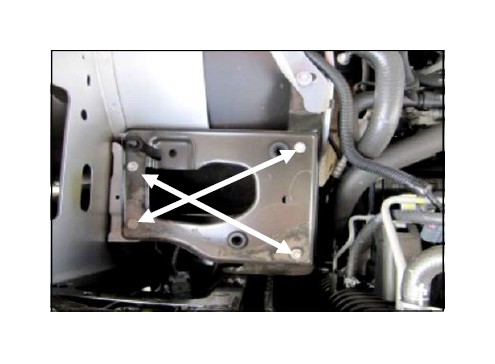
7. Remove the four tray bolts and the airbox mounting tray. Three of the bolts will be reused in step 9.
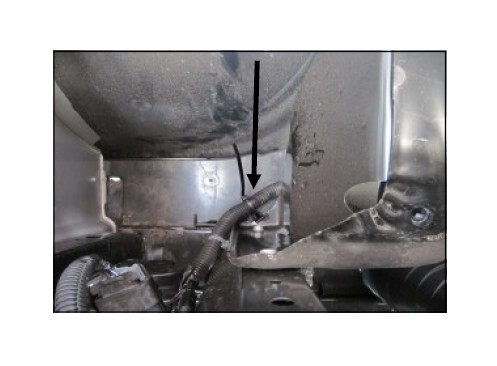
8. Secure the wiring harness to the inner fender as shown using the Edge Clip Cable Tie (#15).
9. Install the Filter Adapter (#4) onto the Cold Air Box or CAB (#3) as shown using the three 1/4-20 Button Head Screws (#10) and 1/4” Flat Washers (#12). A.) Transfer the MAF sensor from the factory air - box into the Filter Adapter. Secure the sensor using the two 8-32 Button Head Screws (#9). B.) Transfer the MAP sensor from the airbox into the Filter Adapter and secure using the 1/4-20 x 3/4” Button Head Bolt (#11).

10. Install the CAB ( #3) into the engine compartment and secure using three of the tray bolts from step 6. Apply the Airaid Bubble decal inside of the Airbox as shown.
11. A.) Install the 3/8 NPT Fitting (#14) in to the Airaid Intake Tube.
B.) Install the Hump Hose (#5), Coupler (#6) and Hose Clamps (#13) on to the Intake Tube as shown. Leave the clamps loose for now.
12. Install the Airaid Intake Tube assembly onto the Filter Adapter first, and then onto the throttlebody. Adjust for fit, and tighten all hose clamps. Reinstall the hose anchor into the Airaid Intake Tube.
13. ) Install the 3/8” Breather Hose (#7) onto the Barbed Fitting and factory hard line.
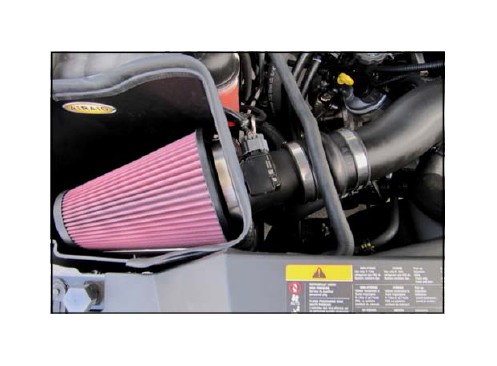
14. Install the Airaid Premium filter (#1) onto the Filter Adapter , and tighten the hose clamp. Reconnect the MAF And MAP sensors . . Install the Weather Str ip (#8) onto the Airaid Cold Air Box. (Hint: Start from one corner and work your way around for ease of install.)
15. Reinstall the engine cover. Double check your work! Make sure there is no foreign material in the intake path. Make sure all clamps, hoses, bolts, and screws are tight. Double check the hood clearance. Reconnect the negative battery cable

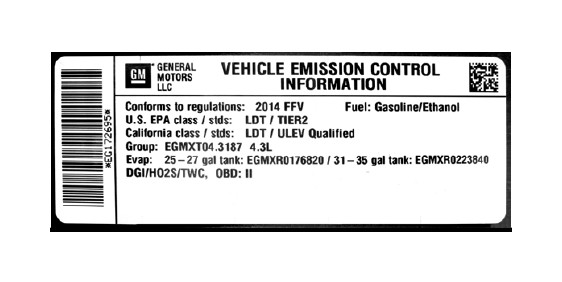
WARNING! If your vehicle has a Vehicle Emission Control Information decal affixed to the factor y air - box, a new replacement label must be obtained and installed in a readily visible position in the engine compartment in order to remain CARB compliant. Failure to do so will prevent the vehicle from passing a smog check. Replacement labels can be ordered from your local dealership. Regulations state that the VECI label shall not be affixed to any equipment which is easily detached from the vehicle. Label placement, under the hood on a painted surface is recommended.


