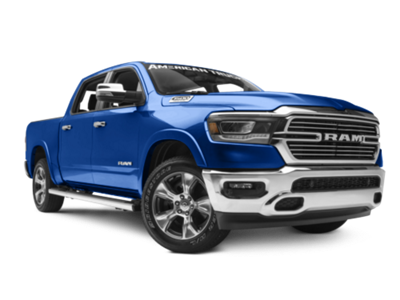
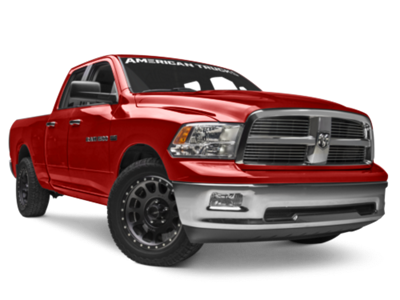
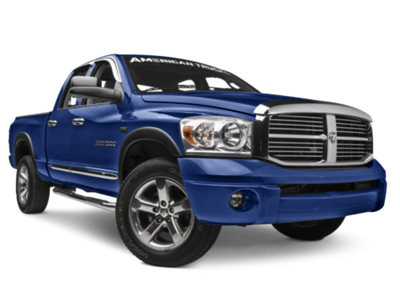
Talk to a Ram 1500 Sales Tech
1-888-706-1096
M-F 8:30A-11P, Sat-Sun 8:30A-9P
$20K Sweeps! 10 Chances to Win! Enter Daily >

Sidewinder Running Boards (09-18 RAM 1500 Crew Cab)

Item R147103
Verify parts fit and get product recommendations.
Ram 1500 Sales Techs: Connect Now M-F 8:30A-11P, Sat-Sun 8:30A-9P
$0.00
Our Price

$349.99 (set)

FREE Shipping Market Price $389.99 You Save 10% ($40.00) Up to 10% off for Military & First Responders! See Details

Will this fit your Vehicle?

Select a different vehicle Help?
Update or Change Vehicle
Ship to: Ashburn - 20149
Sorry, please enter a valid US or CA postal code
We're sorry, zip can't be updated at this time.
Recommended Install Shops
How It Works
Install Shops are available near Ashburn - 20149

Add Local Shop Installation

Total cost of service $175.00
    Create a list
    Add to New List

    Saved - View your saved items

    We're sorry. We couldn't save this product at this time.

    or use

      Product Videos

      Merideth: If you want an easier way to get in and out of your 2009 to 2018 Crew Cab RAM 1500, these Sidewinder Running Boards will be a great option to take a look at. Now, these will be a good choice for your RAM if you and your passengers are having a tough time hopping up into their seat, especially if you've got kids, and even more so if you have a lift kit or a leveling kit installed. Now, these will offer a good amount of drop, making getting in a lot more accessible, while also filling up that wheel-to-wheel space, for a finished appearance to the side, and giving you good protection to your rocker area if you're looking for multiple benefits out of one step. Now, that protection will be great day-to-day, but also if you take your RAM onto the dirt, whether that's the worksite, fire trails, or camping, and want to make sure that your truck stays in good condition, this set will do just that.These will feature a large pentagonal bar up at the top, that will give this set a completed and tough appearance of a rock rail, to hide that pinch weld area, and, of course, provide the protection that you need for door dings in the parking lot or kick-up from smaller obstacles off or even on-road. Now, attached to it are the star of the show here, which are the drop step, offering you that much-needed assistance of getting in and out of your RAM. Now, the step will be roughly 5 inches wide, to offer a good amount of space underneath your foot for you and your passengers, and will feature finned cutouts, for some extra traction, and a bit of extra styling. Now, I do wanna mention that these will not be the most high-clearance option for a side step, just because they do have that drop, but if you're not doing any major off-roading, which most of you won't be, then these will do just fine when it comes to off-roading or lighter off-roading scenarios.These will be made of a tough steel construction, being able to take a hit whenever it's needed, and the ability to support up to 500 pounds. Now, on top of that, this will have a textured black powder coat finish, offering a rust protection to the steel underneath, and offering that heavy-duty appeal to the side of your RAM. Now, this kit will also be completely bolt-on, so no need for modifications, and will come with everything that you need out of the box to get these onto your truck.These will come in at about $400, which, for a drop step, is gonna be right in the middle when it comes to price. What I like about this kit, though, is that this is going to have that angular and boxy construction, setting it apart from other tubular options, and the fact that this is going to have a very large 5-inch wide step, if you want some more support, and some of the most support that you can get out of a step. Now, in addition, the well-fitting upper bar here creates that premium appearance, making these a great option if you want a good-looking and well-functioning drop step for your RAM 1500.Install on these will be a lighter 2 out of 3 wrenches on the difficulty meter, taking you about two hours to get the job done with some pretty basic hand tools. At this point, though, we can head over to our shop and check out a detailed breakdown, step by step, on how to get these onto your RAM at home. So, that's gonna wrap it up for me. Let's go ahead and get into it.Man: The tools you'll need for this project are a 3 /8 ratchet, a short extension, a 10 and a 13-millimeter socket, and a 10 and 13-millimeter wrench.Hi, everyone. Today, we're installing a set of side steps on our RAM, so let's get started. Now, before we get started with the actual install here, there's a couple things we need to note. One is, the brackets that I'm holding here, and the support brackets that go on to these, and the side steps themselves, are side-specific. So, you have a driver side and a passenger side. Driver side, which is what we'll be showing you right here, their large brackets here all have an "A" stamp in them. "A" is for the driver side. A "B" is for the passenger side. Now, to install these, the "A" brackets, we're gonna put two "A" brackets, one in the front and one in the center, and then we're gonna use one of the "B" brackets to go for the rear. On the passenger side, it's gonna be the opposite. You're gonna have two "B" brackets in the front and center, and an "A" bracket for the rear. So, you wanna probably lay these out beforehand, so that you don't get confused, and get frustrated with things not fitting. So, lay these out with two "A" brackets and a "B" bracket on one side, and then the two "B" brackets and an "A" bracket for the other side.Now, we also have the same situation with the smaller support brackets, but the support brackets are not stamped. But, when the kit arrives, you will notice that there are two separate boxes of brackets in there. One box has the brackets for the driver side, and they all have a green wrapper around the brackets. The passenger side has a clear wrapper around the brackets. So, again, for the driver side, we're gonna need two of the ones that have the green wrapper, and one that has the clear wrapper, and this is going to be for the rear support bracket.Now, some of the vehicles from, like, '09 to '13 or '14, will not have threaded inserts into the bottom of the truck in order to attach the brackets to. So you're gonna use these mounting plates. And you'll notice that it does have a bolt welded on, and also a nut. So, in order to be able to put the brackets onto these plates, what you're gonna do is thread one of the bolts into the nut, like so, and then there's a slotted hole on the inner rocker panel that you're gonna use to slip this through, and then the bolt will go through a hole that's already pre-drilled. So, what you'll do is you'll slide this in through the slotted hole, put the threaded bolt through that hole, and then use one of these plastic retainers, screw it on to the bolt, like so, until it's flush against the panel of the truck. Once you've got that done, you can go ahead and remove the bolt that you put in the top, and then use the welded-on bolt to maneuver the threaded plate down to the second hole, and then go ahead and insert your bolt there, along with your flat washer and your lock washer, to hold it in place. So, once you've got that done, then we can go ahead and attach the brackets. Now, I'll show you this underneath, once we get there, but I just figured it would be easier to show you now, before we get underneath and visibility is a little low. So, let's go ahead and get started and get these brackets installed.Now, here's one of the slots that you'll have to be using if you're gonna be using one of these mounting plates. There are several of these slots along the inner rocker here, but the ones that you'll be concentrating on are the ones that have two holes underneath it. And normally, there's also a plastic covering over these slotted holes, like this one right here. What you're gonna do is just peel that off, so that you'll have access to that hole. And then, like I said earlier, if you don't have the threaded inserts, which we do on ours, what you do is put your bolt into the nut on the mounting plate, and then slide the bolt that's welded on through the slot, and work it down until it can feed into one of these holes. Once you've got that fed through, what you're gonna wanna do then is go ahead and put your plastic retainer over the bolt, to hold it in, and then you can start to attach your bracket to the bolt, and then remove the one on top that you screwed in, and then use this bolt to maneuver the plate back over this other hole, and then put a bolt in there.So, like I said, since we don't have to worry about that, we're just gonna go ahead and get our brackets mounted. So, in order to mount it, you're gonna put your bracket up there, you're gonna have one of your 8-millimeter by 30-millimeter bolts, with a flat washer and a lock washer, and go ahead and just put that in, like so. Now, you don't wanna tighten these down until everything is actually attached to it and you've got the side steps on there, so that you can level it, and make sure that it fits the correct way you want to. So, we're just gonna put our screws in loosely right now, so that we can adjust it as needed, to make everything fit properly.Now, like I said, on the driver side, the front and the center, which is what we have right here, are the same bracket, so you can do the same process for the front bracket, and then we'll show you how to do the rear bracket as well. Now, you can see from our rear bracket why we have to use the different format of the bracket, because there just isn't the clearance for the rear to be able to give this side step the proper support if it was facing the other way. So, we'll get this one installed. All right. Now that we've got all three brackets on the driver side installed, now we'll go ahead and attach the other brackets to these brackets, that will actually support the side step. Now we can go ahead and attach our smaller support bracket, and it's going to attach to our pinch weld and to our main support bracket here. Now, ours, as you can see in the pinch weld here, it already has some pre-drilled holes from the factory. You may not have that on your truck, depending on the year. If you don't have it, don't worry about drilling the holes right at this point. I'll show you how to go ahead and attach the bracket first, and then we'll show you about drilling out these holes.So, we're gonna attach our bracket on the inside of the pinch weld, up against the main support bracket, and then we're gonna use a 6-millimeter bolt, with a flat washer, to go through the pinch weld here, slide our bracket on, and we'll use another flat washer on the other side, and then one of these supplied 6-millimeter nyloc nuts. So, again, we're not gonna worry about tightening anything down at this point, until everything is actually attached to each other. All right. Once we've got that in, and now, like I said, if you don't have the holes already pre-drilled, then what we're gonna do is use one of the 8-millimeter bolts, and a couple of flat washers, and another nyloc nut on the end of that, and we're just gonna go ahead and attach it this bracket to the main support bracket, like so.So, we'll put one flat washer on one side of the bracket, one on the other, and then put your nyloc nut on. Now, we'll go ahead and do the same thing for the center and the front brackets, and get those attached, and then we'll go ahead and attach our side steps. Now we've got our brackets installed on the truck, we can go ahead and install our side steps themselves. And like I said earlier, they are side-specific. And if you look at the end of the step itself, you'll see that it has a "08-L." And the other one will have an "08-R." So, "L" is for driver side, "R" is for passenger side. You'll also notice that on the back of the steps, there's three holes, with an insert that's threaded, as well as on the bottom. There's three of them. So, they're gonna line up with these two holes here on the bracket, and the kit also comes with these special bolts, that have the washers already attached to them. These are the ones that you'll use to attach your side step to the actual bracket.Now, if you've got an extra pair of hands, that's great. Things will work out a little bit easier for you. But you can do this on your own, and I recommend starting from the center bracket, to actually hold it up while you get the ones on the ends. So, we'll go ahead and set this on the bracket, line up the holes, and then we can insert our bolts, one from the bottom, and then we'll insert the one from the backside. Now, that'll hold it in place while you go ahead and insert the bolts for the front and the rear.All right. Now that we've got our side step actually attached to our brackets now, we've checked our alignment to make sure that it's where we want it to be, everything looks good, nice, and level, now it's time to go ahead and start tightening everything up. So, the first thing we're gonna do is use our 13-millimeter socket, and we'll tighten up the bolts that hold the steps to the brackets themselves, since those are the ones that are non-adjustable. So let's go ahead and get those tightened up.Now, we'll go ahead and tighten up our bottom bolt here, and the one right above it, using our 13-millimeter socket. Now, for this upper one here, you may find it easier to use an extension on your ratchet, or, if you don't have one of those, putting a wrench in here, you can reach it as well. And you can do that for the other two brackets as well.Now, once you've got all these tightened up, then we'll go ahead and move up to the ones on the inner rocker panel, again using our 13-millimeter socket. And you can repeat that process for the other two brackets as well. And now, using our 10-millimeter socket and a 10-millimeter wrench, we'll get the two bolts on each bracket that are attached to the pinch weld. And repeat that process for the other two brackets as well. And finally, we'll get the last nut and bolt that connects our two brackets together, and for that, we'll use our 13-millimeter socket and a 13-millimeter wrench. And you can repeat that process for the other two brackets as well. And now that we've got one side completely installed, now we can go ahead and repeat this whole process for the other side.And that wraps up our review and install of the Sidewinder Running Boards for your '09 to '18 RAM 1500 Crew Cab. Thanks for watching, and remember, for all things RAM, keep it right here at americantrucks.com.

      Product Information

      Features, Description, Reviews, Q&A, Specs & Installation

      Features & Specs

      • Running Boards
      • Easy Entry and Exit
      • Increased Safety
      • Fits 2009-2018 RAM 1500 Crew Cab Models

      Description

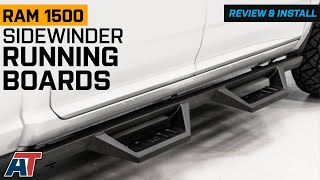
      Accessibility. They have a wide surface area and are built to last, so you may step onto them with security and stability. The same is true when you're getting in: you can count on these Sidewinder Running Boards to provide you with a roomy, secure platform that makes getting in and out of your vehicle a breeze.

      Safe. No of the weather or road conditions, you can step confidently onto and off of your vehicle with the Sidewinder Running Boards. The non-slip surface makes sure that your shoes will grasp the board firmly, avoiding any risky falls or slides. With this additional safety measure, you are not only kept safe but also have peace of mind knowing that any potential mishaps are eliminated.

      Installation. Putting these Sidewinder Running Boards on your RAM 1500 Crew Cab is easy and requires no drilling.

      Application. The Sidewinder Running Boards fit 2009-2018 RAM 1500 Crew Cab models.

      Fitment:

      Details

      CA Residents: WARNING: Cancer and Reproductive Harm - www.P65Warnings.ca.gov

      Installation & What's in the Box

      Installation Info

      What's in the Box

      • (2) Running Boards
      • Hardware
      4.7

      Customer Reviews (36)

        Questions & Answers

        10 More Questions

        Will It Fit My Ram 1500

        • 3.0L V6 EcoDiesel - 14, 15, 16, 17, 18
        • 3.6L V6 - 13, 14, 15, 16, 17, 18
        • 3.7L V6 - 09, 10
        • 4.7L V8 - 09, 10, 11, 12, 13
        • 5.7L V8 - 09, 10, 11, 12, 13, 14, 15, 16, 17, 18