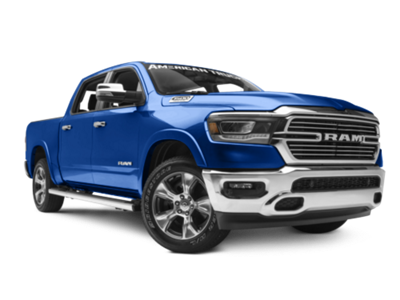
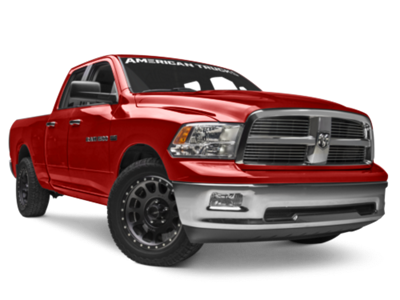
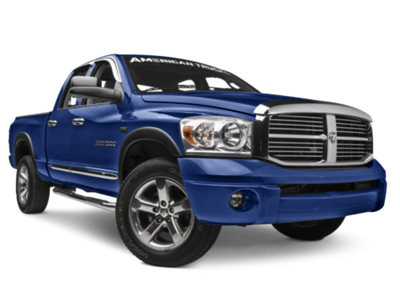
Talk to a Ram 1500 Sales Tech
1-888-706-1096
M-F 8:30A-11P, Sat-Sun 8:30A-9P
$20K Sweeps! 10 Chances to Win! Enter Daily >

Rough Country 2-Inch Front Leveling Kit (19-24 4WD RAM 1500 w/o Air Ride, Excluding TRX)

Item R109305
Verify parts fit and get product recommendations.
Ram 1500 Sales Techs: Connect Now M-F 8:30A-11P, Sat-Sun 8:30A-9P
$0.00
Our Price

$54.95 (kit)

FREE Shipping on orders over $119 Market Price $63.99 You Save 14% ($9.04) Up to 10% off for Military & First Responders! See Details

Will this fit your Vehicle?

Select a different vehicle Help?
Update or Change Vehicle
Ship to: Ashburn - 20149
Sorry, please enter a valid US or CA postal code
We're sorry, zip can't be updated at this time.
Recommended Install Shops
How It Works
Install Shops are available near Ashburn - 20149

Add Local Shop Installation

Total cost of service $499.00
    Create a list
    Add to New List

    Saved - View your saved items

    We're sorry. We couldn't save this product at this time.

      Product Videos

      Hey guys, Adam here with americantrucks.com. Today we're taking a closer look at and installing the Rough Country 2-inch front leveling kit for all 2019 and newer Ram 1500s excluding the Rebel. You should be checking out this leveling kit here from Rough Country if you're looking to accomplish a couple of different things. For one, you might be looking to get rid of the factory rake to level out your truck's appearance. Off the factory line, the front end dips down a little bit lower in the suspension height than the rear to help with towing. But if you're looking to get rid of that and get a more aggressive appearance with your truck, a 2-inch leveling kit is just enough to pull the front end up to match your rear. It'll also help if you guys are looking to add bigger wheels and tires to your truck. Off the factory line, you have somewhere between a 31-inch and a 32-inch tire in all four corners. If you're looking at 33s or even 34-inch tires to your truck without any rubbing issues upon turning, a 2-inch leveling kit from Rough Country like this one here is gonna be the way to go to help you do so.Now, in this video, I'm gonna be throwing on 33-inch all-terrains here just to show you guys what that looks like. But also keep in mind Rough Country lets us know you can fit up to an 11 and a half-inch wide wheel or up to a 295-millimeter tire. So that's something to keep in mind there. Anytime you wanna add these bigger wheels and tires clearance does become an issue without a leveling kit. So this is a really good way to add those tires. Now, 35s are a whole different issue, they do require some modification with a leveling kit like this. If you wanted to add 35s comfortably without any modification on your truck, you'll definitely wanna look into the offset of your wheel to give you a little bit more poke and maybe even a bigger leveling kit or lift kit. Now this kit here from Rough Country is a preload spacer which basically means it's not gonna sit at the top of your strut tower. It's gonna sit between your coil spring and the strut hat itself as a preload spacer. So it installs a little bit differently than some of the other leveling kits on the market. Usually, you would just install it right to the top. This is gonna require a spring compressor to get the job done. This is made from an extremely durable thick ABS plastic so it's not steel like some of the other kits. It is extremely lightweight but still extremely durable and finished in black. Now, the color really doesn't make a difference to performance. You will be able to see it a little bit better than most that would sit at the top of your strut hat. So it's worth noting there. The kit comes as a pair for both sides of the front and it's gonna come in right around 55 bucks making it a super affordable way to level out your truck and fit those bigger wheels and tires comfortably.Now the install I am gonna give three out of three wrenches on our difficulty meter because it does require that spring compressor. There's a little bit more work involved because that is a specialty tool. If you're not really comfortable handling a spring compressor, which can be pretty dangerous if not worked on correctly, there's no shame handing it over to a professional to get done properly. Overall, it'll take about three hours from start to finish. I'm gonna show you every single step of the process. Let's get to it. All right, tools used in this install include an impact gun, air tools, step through ratchet, quarter-inch ratchet, 8-millimeter deep socket, 18, 21, and 22-millimeter deep sockets, hammer, pry bar is recommended, WD-40 is also recommended or something similar, a sharpie, 16-millimeter ratcheting wrench is recommended, 13/16 wrench and 15/16 wrench.First thing's first guys, of course, you wanna get your truck up in the air, whether you're using a lift, or if you're working on the ground with the jack and jack stands. Now I got my 22-socket here, my air tools, I'm gonna get this wheel out of the way so we can get started. First thing we're gonna do with the wheel out of the way is disconnect a couple of ABS line clips. That way when we're lowering down our entire spindle, it's not putting extra pressure on our brake lines. Now, this line here, the ABS line and the brake line are connected. So we're gonna pull back on this plastic clip to disconnect and slide those guys out. Follow the ABS line up and it's connected to the upper control arm. I'm gonna wiggle that guy back and forth to disconnect it. Follow it back down to the spindle and there's one more to pull out. All right, now on the back of the spindle you'll see this metal clip, it's more of an S-shaped. We're just gonna wiggle this rubber grommet out of that. And now you can see this whole thing's loose and has a lot of slack. Next step, we're gonna pick up our 21-millimeter deep socket and we're gonna loosen it and remove the nut holding on our tie rod end. And what I like to do is once I have that nut off, pull the tie rod end out and I like to put the nut back on just so we don't lose it. Next, we're gonna remove the bottom bolt of our strut. Now, it's a 21-millimeter bolt head with a 15/16 nut on the opposite end. So I've got my wrench on the nut there and my 21 on the bolt head, I'm gonna get this guy off. Now, we may need a hammer to just tap this out, but if you can wiggle it out, you can do that now.All right, next we wanna remove the bottom of our sway bar end link nut and the upper control arm to spindle nut. Those things are gonna have the entire spindle drop down or the lower control arm as well. And we wanna make sure we have that weight supported so it doesn't drop down on us. So if you're working on a lift, grab a pole jack at this point, if you're working on the ground a hydraulic jack will do the trick.All right, next up we're gonna grab an 18-millimeter deep socket and loosen and remove the bottom nut of our sway bar end link that connects to the lower control arm. Now, in theory, you could remove the top portion that connects to the sway bar, but I find it easier to do it this way just because there's a lot more room to work with and I can get an impact gun on here. So now we can take the 18 and remove it. With this out of the way when we go to lower this thing down, the sway bar won't stop it from going as low as we need it.All right, so next we wanna tackle the upper control arm to the spindle bolt. Now when we're trying to loosen it, this is gonna rotate back and forth. In order to keep it from doing that to make our lives easier. I'm just gonna take this nut off and put our tie rod end back on. Now we don't have to tighten it down, but that'll keep it from moving around too much and help us out. With your lower control arm still supported, grab a 13/16 wrench or a 21 and you're gonna go in here and break this upper control arm to spindle nut loose. We have this loose I'm gonna bring the nut down to a couple of the last threads. We're not gonna completely remove the nut just yet. As you can see the spindle is still attached to the upper control arm. We need to grab a hammer and break this guy loose, so it'll jolt free. If you completely remove this nut that'll break free and it'll drop down. So this is gonna help catch it, then we'll come back and remove it. So we're gonna grab a hammer and tap on the actual spindle. You don't wanna hit the upper control arm, you don't wanna risk damaging the bushing. So we're gonna hit this side right here on the spindle.All right, so you saw us break that loose. Now we can remove our nut. I'm gonna grab a pry bar and put it on the coil and pull down on the upper control arm. That way, we can disconnect them. Let's work that nut off. All right, I'm gonna drop that off to the side for now. You wanna grab the spindle and slowly let go of the upper control arm. Now we can bring this down. And now I'm just gonna take that nut and again, just thread it up on the upper control arm just so we don't lose it.All right, now we have our truck lowered a little bit to gain access to the top of our strut. Now, there's three nuts if you push this liner back a bit, one in the front right here and then two at the back. Now you'll see the wire is actually mounted to the top of that. So we'll be able to pop those off in just a bit. I would definitely recommend a 16-millimeter ratcheting wrench. I have a longer guy here to give me a little bit more leverage. This is gonna make life a lot easier, just ratcheting back and forth. Otherwise, you can use a regular wrench or a ratchet and socket if you can get it in there. So let's get these three nuts off. Right now I'm just reaching my hand back in here and I'm gonna wiggle back and forth the wiring harness to get them off of the stud. All right, so we got one of them off, this little clip, just pull that back and rotate it up. It's the same thing on the other one. And again, I know this is tough to see, really just pushing it out of the way. All right, so now we're switching back over to our ratcheting wrench and we're gonna work off the last two bolts. All right, at this point the strut is loose, we just have to get it out of position. So in order to do that, I'm gonna push down on the entire spindle lower control arm assembly, lift this guy up and pop it out, just like that.With our strut assembly out there's one more thing we wanna do before we head to the spring compressor, and that's grab a sharpie and mark the orientation of the shaft and the top hat. We wanna make sure when we're assembling it again at the spring compressor with our spacer on that the strut hat is still lined up with exactly how it was off the car. At the bottom here, I'm gonna grab the sharpie and just make a line because this was the front facing outward. Now, I wanna make a line perfectly straight with that on which stud was facing forward. So this stud here was at the front, so I'm just gonna make a quick mark on it. And then I'm gonna make a mark on the top hat assembly itself. That way you know when we assemble it again, we want all those lines to match up. So let's head over to the spring compressor.All right, so as you can see, we're out here at our spring compressor with our factory strut assembly. What we're basically doing is attaching these bars to the top and bottom coils and compressing the spring to take the tension off the top hat. We're gonna take an 18-millimeter deep socket to remove that nut, pull our top hat off, insert a new spacer and then put it back together. Taking the load off of that spring can be pretty dangerous with a spring compressor, iif not done properly you risk at decompressing which can be really dangerous. So exercise extreme caution when using a compressor. So now that we have that taken care of let's work on getting our top hat off and move forward.So as you just saw our nut was a little too rusted to use our impact gun, it just kept spinning and did not wanna break loose, so I hit it with some PB B'laster to loosen up the threading. We also swapped over to a pass-through ratchet along with an 8-millimeter deep socket to help work that guy off. Now, this did the trick. You can pick this up at your local auto parts store if you're having the same issue or you can get creative in your own way to break that guy loose.All right, from here with the spring still compressed we're gonna take that top hat off. And as you can see it does have the dust boot. These guys come apart. This is your top hat and this is your dust boot. So what we're gonna do now is set the top hat down, take the spring isolator off of the dust boot, and we're gonna put our spacer from Rough Country in between that and this. So here, take the top of the spacer, the side that doesn't have the holes and slide that guy face up into the dust boot. Take the spring isolator and slide that guy back through. Now what we're gonna do is slide this guy back into the spring making sure that the little divot here lines up with the end coil on our spring, so it seats nicely, and put our strut hat back on. So the strut hat goes on pretty easily. Now we can grab our strut, slide it back through, line up those lines that we made when we uninstalled it, and then tighten back down the nut. All right, so now it looks like we have to compress our spring a little bit more to get our threads to come through since we added 2 inches of space. The threading just isn't peeking through yet. So let's compress and then we'll be able to get our nut on. All right, so with our nut on there, it's not all the way tightened down just yet, but it's enough that we can decompress our spring, get this guy off of the compressor and tighten it down on the floor. Now we can head back to the truck and install our new strut assembly.All right, so now that we're back at the truck, we're gonna slide this guy in with the top portion going in first, line it up to our lower control arm and then we're gonna work on putting our three nuts back at the top. All right, so with our strut back in position, we're gonna take the three top nuts and put them loosely into place on the top. We don't have to tighten it down too much just yet. Just get it nice in hand tight. All right. Now once we have the rest of our components tightened down, we'll come back into this last. Now we're gonna put our factory bottom strut bolt back through the opening in the lower control arm. So at this point, we just need to line up the opposite side. So I'm using a pry bar to guide our strut into position as I push the bolt head through. Now we can grab a hammer and finish that job. All right. Put the nut on the opposite side and then go back and tighten them both down. All right, I got my 21-millimeter socket on the bolt head and my 15/16 wrench on the nut.All right, so next we're gonna focus on the spindle and the upper control arm. Let's take this nut back off. All right, now I'm gonna grab a pry bar and pull the spindle into position. All right. I'm gonna pry down on the upper control arm to guide it into place. With that stud through, grab the nut and thread it on. All right. Now without prying down on this upper control arm, you may find that trying to tighten this down spins the entire stud. So I like to pry down on it to put a little bit of pressure on and then just tighten it up. Now trying to tighten this down again, we're starting to get that spinning problem. So let's put our tie rod end back into that spot just to keep it from rotating. So that'll stop the rotation and now we can finish tightening that up. Perfect. All right, so I've raised the truck back up a little bit to access the bottom of our tie rod end and our sway bar end link a little bit better. Grab your 21-millimeter deep socket and tighten down your tie rod. All right, now we have our sway bar end link. So I'm gonna put that nut back into place underneath. You, of course, wanna make sure that the sway bar end link is actually coming through that hole. Ours is in position. So I'm gonna grab my 18-deep socket and tighten that down. So next up, we're gonna grab our 16-millimeter ratcheting wrench again, which is what I recommend and we're just gonna finish tightening the top three strut bolts. All right, now if you remember from the uninstall we had those wire harnesses clipped to the studs. So let's put those back.Last step here, let's reconnect those ABS and brake lines. So if you remember we had this plastic clip in the middle that attached them together. Let's put that plastic clip back through the brake line and snap them shut. Up top let's reconnect this to our upper control arm. Now at the back of our spindle. At this point, guys, grab your Torx wrench and your Torx specs making sure you're torquing down all your bolts. Grab your wheels, throw them back on and you're good to go.All right, guys, that's gonna wrap things up here. So if you're looking for a way to fit larger wheels and tires and if you're looking to level out your truck's appearance, making the front equal with the rear, then the Rough Country leveling kit is gonna be a good way to go. You can pick yours up right here at americantrucks.com.

      Product Information

      Features, Description, Reviews, Q&A, Specs & Installation

      Features & Specs

      • Two-Inch Front Leveling Kit
      • Raises Truck’s Front Half by 2 Inches
      • A Quick Way to Gain a Level Stance
      • Crafted Entirely Out of Steel
      • Comes With a Black Powder Coating
      • Accommodates 11.50-Inch or 295-mm Tire Widths
      • Professional Installation Is Required
      • Sold in Pairs
      • Backed by a Lifetime Replacement Warranty
      • Compatible With All 2019-2024 Dodge RAM 1500 4WD Models Without Air Rides
      • Does Not Fit 2019+ RAM 1500 Classic Models

      Description

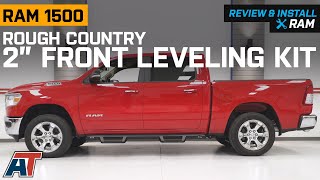
      Gives Trucks a Balanced Stance. If your Dodge RAM 1500’s factory rake isn’t doing much for your truck’s off-road-ready style, give it some extra lift by installing Rough Country’s 2-Inch Front Leveling Kit. Like what this product implies, it’ll raise the front end of your truck by 2 inches. This results in giving the truck a more balanced and aggressive stance. This leveling kit also allows you to install larger and wider tires, completing your truck’s off-road-ready build.

      Boasts a Durable and Long-Lasting Construction. The strut pre-load spacers that are in this kit are constructed out of premium quality steel. They’re also covered in a protective, black powder coat, making them highly resistant to corrosion. As a result, the spacers have the strength to carry your truck’s weight and last you a good long time.

      Professional Help Is Required. To ensure that this 2-inch front leveling kit is properly installed, it’s in your best interest to let a qualified mechanic handle the installation. The entire procedure will take 1-3 hours to complete.

      Backed by a Lifetime Replacement Warranty. This front leveling kit is covered by Rough Country’s lifetime replacement warranty. For more information, please visit the manufacturer’s website.

      Application. This 2-Inch Front Leveling Kit from Rough Country is compatible with all 2019-2024 Dodge RAM 1500 4WD models without Air Rides.

      Shop All Truck Parts And Accessories

      Shop All Truck License Plates And Frames

      Fitment:

      Details

      Rough Country 35400

      CA Residents: WARNING: Cancer and Reproductive Harm - www.P65Warnings.ca.gov

      Installation & What's in the Box

      Installation Info

      What's in the Box

      • (2) Strut Preload Spacers
      4.9

      Customer Reviews (15)

        Questions & Answers

        10 More Questions

        Will It Fit My Ram 1500

        • 3.0L V6 EcoDiesel - 20, 21, 22, 23
        • 3.6L V6 - 19, 20, 21, 22, 23, 24
        • 5.7L V8 - 19, 20, 21, 22, 23, 24

        It is not Compatible on RAM 1500 Classic Models, fits the New Body Models Only.