FREE 1 to 3-Day Delivery on Orders $149+ Details
How to Install RBP RX-3 Side Step Bars - Black on your Dodge Ram
STEP 1 - Remove any old steps and hardware from the truck.
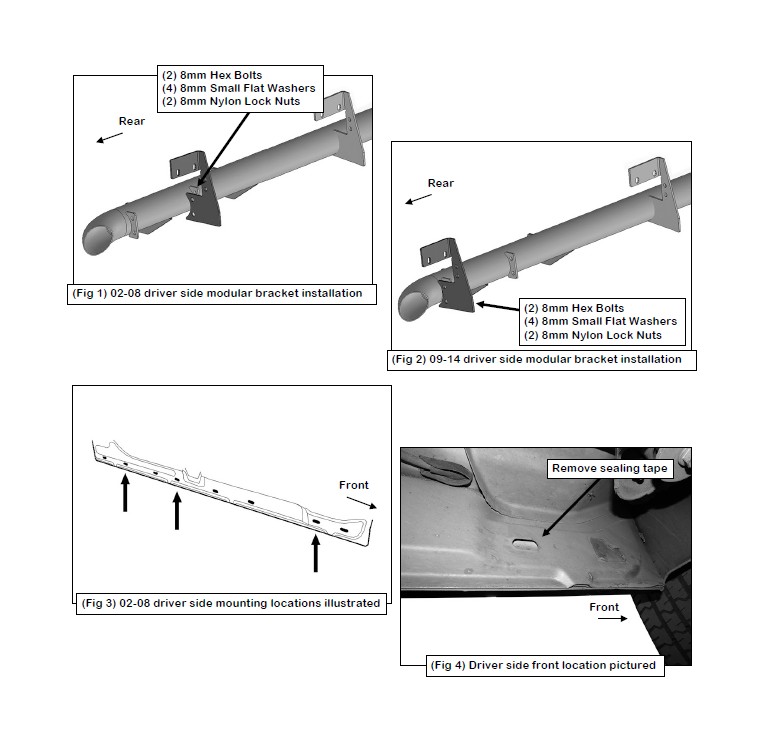
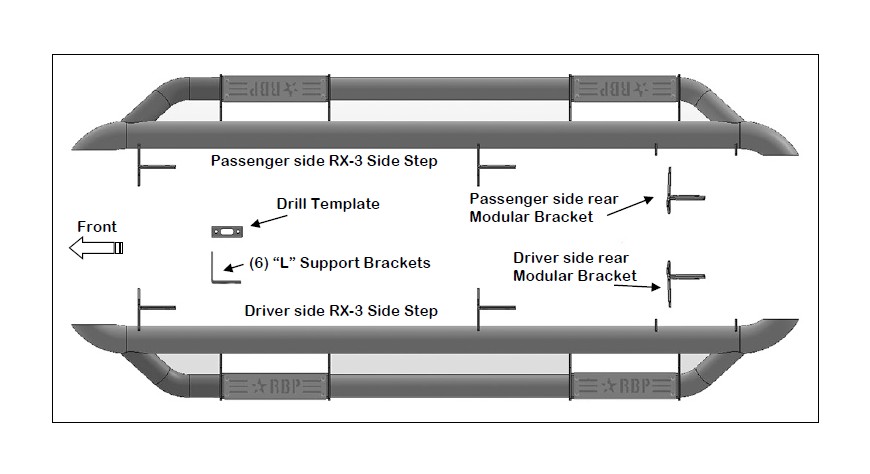
STEP 2 - Select the driver side step, (use illustration on page 1), and driver side rear Modular Bracket. Attach the Modular Bracket to the appropriate mounting flange toward the back of the step with (2) 8mm Hex Bolts, (4) 8mm x 16mm Small Flat Washers and (2) 8mm Nylon Lock nuts, (Figures 1, 2 , 14 & 19). 02-08 1500, 03-09 25-3500:
Attach the rear modular bracket to the back of the forward mounting tab on the step, (Figure 1). Snug but do not fully tighten hardware at this time.
09-14 1500, 10-14 25-3500: Attach the rear modular bracket to the back of the rear mounting tab on the step, (Figure 2). Snug but do not fully tighten hardware at this time.
STEP 3 - Start installation towards the front of the driver’s side of the vehicle. Locate the factory mounting holes in the side of the inner body panel, (Figures 3 & 9). NOTE: Remove any plugs or sealing tape as required, (Figure 4).
STEP 4 - Determine the correct procedure for your vehicle. NOTE: On 02-08 models, there are several mounting holes to choose from in the body panel, (Figure 3). Temporarily hold the Side Step assembly up in place and mark the locations to identify the correct mounting holes required for installation. 02-08 1500, 03-09 25-3500:
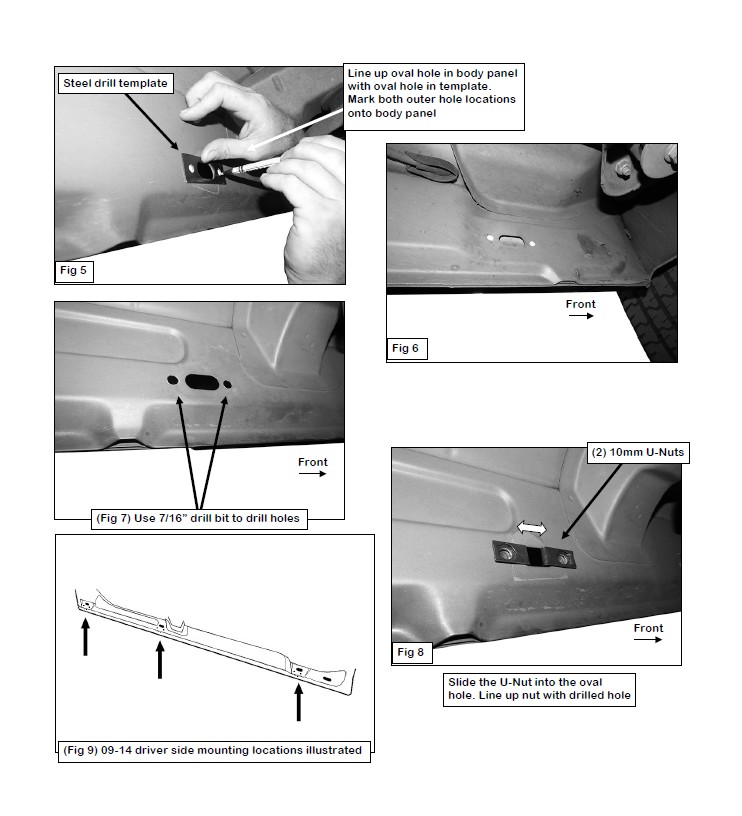
Locate the 2nd oval hole from the front, (Figure 4). Select the drill template from the bracket kit. Line up the drill template with the correct oval hole, (Figure 5).
Mark the smaller holes in the template onto each side of the oval hole, (Figure 6). Use a 7/16” drill bit to drill the (2) holes as marked, (Figure 7).
Select (2) 10mm U-Nuts. Slide the U-Nuts into the oval hole and over the (2) drilled holes, (Figure 8). Repeat this Step for the center and rear bracket mounting locations.
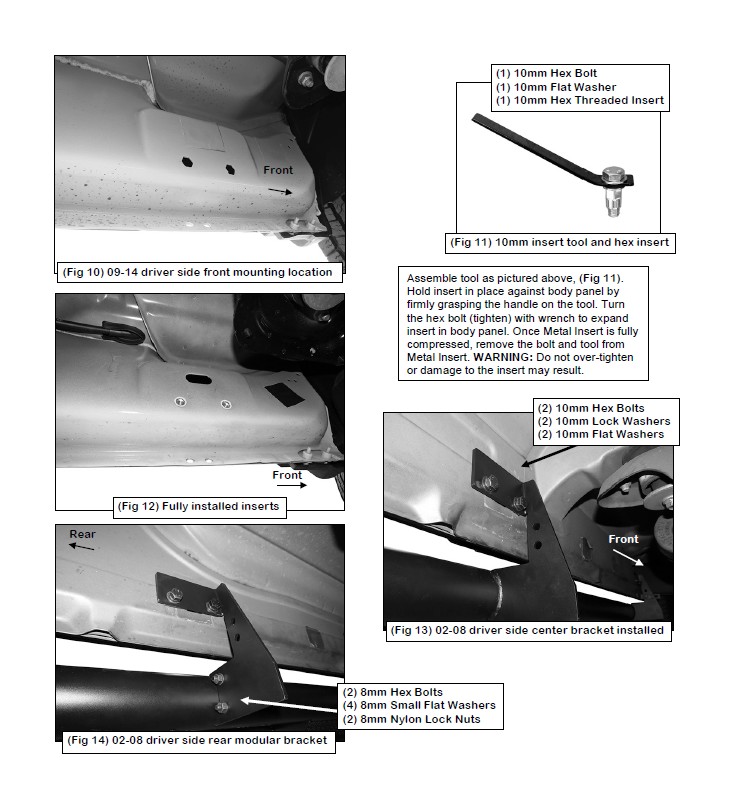
09-14 1500, 10-14 25-3500: Locate the factory front mounting location along the inner body panel, (Figures 9 & 10). Select (1) Hex Threaded Insert and (1) Insert Tool, (Figure 11). Insert (1) 10mm Hex Bolt and (1) 10mm Flat Washer into the tool. Thread (1) Insert onto the Hex Bolt.
Push the threaded insert into either hex shaped hole below the oval hole. Firmly hold the handle on the tool and tighten the hex bolt to expand the insert in the hex shaped hole, (Figure 12). Once fully installed, remove the hex bolt and tool from the insert. Repeat this step to install all (6) required threaded inserts along the driver side body panel.
STEP 5 - With assistance, hold the driver side step assembly up in position against the mounting locations. Attach the brackets on the step to the (3) locations with (6) 10mm Hex Bolts, (6) 10mm Lock Washers and (6) 10mm Flat Washers, (Figures 13 & 14). Snug but do not fully tighten hardware.
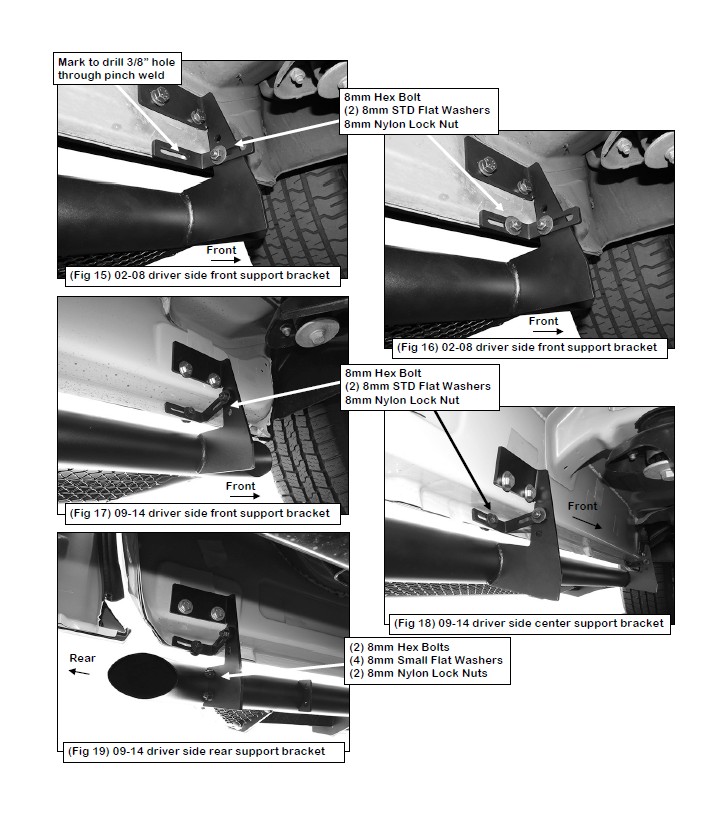
STEP 6 - Select (1) “L” Support Bracket. Attach the support bracket to the back of the front bracket with (1) 8mm Hex Bolt, (2) 8mm x 22mm STD Flat Washers and (1) 8mm Nylon Lock nut. Leave loose at this time.
NOTE: Attach support bracket with leg toward the rear of the vehicle.
02-08 models, use the bottom hole in the mounting bracket, (Figure 15).
09-14 models, use the top hole in the mounting bracket
STEP 7 - Hold the Support Bracket up to the back of the pinch weld and tighten the 8mm hex bolt.
02-12 models without holes in the pinch weld: Use the support bracket for a template and mark the hole location onto the back of the pinch weld. Move the support bracket out of the way. Use a 3/8” drill bit to drill a hole through the pinch weld, (Figure 15).
12-14 models with factory holes in the pinch weld: Proceed to Step 8, (Figures 17—19).
STEP 8 - Line up the “L” Support Bracket with the hole in the pinch weld. Attach the bracket to the pinch weld with (1) 8mm Hex Bolt, (2) 8mm x 22mm STD Flat Washers and (1) 8mm Nylon Lock nut, (Figures 16-19). Leave hardware loose at this time.
STEP 9 - Repeat Steps 6—8 to attach the center and rear support brackets to the pinch weld.
STEP 10 - Align and adjust the step to the side of the vehicle. Once properly adjusted, tighten all hardware. Tighten the 8mm hardware to 18-20ft-lbs and the 10mm hardware to 35-40ft-lbs.
STEP 11 - Repeat the above steps for the passenger side installation.