


Installation Time
(approx) 4 Hours
Difficulty Level:
Light to Moderate mechanical skill required.
 FREE 1 to 3-Day Delivery on Orders $149+ Details

$594.99 kit
CONFIRM THIS FITS YOUR VEHICLE!
Saved - View your saved items
We're sorry. We couldn't save this product at this time.
or use

Features, Description, Reviews, Q&A, Specs & Installation
| Brand | MBRP |
| Exhaust System Type | Cat-Back System |
| Exhaust Tip Finish | Chrome, Polished |
| Exhaust Tubing Diameter | 2.50 Inch |
| Exhaust Material | Aluminized Steel |
| Exhaust Tip Outlet Style | Dual |
| Exhaust Exit Location | Rear - Dual |
| Exhaust Loudness | Moderate |
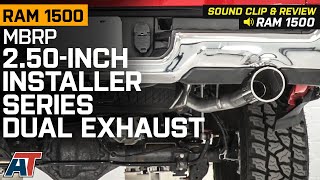
Exhaust Performance Upgrade. The MBRP Armor Lite Dual Exhaust System with Polished Tips and Rear Exit is designed to enhance the sound and performance of the 5.7L RAM 1500. It replaces the factory exhaust with a cat-back system that delivers a deeper, more aggressive tone while maintaining a refined appearance. This upgrade is ideal for those seeking to improve their truck’s exhaust note and overall driving experience.
Construction and Appearance. Made from aluminized steel, this exhaust system provides durability and corrosion resistance. It features polished single-wall stainless steel tips with a rolled angle cut, creating a street profile that balances a richer sound with everyday drivability.
Installation. This exhaust system is designed for a direct factory dual replacement with moderate installation ease. Typically, no drilling is required, making the upgrade straightforward for both enthusiasts and professionals.
Warranty. Backed by a 3-year warranty, this system offers quality assurance and peace of mind.
Application. Specifically designed to fit 2019-2026 RAM 1500 models equipped with the 5.7L V8 engine in Crew Cab or Quad Cab configurations. Ram 1500 Classic models are excluded from compatibility.
Shop All Truck Parts And Accessories
Shop All Truck Exhaust
MBRP S5152AL
CA Residents:  WARNING: Cancer and Reproductive Harm - www.P65Warnings.ca.gov
Installation Info
Installation Time
(approx) 4 Hours
Difficulty Level:
Light to Moderate mechanical skill required.
What's in the Box
Tech Guides:

