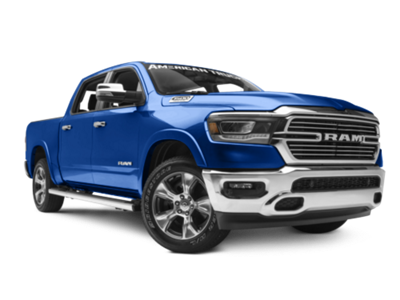
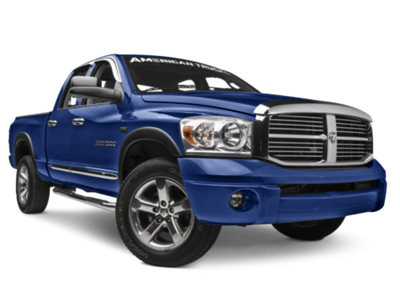
Talk to a Ram 1500 Sales Tech
1-888-706-1096
M-F 8:30A-11P, Sat-Sun 8:30A-9P
$20K Sweeps! 10 Chances to Win! Enter Daily >

Insane Audio Plug and Play Navigation Unit (09-18 RAM 1500)

Item R109178
AmericanTrucks no longer carries the Insane Audio Plug and Play Navigation Unit (09-18 RAM 1500). Please check out 2002-2008 Dodge Ram 1500 Audio & Electronics for an updated selection.
Verify parts fit and get product recommendations.
Ram 1500 Sales Techs: Connect Now M-F 8:30A-11P, Sat-Sun 8:30A-9P
$0.00

    Product Videos

    Hey, guys. So today we're checking out the Insane Audio Plug & Play Navigation Unit fitting all 2009 to 2018 Ram 1500s. So if you're looking for a big upgrade to your factory head unit and your overall interior of your Ram, this option by Insane Audio is going to be a great choice to take a look into.So this is going to be a fully capable navigation unit as well as an upgraded radio and multimedia center that's gonna come with a laundry list of different features, increasing the capability of your interior and your experience while you're driving around in your truck. Now, this is going to not only do just that, but it's also going to have a more modernized appearance to your factory head unit with the full touchscreen display and full-color display giving you a more modern feel to your interior.Like I mentioned, again, this is going to come with a laundry list of different features that I'll dive deeper into in just a little bit. But to touch on a few, this is going to have a Wi-Fi and Bluetooth compatibility with iPhone as well as Android. This is also gonna be compatible with a number of different apps that you can download on to it this device in the Google Play Store, including Waze as well as Pandora and Spotify and so on. This is even gonna come with a OBD2 plugin so you can read and clear trouble codes with this multimedia center as well as read real-time data from your ECU, making this, again, fully capable. Now, what I really like about this is that it's going to be completely plug and play. It's going to be very specific to your Ram. So you are going to get a plug and play wiring harness as well as a specific faceplate for your Ram, making sure that it's going to have an OEM fit.Now, with all that being said, this is gonna be roughly $1,200, putting this at a pretty fair price point in my opinion with everything that this comes with. So a lot of other units on the market are going to be more universal options, and they may not come with all of the different features that this is going to have as well as being plug and play in the meantime. So, in my personal opinion, I think that this is a pretty good price for what you're getting out of the unit itself.Not to mention, the install is going to be quite easy at a one out of three wrenches on the difficulty meter. It's not really gonna be much wiring. We are going to have to plug a bunch of stuff in and do some minor cutting to make sure that this fits okay. But speaking of the install, let's jump into that now. The tools that I used for my install were a marker, a Philips head screwdriver, a small extension, a T20 Torx socket, a 7-millimeter socket, a 1/4-inch drive ratchet, a trim or panel removal tool, and a body saw.So our first step is to remove this full trim piece here. Now, in order to do that, there is a little rubber tray up at the top. I'm just going to pull that out with a trim removal tool. So once this little rubber piece is out, that will expose two Torx screws. I'm gonna take a T20 Torx and a small extension just to give myself a little bit of room. And we're gonna go ahead and remove those.Once those two screws are removed, what we can do is take our trim removal tool and work around our trim piece, and it should fully come off. Before we can fully remove our panel, we do have a couple of plugs. So I'm gonna go ahead and just push down on the tabs and pull back. All right. And once everything is unplugged, we can put this to the side.Now we can remove our factory head unit by unscrewing the four 7-millimeter bolts that are on either corner. I'm using a 7-millimeter socket. Once those screws are out, we can pull our head unit back and wiggle it out. And we will just need to disconnect a couple plugs on the back here. Then we can put our factory head unit aside.So as you can see, our factory head unit is a single din. Our new head unit is a double din. So it is going to be a lot larger than this, and our bracket in the inside of our Ram is going to obstruct that. So what we have to do is make a cut to the bottom here. We're gonna take out this section. So I'm gonna take a sharpie and just mark where I have to cut. We're just gonna cut from the seams on the corners and get that lower bracket out of there. So now that I've made a mark, what I'm gonna do is take a body saw and cut where I marked. So I'm just gonna go on from the side. Now that we've cut our main bracket, we're ready for install.So before we hop into the install portion of this video, I did wanna stop down and tell you guys a little bit more about our new Insane Audio Navigation Unit, what it comes with, what benefits that it has in comparison to our factory setup. Now, right off the bat, you can tell that this is obviously going to be a big upgrade as far as functionality is concerned. Again, we have that large touchscreen display that's going to be a full-color display right on the front. That's gonna be a big upgrade from our small screen over here on the side.Now, as you can tell on our factory unit, this is gonna have a number of different tactile buttons. We are getting a couple on our new Insane Audio unit, but our factory one will not be a touch screen compatible. Now, this is also going to have some pretty basic features as far as a head unit is concerned. You will have navigation as well as Bluetooth and the standard radio controls, but when moving over to this Insane Audio kit, it's just going to take that to a whole new level.Now, with this navigation unit, you will be able to have a number of different features inside the navigation that I'll show you when we're doing our demo. But this is going to have 3D topography and 3D technology, giving you a little bit more than your factory navigation is able to give you. Not to mention, on this large screen, it's going to be a lot easier to read your maps and just a lot more modernized inside your cab area.This is also going to be compatible with iPhone as well as Android. This is Bluetooth and is Wi-Fi compatible. We have a little Wi-Fi antenna right at the bottom of the table here, and that's going to allow you to download different apps on the Google App Store or the Google Play Store and really make this and customize it to your own liking. This is essentially a smartphone for your truck, and that's exactly what this is going to give you.Now, obviously, we have basic radio controls, but you will also be able to plug in an iPhone or an Android with a USB port or a USB cord. This is gonna come with a number of different options for USB ports. It's also going to come with a micro USB adapter if you want to plug anything into the device itself.Now, it's also going to come with an OBD2 plugin, and that is going to be Bluetooth compatible. I really like that because you can read and clear trouble codes, and you can also read real-time data from your ECU, which is something that not a lot of competitors offer, and that's something that our factory stereo is obviously not able to give us. Now, this is just going to be an overall big upgrade. It is going to be completely plug and play. We will have to put on the faceplate in just a minute, but just bumping up to a multimedia center and navigation unit, it's going to come with this much is obviously a big plus.Now, this is also going to be a little bit stronger than the factory one. This is going to have no moving parts inside of the device itself. It is very strong according to Insane Audio with IP66 dust and waterproof rating. So this is ensured to hold up for a very long time, and it is going to come with that factory faceplate, making sure that it has an OEM fit. So, enough about these two on the table, let's set up our new Insane Audio Navigation Unit.So, first, we're gonna install this faceplate. Now, you're gonna see that the bottom and the top of the mounting points are gonna be a little bit different. The one that is going to be a little bit larger, that's gonna be down at the bottom, and the smaller one is gonna be up at the top. You're also gonna have some writing inside the plate itself. So, as long as that's facing up, you should be okay. Then we can take our head unit. I have just a towel down, making sure that our screen is protected. There's also gonna be a little screen protector on there right out of the box. So, that will do the job.All right. So once that is around the head unit itself, what we can do is take our brackets, making sure that they are oriented in the correct way. There is going to be a left and a right side. And these will also be the same size as the faceplate. You can line them up accordingly. Now, this is gonna sit on the side there, and we're gonna have a number of Philips head screws that we can attach the side plates with. So I'm gonna grab a Phillips head screwdriver and start lining those up, screwing those in. You wanna make sure that it's all the way back. Just gonna put one in on either side then we can secure the rest down.So now we're ready to plug everything in, and this is going to be pretty self-explanatory. There are going to be labels on the back of the navigation unit its self, labeling what everything is. So, our RCA cable is going to go into the back here. Now, this is going to be one of the larger white pin connectors. You wanna make sure that that's seated down in, and this is going to be all of your audio and even some of your cameras and really whatever you want to hook up to this that's auxiliary. We are not gonna be using this, so I am not going to install it here. But if you are looking to hook up any audio to your navigation unit or a multimedia center, this is what you would use.So on the side here, you're gonna have two USB ports. This is a micro USB. You can plug that into the back. We don't have anything to plug into this, so we're not gonna be using this right now. But if you did want to use a micro USB, you can on the back here. This will also accept any standard USB. So if you did have a charger or a lightning cable that you wanted to put through here and run inside your cab, you can do that as well.Now, this is a plug for the older generations. Now, this is also provided in the kit. This is going to allow you to hook up to your phone if you have an older generation iPhone or a iPhone or Android that is going to accept this cable. Now, we are not gonna be using this because this obviously is an older gen connector here, but this would plug into the radio just like that.For the stuff we are going to keep, right over here is going to be our radio antenna adapter. That's going to go right down in, and this side is going to plug into our factory radio or antenna. Now we're gonna have our Wi-Fi antenna. This is going to screw on the Wi-Fi thread here. You can really orient this however you want depending on your cables in the back. Now, I'm not gonna be hooking this up right now, but we will be using this. This is our microphone. This is going to plug right in the back here. Now, I do need to run the cable. So it is looking clean inside our cab area. So we'll plug that in before we actually mount our head unit up. Now, on the other side, we have our GPS. That is going to be the same kind of system that we have going on with our Wi-Fi. We're gonna thread that on, make sure that that's in place. And we wanna make sure that it's out of the way of our main harness. Now, this is going to be a magnet. We're gonna stick that right up at the top here. Gonna keep all this wire here as well.And then last but not least, we have our main harness. Obviously, you can see that this is the plug that's going to plug into our factory harness. We have a number of different things that are actually in this harness. You can hook up another RCA, and then you can also hook up a backup camera if you're equipped. What I'm gonna do is just plug this in. And that's all we need for right now. So we can head over to our truck and install our new head unit.So before we mount up our head unit, we do wanna run our mic wire and mount up our mic. We're gonna have a little casing on it, and it's gonna have some 3M on the back. So we're gonna mount it up right at the gauge cluster here. So I'm gonna drop this down actually through steering wheel, and then there is an opening where we're gonna run it through into our head unit.So once that's pulled through, we're able to plug that into the back of our head unit. Real quick, I do wanna mount this up. Peel that backing tape. Make sure that this area is clean. Right, then we're gonna pull all of that excess wire through, making sure that it's out of the way, and then we'll clean this up in just a minute. What we can do now is plug in our mic to the back of our navigation unit. Next, we can plug in our antenna adapter. This is gonna go right into the white and black antenna here. So after your antenna cable is in, then we can plug in our main wiring harness.So once everything is plugged in, what we can do is place the wires inside and line up our head unit. Right, then we can take our faceplate, put this up on top, grab two of our screws, line up the unit, and secure it down. Now, we'll be reusing these factory screws. Then we can take our 7-millimeter socket and secure down the other two mounting points and completely tighten down the head unit in the brackets to our dash. Right. So now that that is in place, I would recommend to test it, and then we can go ahead and put our trim piece back on.So now that you're sure that the head unit is working after you've tested, what we can do is plug in all of our wiring harnesses on our faceplate. There is a red locking tab on this one. Wanna make sure that everything clicks. Right. And then we can line this up, give it some pressure, and pop it into place. Right. Once it's in place, we can take those two Torx screws that were up at the top. Line those up. Once they're lined up, we can take our T20 Torx and tighten those down. Once those are tightened down, we can take our little rubber insert, pop that back into place. And then last but not least, what we have to do is plug in our OBD2 connector. Last but not least, we can plug in our OBD2 connector, and then we're all set to go.So once you have your Insane Audio Navigation Unit installed, you can go ahead and turn it on if it isn't already illuminated. You can just hold in the button here. Now, this is gonna have, again, a number of different features. You have some standard apps down at the bottom. This is going to be your EQ software. [inaudible 00:19:26] go back home, your radio. You're gonna have a number of different presets. You can go through those and even search. Go back home. This is where you can attach music or download music to the device or where you would access for your iPhone or Android.Can go into the app screen. This is just going to look like a standard smartphone. So you're gonna have a number of different apps. You can go to the installer system. This is gonna have some basic apps, including a calculator, a calendar, Gmail. You will be able to go on Google and access Wi-Fi once you hook that up. You will have Chrome already installed. You have your Bluetooth and Bluetooth music here where you can access your phone if you are going to pair one up.You'll also have a couple of other options. On the next page, you'll have video. Here you can go into your settings. You'll have your navigation as well. This is going to have a couple of different features inside the navigation center. As you can see, this is a 3D map here. You can put in a destination or find a couple of different places. There's just a number of different features inside the navigation itself. Back into the app screen.Now, there is the Play Store as well. You'll be able to download really whatever you'd like on to the system. Again, it is going to be an Android-based system. So, you'll really be able to use this as you would any smartphone. Insane Audio also has a number of their options for apps. You have, again, your Insane EQ. You also have Insane TV. Now, you will need an additional accessory to plug into the back of the head unit itself in order to access Insane TV. You will have a RockCam as well. This is not working right now because we haven't hooked up a RockCam system. But you'll also be able to check your OBD2. So this is pulling data from the ECU. Now, obviously, our truck is not on, but you'll be able to read all that real-time data through your head unit here and be able to read and clear trouble codes. You can data log as well and go through any of the individual gauges. So you will be able to use your steering wheel functions if your truck is equipped. There is instructions in the manual itself. But you would go into this and start to save your steering wheel functions if your truck has them. And then on the side here, we're just gonna have some tactile buttons like the home and the navigation unit as well as the volume button. If you'd like to shut it down, you can hold in the button and power it down.So that's gonna wrap it up for my review and install. Make sure you like and subscribe. And for more videos and products like this, always keep it right here at americantrucks.com.

    Product Information

    Features, Description, Reviews, Q&A, Specs & Installation

    Features

    • High-Quality Navigation Unit
    • Android and WiFi Onboard
    • Bluetooth 4.0LE Phone and Audio Streaming
    • On and Off-road Navigation with 3D Topography
    • High-Resolution Capacitive Touch Screen Display
    • Support for Onboard Satellite Imagery
    • Compatible with Countless Apps like Waze and GoPro
    • Entirely Solid State
    • Octa-Core 1.6 GHZ Processor
    • IP66 Waterproof and Dustproof
    • Plug-and-Play Installation
    • 1-Year Limited Warranty; Lifetime Technical Support
    • Fits All 2009-2018 Dodge RAM 1500s

    Description

    Effective Navigation. Utilizing on and off road navigation with 3D topography, trail maps, and support for onboard satellite imagery, Insane Audio's Plug and Play Navigation Unit is the perfect choice for your 2009-2018 Dodge RAM 1500 if you're planning on embarking on a challenging adventure. The all-in-one unit also features android onboard for easy access to countless apps, including Waze, Spotify, and GoPro, as well as a Bluetooth 4.0LE phone and audio streaming. With a high-quality amplifier, radio capabilities, and a subwoofer output with integrated volume control, you'll get to listen to your tunes the way you want. The unit even comes with onboard diagnostics with custom gauge displays for easy reading and clearing of engine fault codes.

    Long-Term Durability. The navigation unit is rated IP66 waterproof and dustproof for ideal reliability long term and is entirely solid state with no moving parts, 32GB of storage, 4GB of memory, and strong electronics shock protection. The unit also sports an octo-core 1.6 GHZ processor, multiple USB and AUX ports, a MicroSD card slot for up to 400GB of music and movies, and a 9 band graphic equalizer. For ease of use and impressive functionality, the unit is finished with a high-resolution capacitive touch screen display with completely customizable LED backlighting.

    Installation. This unit boasts a plug-and-play design, meaning the installation process is simple and only takes about 1 hour. Those with basic mechanical skills will have no problem securing the unit.

    Warranty. This navigation head unit is backed by a 1-year limited warranty against defects as well as lifetime technical support and free software updates. Check out the full warranty for more information.

    Application. Insane Audio's Plug and Play Navigation Unit is created for all 2009-2018 Dodge RAM 1500s.

    Shop All Truck Parts And Accessories

    Shop All Interior Truck Accessories

    Shop All Truck Radios And Speakers

    CA Residents: WARNING: Cancer and Reproductive Harm - www.P65Warnings.ca.gov

    Installation & What's in the Box

    Installation Info

    What's in the Box

    • (1) Head Unit
    5.0

    Customer Reviews (2)

      Brand Image

      Reviews of Insane Audio Interior products have an average rating of 5.0 out of 5

        Questions & Answers

        10 More Questions