 FREE 1 to 3-Day Delivery on Orders $149+ Details
How to Install Husky 5th Wheel Tailgate Back Up Camera Mount (14-18 Sierra 1500 Denali, SLE, SLT) on your GMC Sierra
Installation Time
30 minutes
Tools Required
- 10mm Wrench
- T-15 Torx Wrench
- Phillips Screw Driver-Medium
- Phillips screw Driver-Small
- Drill
- Scissors
- Center Punch
- Masking Tape
- 3/16 Drill Bit
- 9/64 Drill Bit
- 5/64 Drill Bit
The following pages provide instructons for removing the Chevy/GMC backup camera from your factory tailgate and installing it in your Husky Aluminum 5thwheel tailgate. If you prefer not to remove the camera from your factory tailgate you will need to purchase a camera from your Chevy/GMC parts department. Always provide your pickup serial number as part numbers and revisions may change.
CONTENTS
• PN 15258-1 Mount Bracket 1 each
• PN 15248-2 Front Housing 1 each
• PN 15248-3 Rear Housing 1 each
• PN 15248-4 Hole Template 1 each
• #8 Phil Truss SMS Screws 4 each
• 5/32” Push Rivets 2 each
• Instructons 1 each
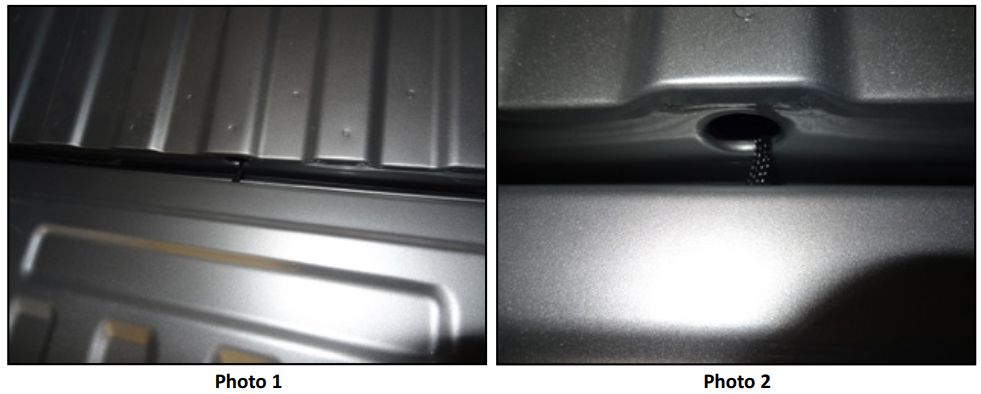
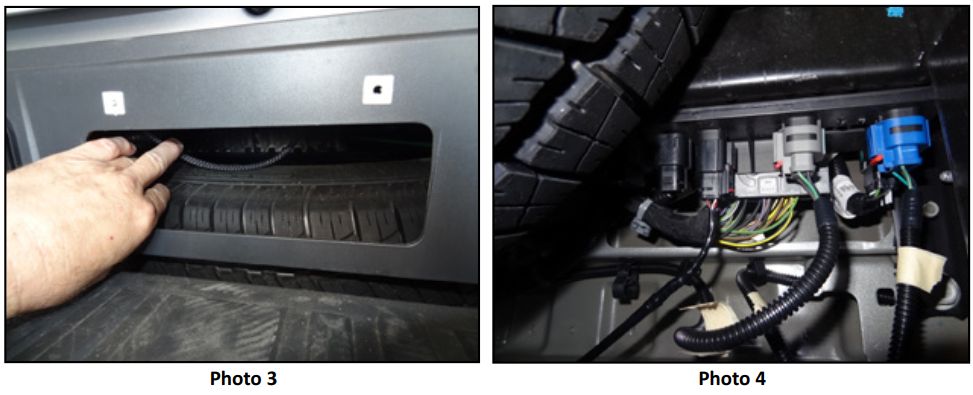
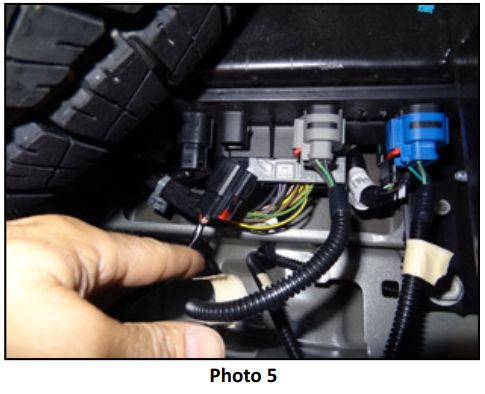
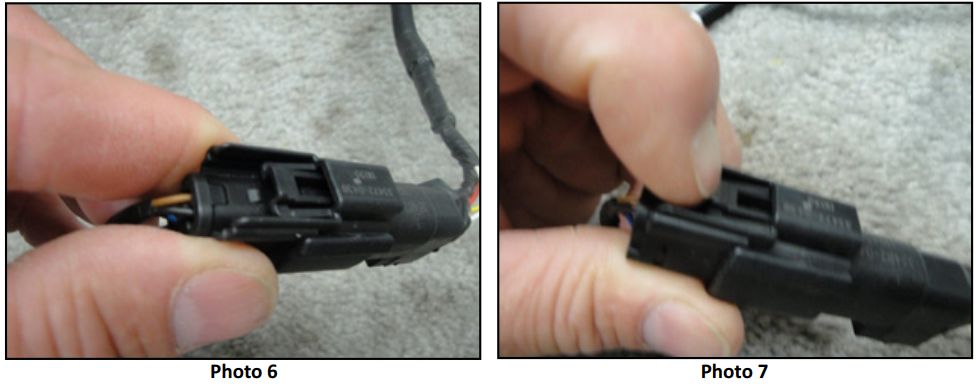
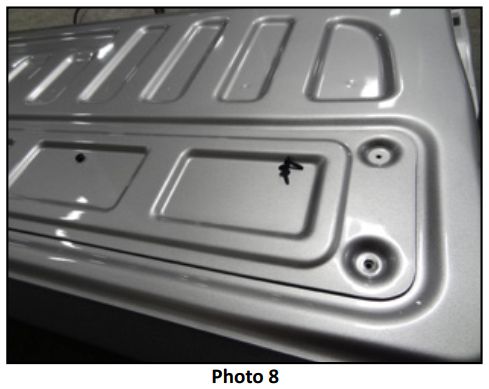
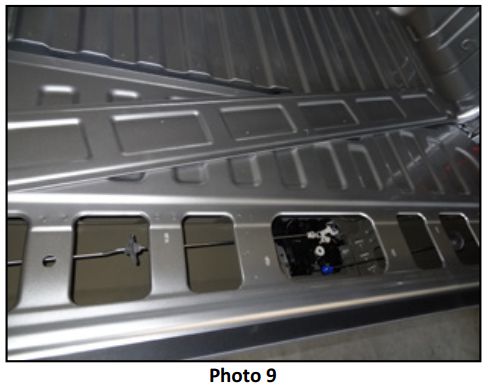
Locate the camera harness where it passes from the tailgate to and through the pickup bed. Remove the license plate, or from under the rear of the pickup, locate the connector above and beside the spare tre on the drivers side and disconnect it by pulling the red tab from its latched locaton, depressing the connector latch and pull the connector halves apart per Photo 5. (Photo 6 & 7 illustrate the connector latch)
Lower the factory Chevy/GMC tailgate and remove (8) T-15 Torx tailgate cover screws then remove the tailgate cover.
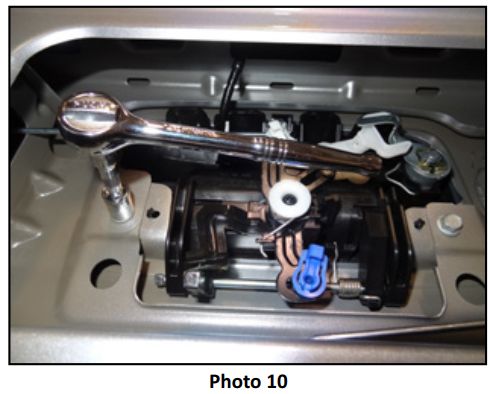
Remove the camera/handle assembly by removing two 10mm handle retaining bolts.
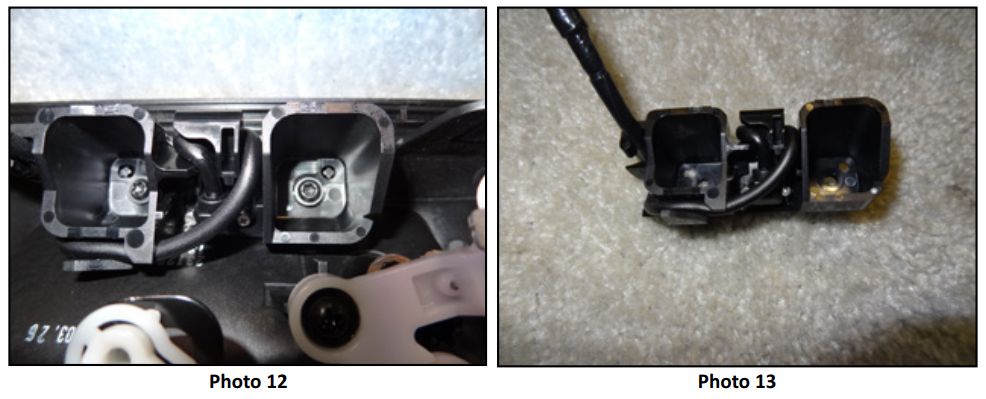
Remove the camera assembly mountng bracket from the latch handle bezel by removing the two T-15 torx screws.
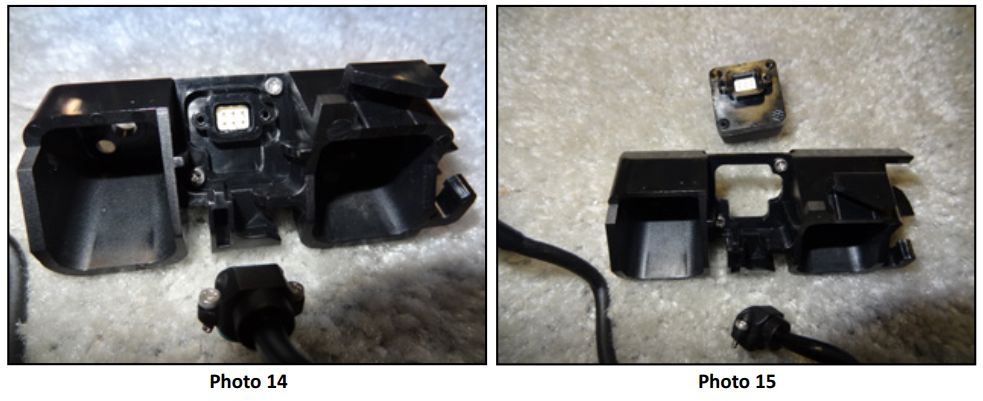
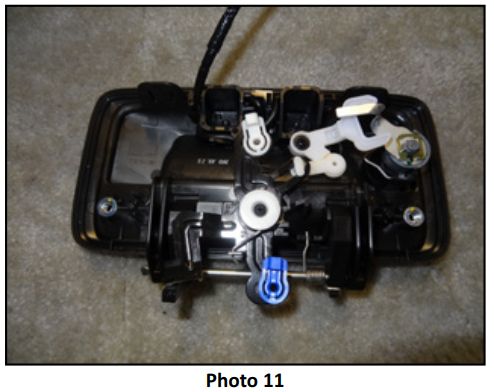
Gently pull the harness from the bracket and remove the camera from the camera assembly mountng bracket by removing the four small Phillips screws. Use cauton; do not allow dirt, dust, or moisture to contaminate the camera/cable connecton.
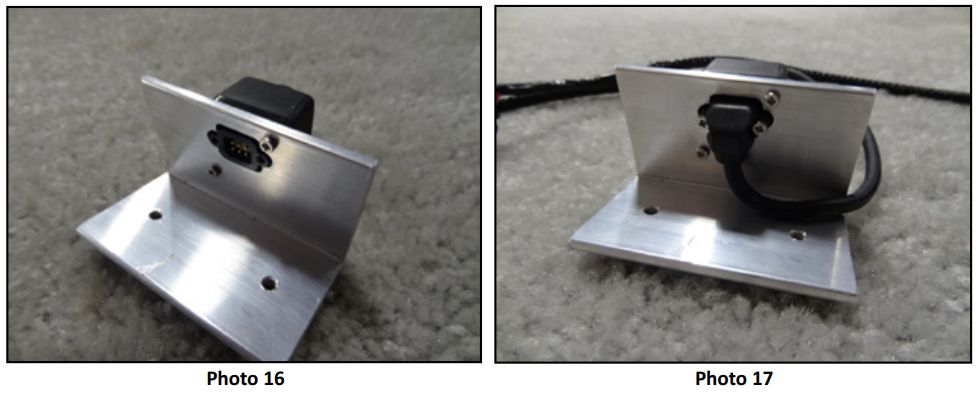
Using the same screws, mount the camera in the 15258-1 mount bracket and reatach the harness to the camera. Do not over tghten the screws.
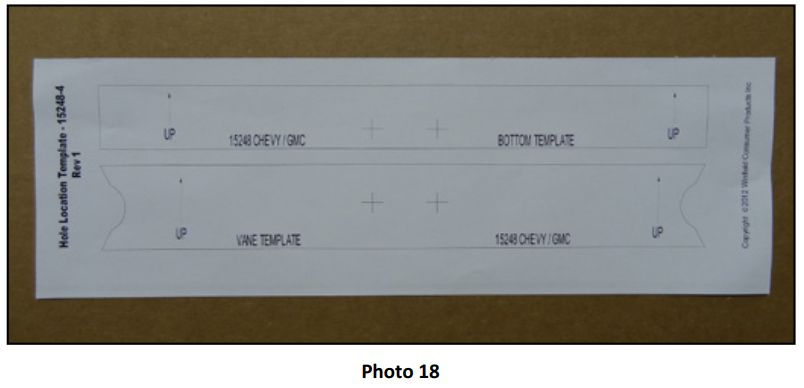
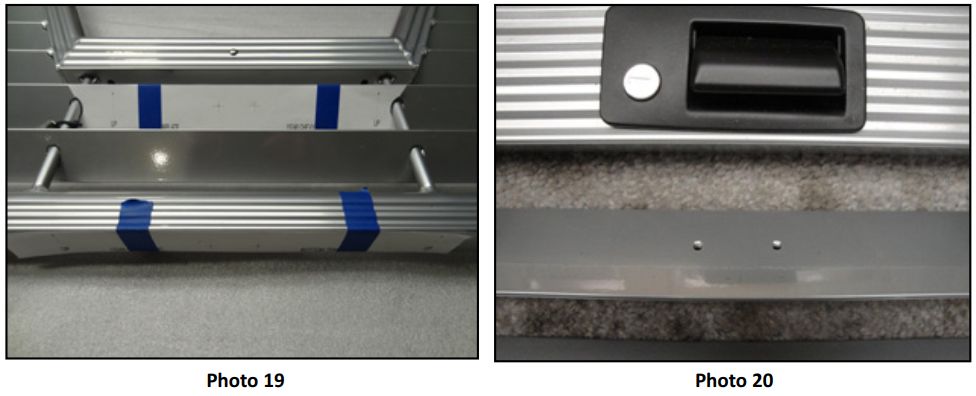
Cut the “tailgate hole patern” templates from the 15248-4 sheet. Positon and tape the vane template on the back side (the side of the tailgate that would be to the inside of the pickup box) of the vane just below the Husky Tailgate center handle. See images above. The hole locatons should be centered horizontally and positoned as in Photo 19, 7/8 inch from the top edge and 1 1/8 inch from the botom edge of the vane. Center punch the two hole locatons and remove the template. Predrill the two center punched hole locatons with a 5/64 inch (.078) drill bit perpendicular to the surface of the vane.
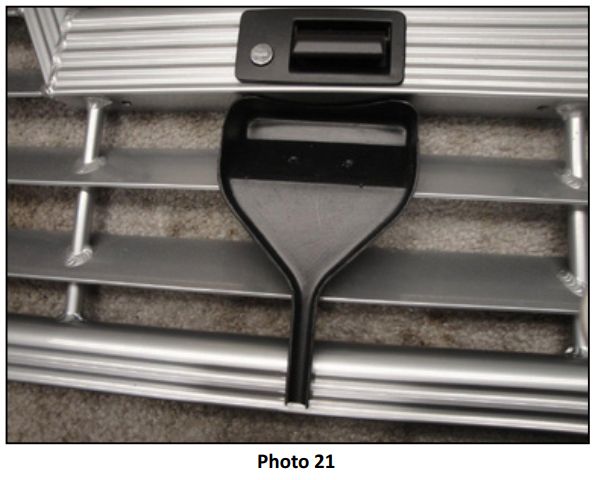
Then drill with an 11/64 inch (.172) drill bit. The predrill prevents the larger drill from wandering and mislocatng the holes. Positon and tape the botom template on the botom of the husky tailgate. The hole locatons should be centered horizontally and 1/2 inch from the outside edge and 1 inch from the inside edge of the D shaped botom tubing. Center punch the two hole locatons and remove the template. Drill the two center punched hole locatons with an 9/64 inch (.140) drill bit perpendicular to the surface of the D shape tube.
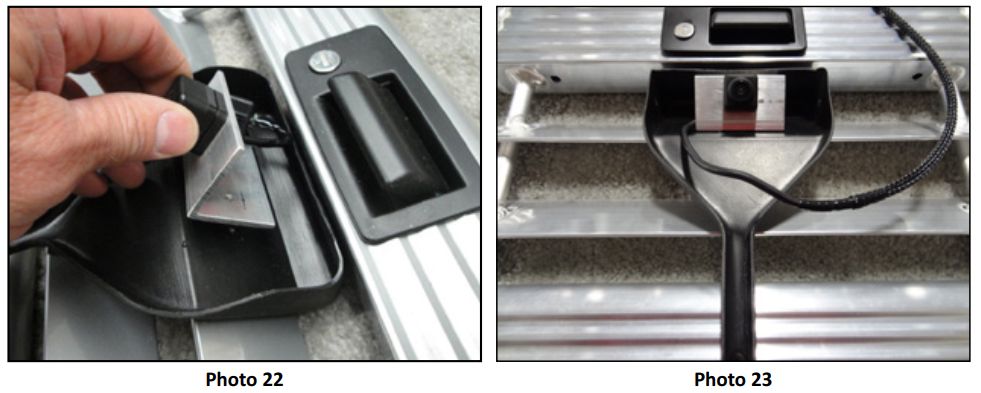
Positon the 15248-3 rear housing on the Husky Tailgate, align the holes, positon the camera/bracket assembly on the holes, and install two #8 X 1/2 long phillip truss head screws through the vane, rear housing, and into the camera bracket and tghten.
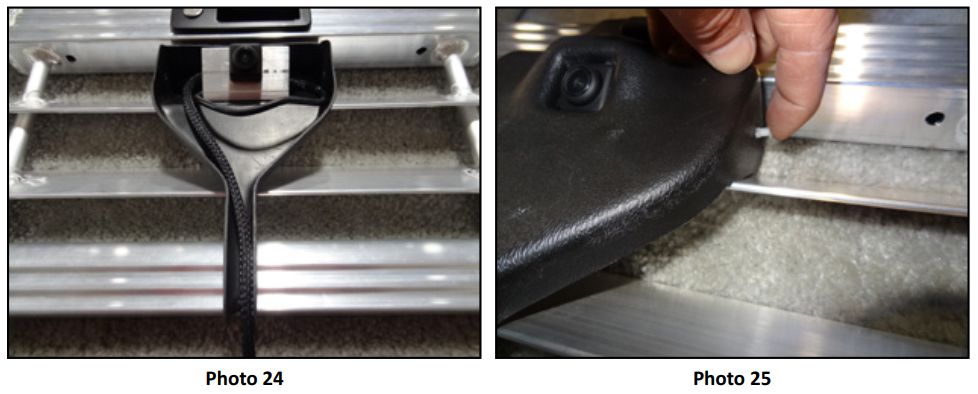
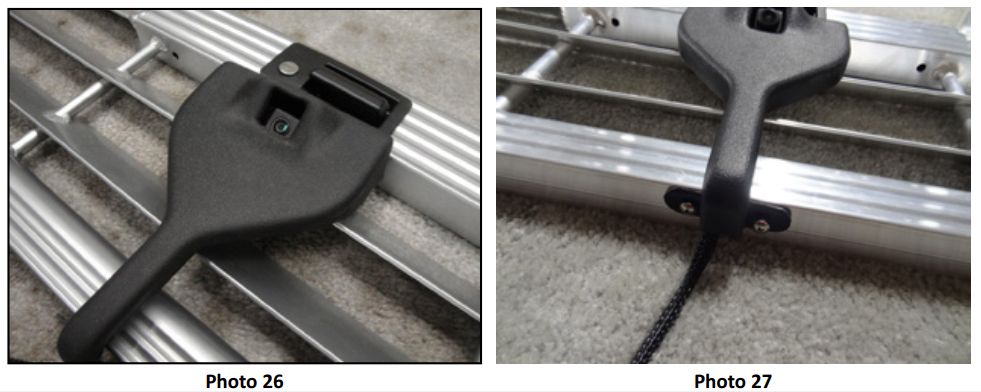
Wrap the harness around the camera/bracket assembly per the above photo and place the 15248-2 front housing in place. Positon the two push rivets in the 5/32 holes on each side of the front housing and with your thumb snap them into place through the front and rear housing. Install two #8 X 1/2 phillips truss head screws through the lower porton of the 15248-2 and into the botom of the Husky Tailgate and tghten.
INSTALL HUSKY TAILGATE PER TAILGATE INSTALLATION INSTRUCTIONS
Place the camera harness connectors through the hole in the pickup bed they originally came out of and install your Husky Tailgate. From under the rear of the pickup or through the license plate opening, reconnect the camera harness connectors and reinsert the harness retainer into its mountng hole.


