 FREE 1 to 3-Day Delivery on Orders $149+ Details
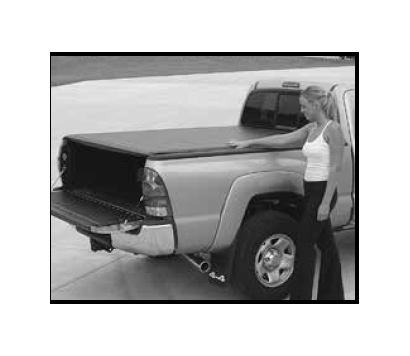
How to Install Weathertech Roll Up Truck Bed Cover - Black on your Sierra
Installation Time
1 minutes
Tools Required
- 2 - 1/2" wrench
- 1 - Spring clamp optional
- 1 - Tape measure or ruler
- 1 - Protective eyewear
- 1 - Scissor

Shop Parts in this Guide
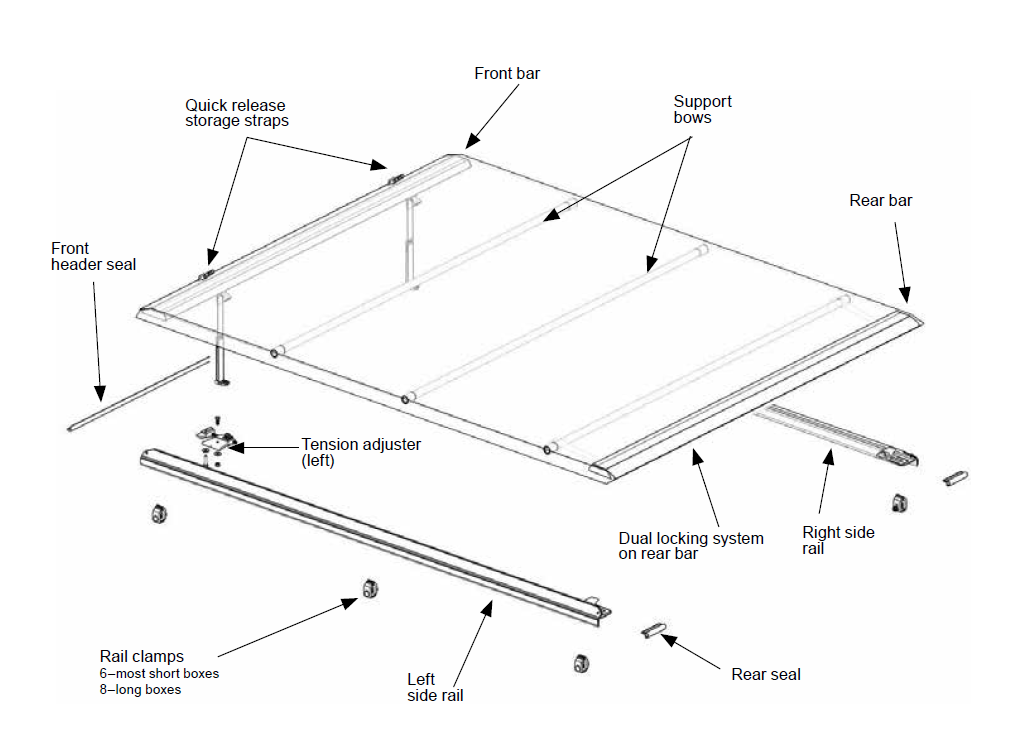
1. INSTALLING COVER SIDE RAILS
NOTE: Some installs require drilling/bolting. Those kits will contain special side rail instructions. Follow those instructions for rail attachment in conjunction with instructions in this owner’s manual.
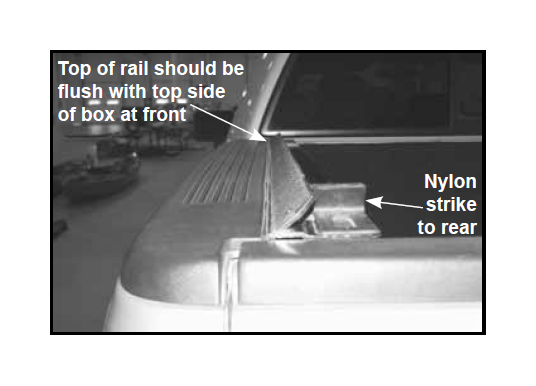
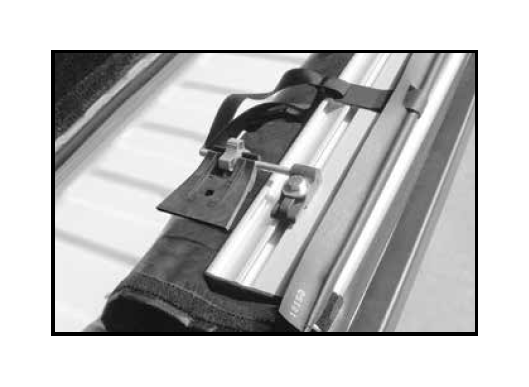
A. Position side rail with weather strip against inside lip of box. Push rail forward until it touches front of box. End of rail with strike goes to rear.

B. At front, adjust top of rail flush with top of box and hold it there with assistance of another person or with a spring clamp.
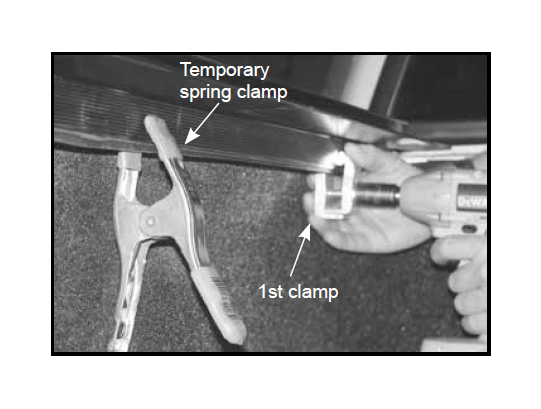
C. Install first clamp as close to front as possible and use 1/2" wrench to tighten.
IMPORTANT TO KEEP RAIL ON TRUCK SECURELY: Before using wrench on clamp, make sure clamp teeth engage grooves on rail, turn nut finger tight and then use wrench.
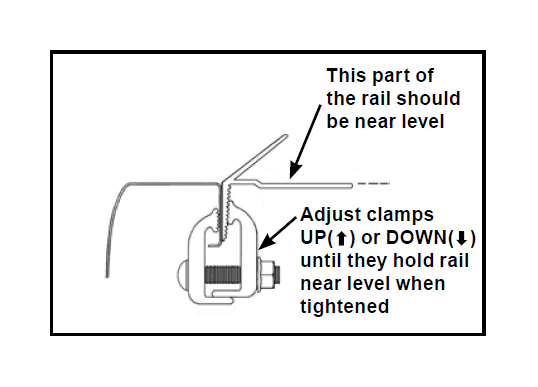
D. With rail flush at top of box and clamp teeth engaged, tighten clamp. Check if rail is level. If rail tilts up, loosen clamp, lower it, engage teeth and tighten it. If rail tilts down, loosen clamp, raise it, engage teeth and tighten it.
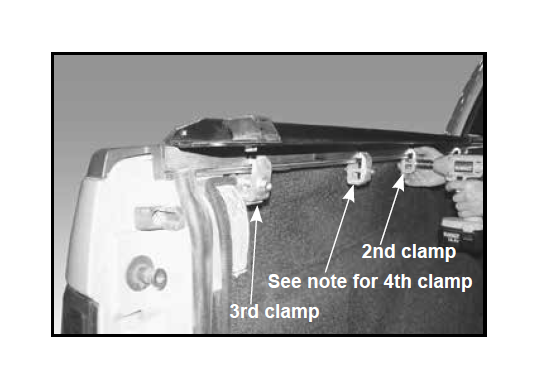
E. Install second clamp on rail at midway point of box. Adjust rail flush at top of box and repeat clamping procedure, always making sure teeth are engaged on rail grooves.
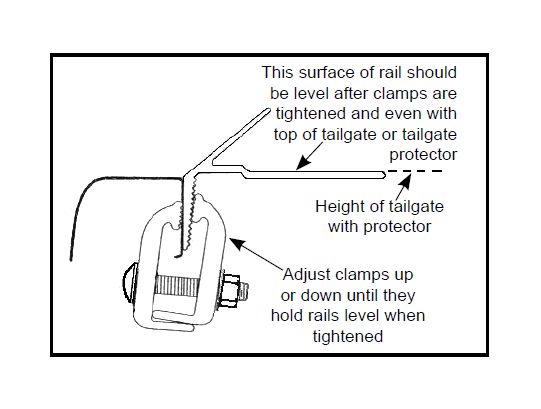
F. At tailgate, adjust rail height flush with top of tailgate. Repeat clamping procedures placing third clamp as close to tailgate as possible. NOTE: For trucks with an electric tailgate, rails will have to be installed slightly higher (approximately 3/16") to eliminate interference. Most short box kits contain 6 total clamps. Install 3 per side rail. For kits with 8 total clamps, install the 4th clamp between 2nd and 3rd clamp on each side rail. Repeat STEP 1 to install rail on opposite side. When done, make sure all clamps are torqued to 15-20 ft-lbs on both rails.
2: APPLY FRONT HEADER SEAL
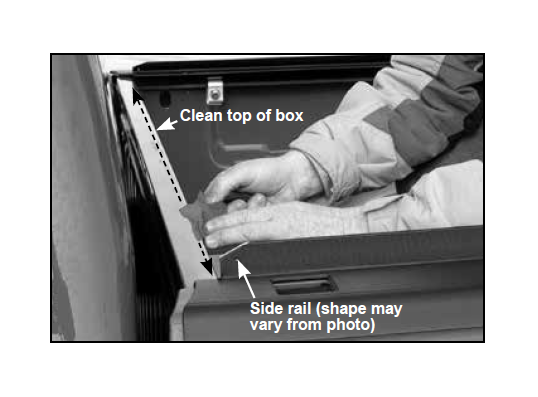
NOTE: For best adhesion, air and surface temperature should be above 600 F.
A. At front of box header, clean top surface with alcohol pad (wash first if needed). Save alcohol pad for use in Step #3.
B. Peel paper back, align and adhere front header seal at one corner across box to opposite corner and cut to length.
NOTE: For additional protection–locate and seal miscellaneous factory holes, crevices, stake pockets, etc. that may be on box (sealant not included).
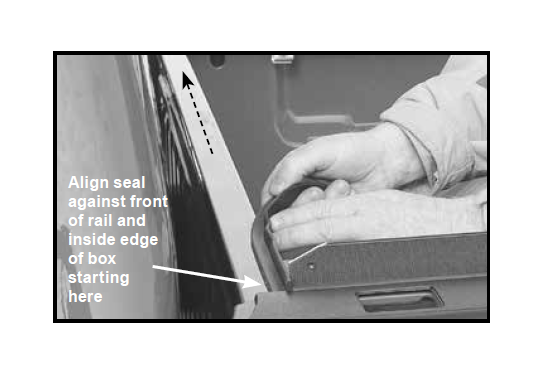
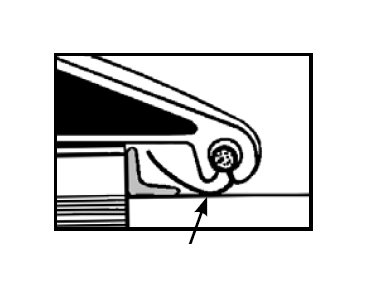
3: APPLY REAR SEAL
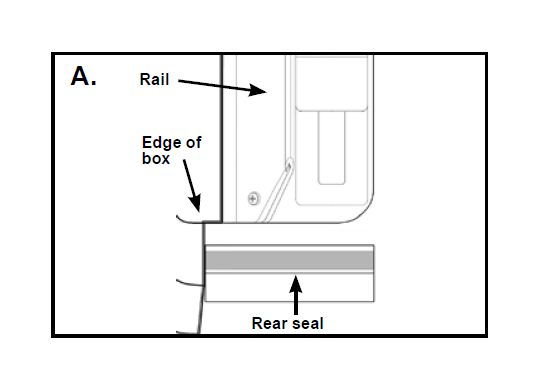
NOTE: For best adhesion, air and surface temperature should be above 600 F.
A. Clean underside of rail w/ alcohol
pad included. Hold seal up to end of
rail, make sure end of seal contacts
edge of box.
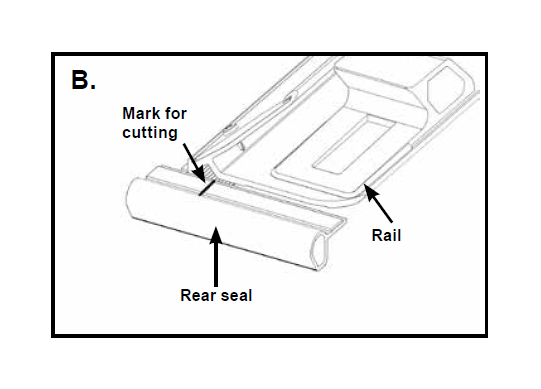
B. Mark leg of seal and cut notch in
seal.
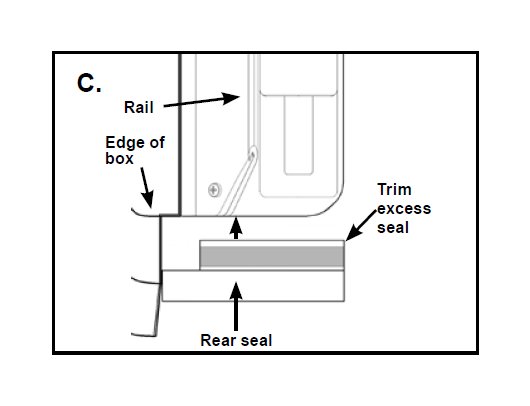
C. Peel paper back, align and
adhere seal at end of rail.
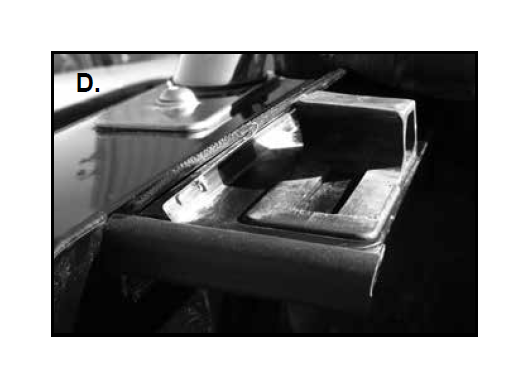
D. Edge seal installed.
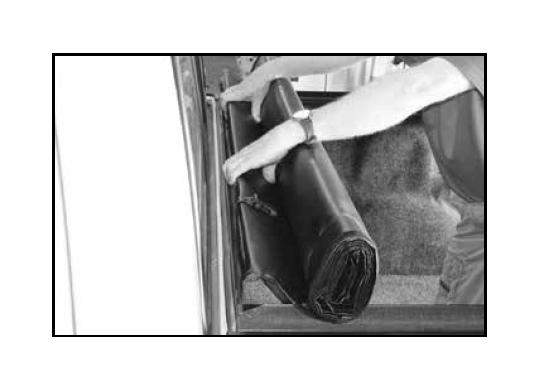
4. ASSEMBLING TENSION ADJUSTERS TO COVER

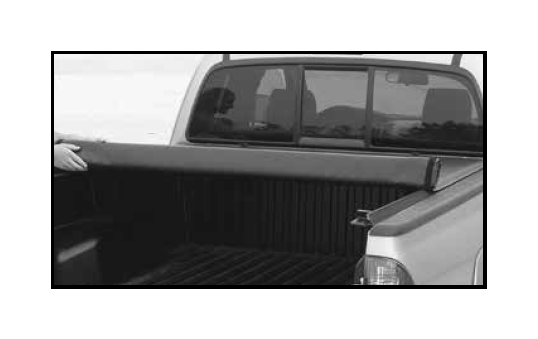
A. The cover comes pre-rolled to its normal open position for ease of installation. Set pre-rolled cover on tailgate with front bar facing up as shown. Align tension adjuster (marked “L”) on driver side of cover - positioned as shown in photo.
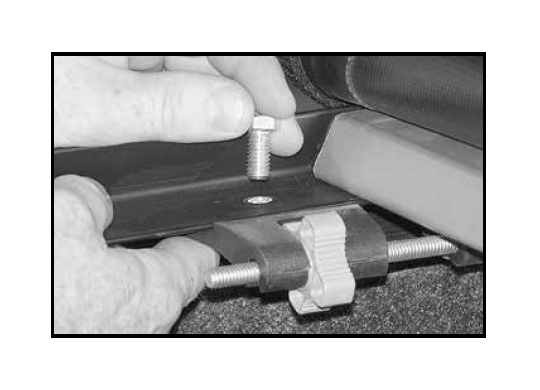
B. Turn 1-1/4" bolt with flat washer
onto nut in bar. Leave loose for
now. See photo. Repeat for tension
adjuster (“R”) on passenger side of
cover, and leave that bolt loose also.
5. MOUNTING COVER TO SIDE RAILS
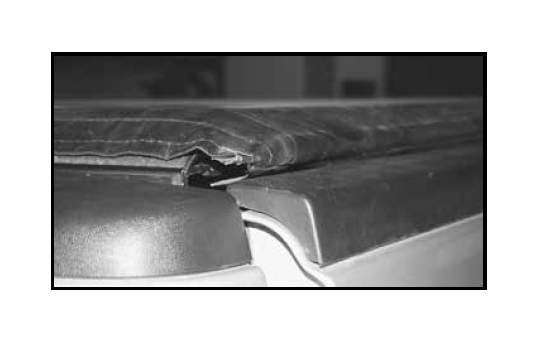
A. Set rolled up cover on rails at front of box (behind cab) with bar facing up. Roll cover bar onto front of rails and fold/tuck vinyl flap under. Now bar will face down. Let straps hang to inside of box. Push cover bar forward until it sets flat on front of side rails and overhangs them.
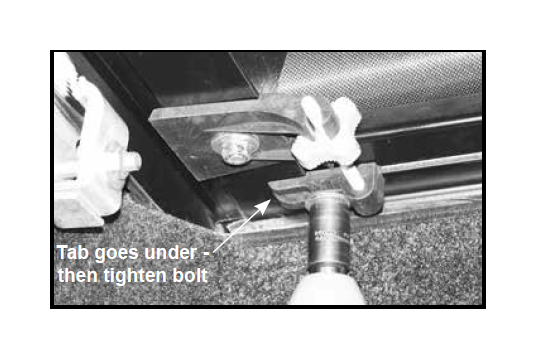
B. Slide left tension adjuster over until it engages under side rail. (See photo in Step 5E for tension adjuster tab under side rail.) Push bar back and forth to line up holes. Do not turn dial wheel. Insert bolt from top, flat washer and nut from bottom.
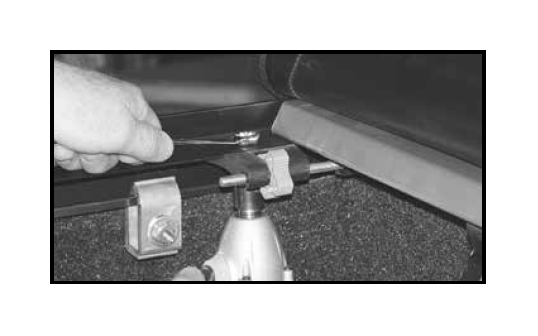
C. Hold bolt at top and tighten nut under side rail. Repeat procedure for right hand tension adjuster.
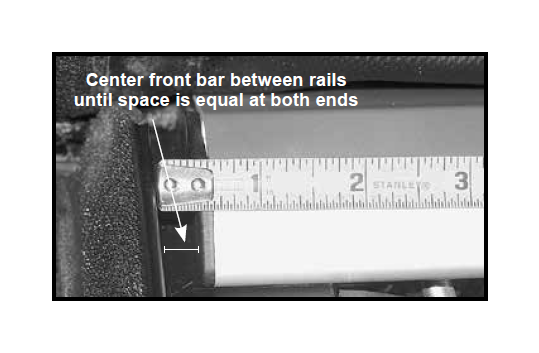
D. Center the front bar between the two side rails.
NOTE: Before tightening, make sure vinyl weather flap is still tucked under front bar.
E. Then tighten bolt (left loose earlier) under front bar on each tension adjuster.
6. INITIAL OPERATION AND ADJUSTMENTS
A. Unroll cover and place rear bar into strikes on side rails. Press down on bar to close (20-30 lbs. pressure). The cover fabric may be tight. Over time under tension it will conform to its hardware and loosen slightly. If bar is too hard to push down, adjust tensioners equally as needed to close.
B. Close tailgate slowly - top of tailgate should fit snug under cover bar. If cover hampers normal tailgate operation raise rails by loosening rear clamps; adjust rails up; and tighten clamps. If there is too much gap between tailgate and cover bar, lower rails by loosening rear clamps: adjust rails down; and retighten clamp.
IMPORTANT: When done, go back and double check each clamp and make sure it is fully tight. Start behind cab and work towards tailgate.
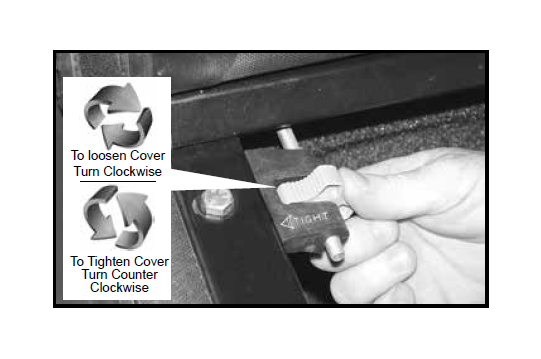
C. Check cover tension by releasing the dual locking system and open and close rear bar several times. It should snap down when closing. Cover fabric should be tight with no sagging between the bows. If adjustment is needed, roll cover open and to loosen turn tension adjuster Clockwise. To tighten turn tension adjuster Counter Clockwise. Always turn Dials in Equal amounts.
D. When done, always seal both
sides of cover with hook and loop
system. For detailed operating
instructions see Page 8.
TIP: Reasons to keep cover drum tight:
1) Lasts longer
2) Less noise
3) Looks nicer
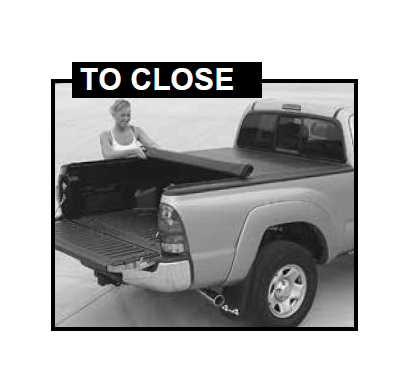
Release retainer straps at front and using both hands roll cover to rear of box.
Position roll-up bar against strikes. Push down on bar until dual locking system locks in place.
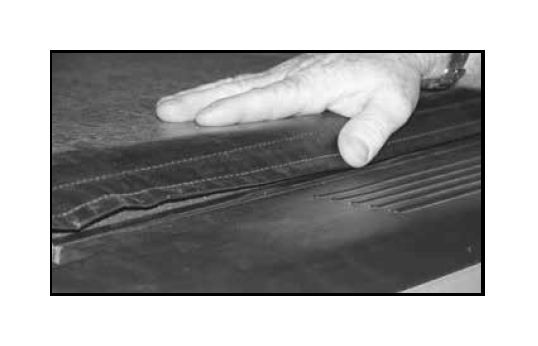
Along side of box, seal cover edges with hook and loop sealing system the full length of cover on both sides. Pull with one hand seal with other hand.
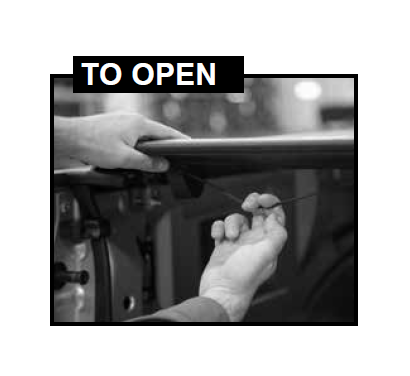
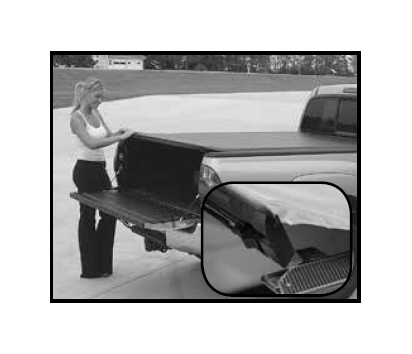
Open tailgate, lightly pull down on dual locking system and rotate rear bar with other hand.
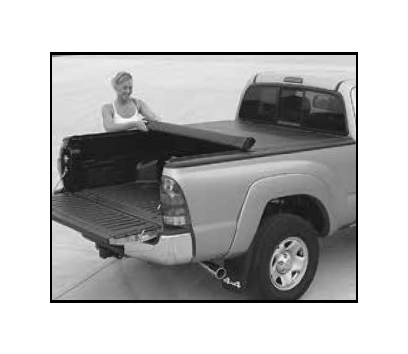
Using both hands, roll cover toward front of box (not against the cab).

Securely fasten retainer straps to store the cover.
STRAP ADJUSTMENT

To tighten storage strap ...pull back on top layer of strap loop until strap is snug.

To take out slack in loop ...slide slip bracket down.
TIPS FOR A LONGER LASTING COVER
• Keep cover closed when not in use and always seal cover edges the full length of box on both sides with hook and loop sealing system.
• Keep the cover tight; cover vinyl should sound drum-like when tapped on.
• Make sure cover is properly latched and sealed. Lock while traveling and before entering automatic drive-through car washes.
• Avoid storing cover in its rolled up position for long periods of time.
• When cleaning, for best results use mild liquid soap and water. Never clean with petroleum or citrus based products.
• Periodically treat cover with vinyl cleaner & UV protectant instead of petroleum based products that may dry out and damage the vinyl.
• Avoid allowing cargo to rub against cover while transporting, whether in open or closed position.
INSPECTION AND MAINTENANCE
• Inspection and much of the maintenance can be done by the operator. It may be necessary to review the installation and operating instructions.
• Periodically inspect the cover assembly and the condition of all parts. Check for loose bolts and parts, tighten if needed. Test the operation to ensure that the parts are functioning properly and that the cover is in top operational condition.
• If latch has been damaged, replace with new one. NOTE: Inspection and/or maintenance should also be performed anytime a malfunction is observed or suspected. If you need assistance inspecting and/or servicing your cover, or if you want to order a replacement part, call the customer service number on the back page. Always use original equipment replacement parts for your cover.
SAFETY INFORMATION
• Do not cover cargo that is higher than the cover.
• Do not place object(s) on or against the cover or its framework at any time
• Always secure cargo so it cannot shift and damage the cover or its parts.
• Do not use the covers framework to tie down cargo.
• Never stand, sit or ride on the cover or allow others to do so.
• Do not leave valuables in an unattended vehicle as cover does not prevent theft of contents in truck box.
• The cover does not eliminate moisture and dust from entering the truck box. Special wrappings or packaging of the contents may be necessary.
• Due to poor ventilation, if you allow a pet/animal in the box, leave cover open. Do not allow people or animals to occupy box with the cover closed.
• When towing vehicle backwards, cover must be rolled fully open and secured with safety straps or fully closed and secured.
• ALWAYS finish securing the cover by sealing sides. Use caution when operating cover in windy conditions.
• Periodically check and/or retighten clamp and front bar tensioning bolts as needed.
• Periodically check dual latching system cord to ensure latches fully engage side rails.


