FREE 1 to 3-Day Delivery on Orders $149+ Details
How to Install SLP Blackwing Cold Air Intake on your Sierra
Tools Required
- 1/4" Drive Socket Set
- T-15 Torx Bit
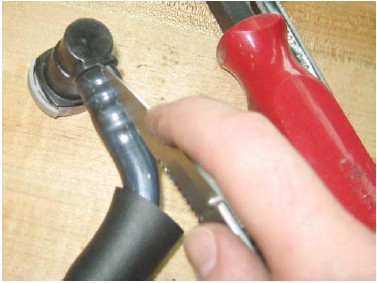
- Pliers
- Razor Blade
- Flat-head Screwdriver
- Trim Tool
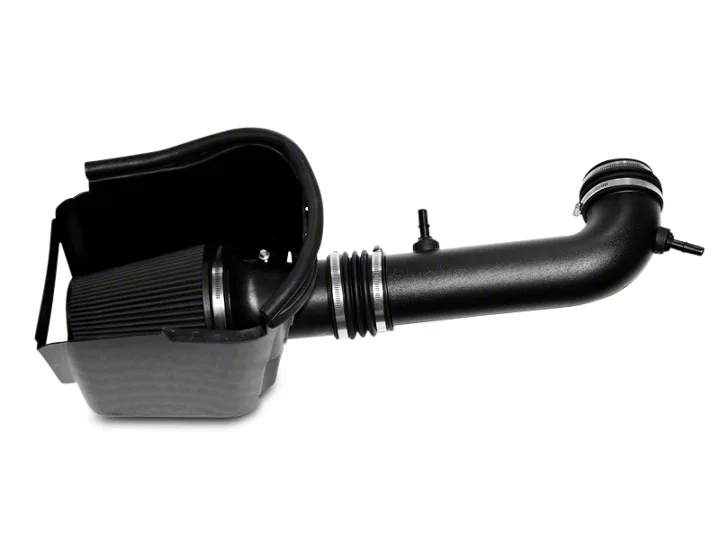
Shop Parts in this Guide
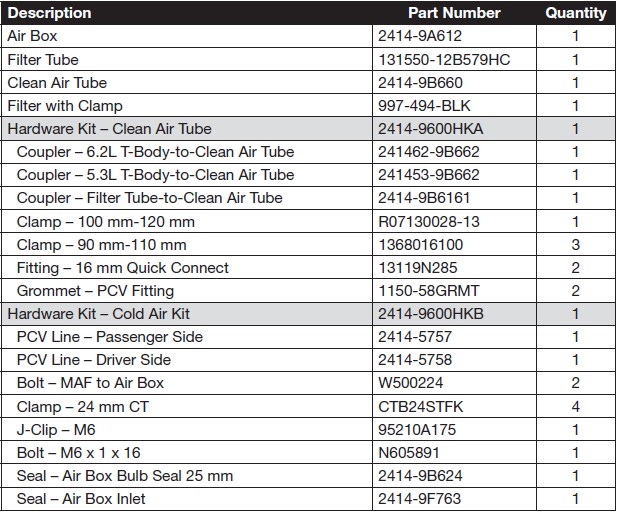
PACKING LIST FOR 2014-2017 GM TRUCK COLD AIR INTAKE
SECTION A – REMOVAL
The following section will guide you through the disassembly of the stock components. Special care should be taken to label fasteners and parts that are taken off during this procedure since many will be reused.
1. Cover both fenders with fender covers to protect the vehicle fi nish.
2. Disconnect the battery ground cable.
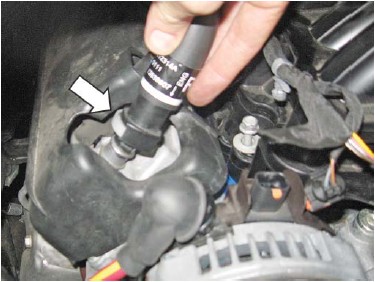
3. Disconnect the MAF sensor connector.
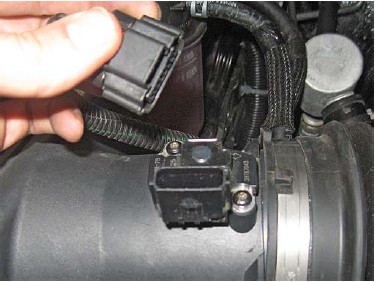
4. Using the T-15 Torx bits, remove the two screws retaining the MAF sensor. Retain screws for installation.
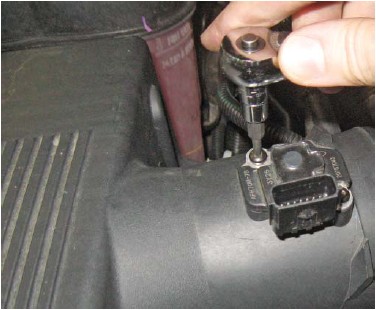
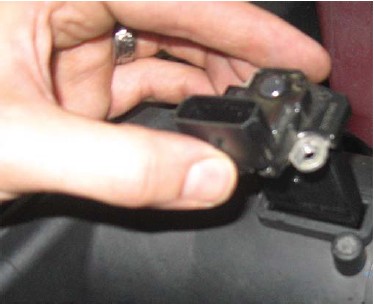
5. Remove the MAF sensor and retain for installation.
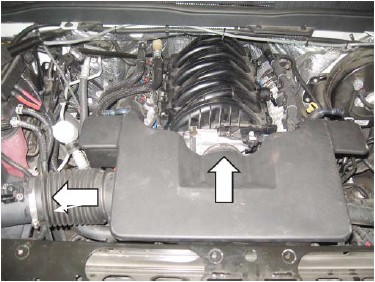
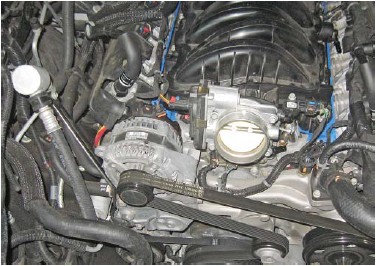
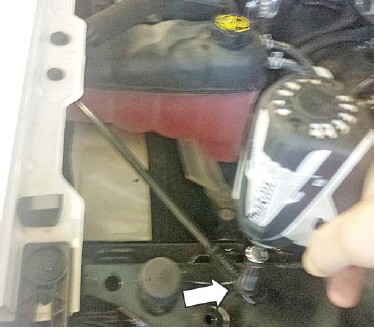
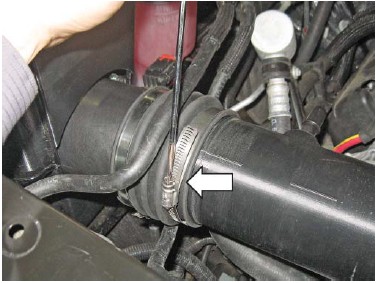
6. Loosen the clamps retaining the clean air tube to the air box and throttle body.
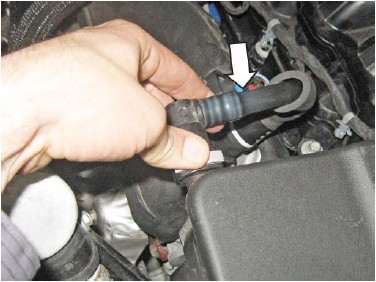
7. Disconnect the quick connect fi tting on the driver side of the clean air tube.
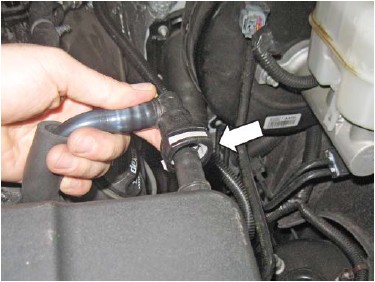
8. Disconnect the quick connect fi tting on the passenger side of the clean air tube.
9. Remove the clean air tube from the vehicle.
10. Remove the air box assembly from the vehicle, by pulling up. It is held in place by three (3) barb fi ttings.

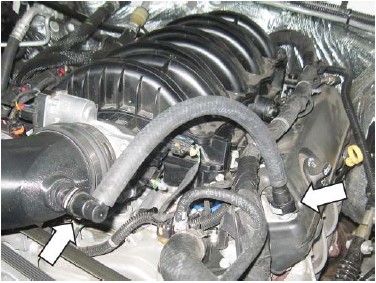
11. Disconnect and remove the PCV from the driver side valve cover. Retain for installation.
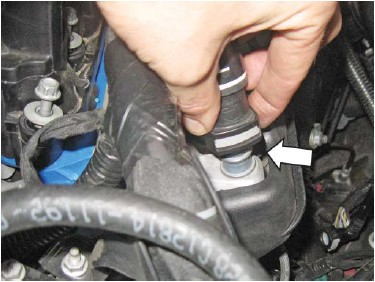
12. Disconnect and remove the PCV line from the passenger side valve cover.
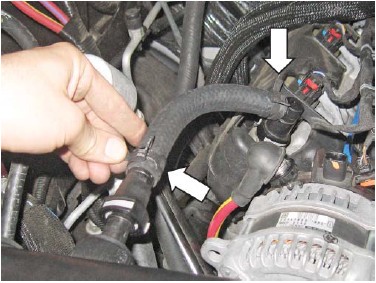
13. Using a razor, score the PCV lines just removed then pull out the quick connect fi ttings. Retain the fi ttings for installation.
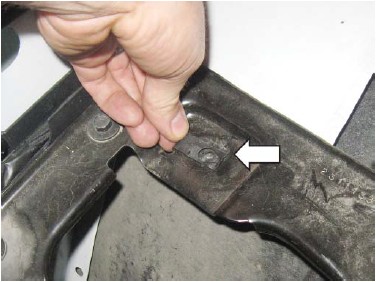
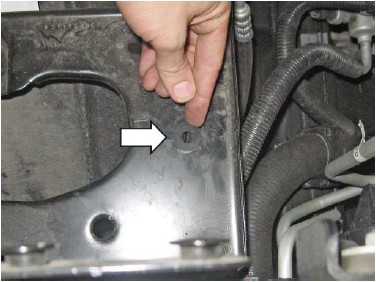
14. Remove the two (2) bolts holding the retaining support bracket between the radiator support and the fender.
SECTION B – INSTALLATION
1. Install two (2) rubber grommets (P/N: 1150- 58GRMT) and fi ttings (P/N: 13119N285) into the clean air tube (P/N: 2414-9B660). Tip: Use glass cleaner or spray lubricant on the parts to help installation.
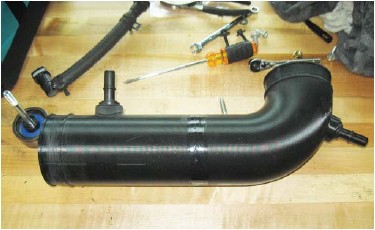
2. Insert one (1) straight quick connect and one 90-degree quick connect to each of the supplied PCV hoses (P/N: 2414-6757, 2414-6758). Use the supplied hose camps (P/N: CTB24STFK) to attach the fi ttings.

3. Install the J-clip (P/N: 95210A175) into the air box tray as shown.
4. Install the grommet (P/N: 9600K53) into the air box tray as shown.
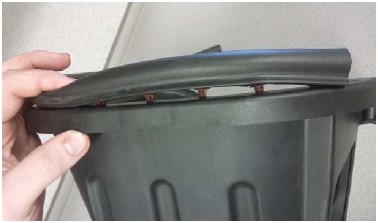
5. Place the bulb seal (P/N: 2414-9B624) onto the top of the air box (P/N: 2414-9A612) and clip into the holes. Trim ends as required.
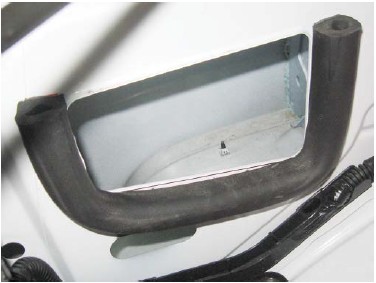
6. Clean off the fender well, then attach the inlet seal (P/N: 2414-9F673) as shown.
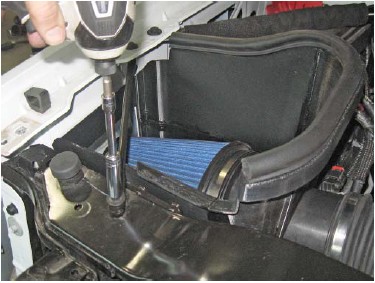
7. Insert the air box assembly into the truck, push down to seat the posts into the grommets.
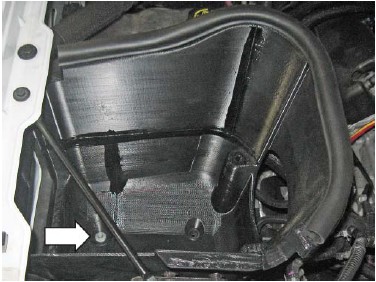
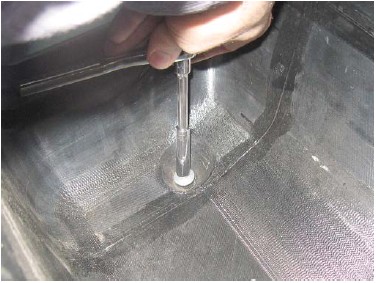
8. Thread and tighten the provided M6 bolt (P/N: N605891) into the bottom of the air box. Tighten to 10 Nm.
9. Insert the fi lter tube (P/N: 131550-12B579HC) into the air box tray.
10. Install the air fi lter (P/N: 997-494-BLK) onto the fi lter tube. Make sure the metal rib on the fi lter points down when the fi lter tube is oriented as shown. Tighten the fi lter clamp to 3 Nm.
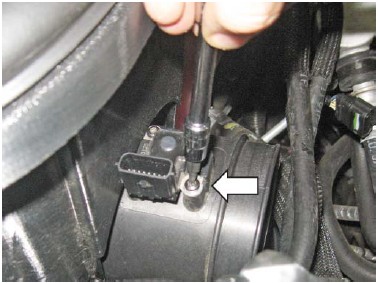
11. Install the MAF sensor into the fi lter tube. Torque the screws to 2 Nm.
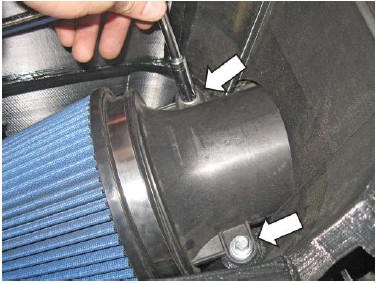
12. Using the two (2) M8 bolts (P/N: W500224), attach the fi lter tube to the air box. Tighten to 10 Nm.
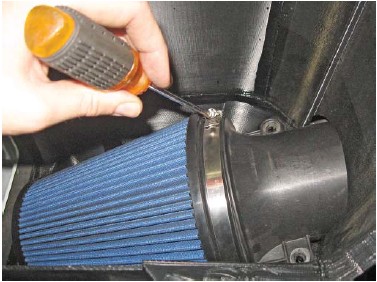
13. Using two (2) hose clamps (P/N: R07130028-13 and P/N: 1368016100), install the fi lter tube-toclean air tube coupler (P/N: 2414-9B661) to the fi lter tube and the clean air tube.
14. Attach the correct coupler between the throttle body and the clean air tube coupler for the specifi c vehicle (5.3L P/N: 241453-9B662, 6.2L P/N: 241462-9B662). Use the remaining clamps (P/N: 1368016100) to attach the coupler to the clean air tube and throttle body. Torque the clamps to 3 Nm.

15. Install the driver side PCV hose (P/N: 2414-6758) between the quick connect barbs on the valve cover and clean air tube assembly.
16. Install the passenger side PCV hose (P/N: 2414- 6757) between the quick connect barbs on the valve cover and clean air tube assembly.
17. Reinstall the support brace between the core support and fender.