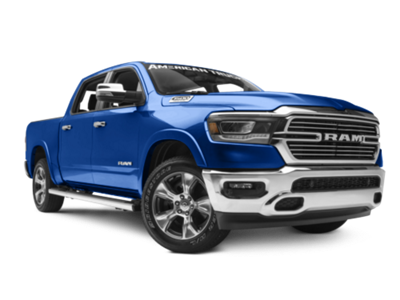
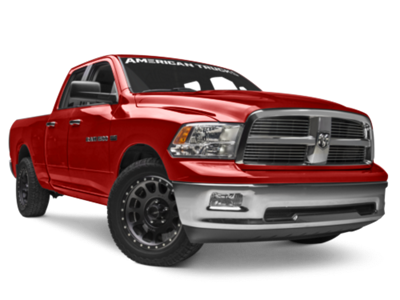
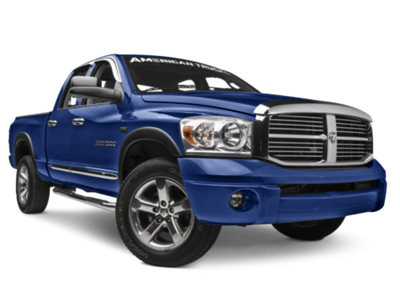
Talk to a Ram 1500 Sales Tech
1-888-706-1096
M-F 8:30A-11P, Sat-Sun 8:30A-9P
$20K Sweeps! 10 Chances to Win! Enter Daily >

Flowmaster FlowFX Direct-Fit Muffler with Active Valve (09-18 5.7L RAM 1500 w/ Factory Dual Exhaust)

Item R110789
Verify parts fit and get product recommendations.
Ram 1500 Sales Techs: Connect Now M-F 8:30A-11P, Sat-Sun 8:30A-9P
$0.00
Our Price

$922.95 (kit)

FREE Shipping Market Price $1,061.99 You Save 13% ($139.04) Up to 10% off for Military & First Responders! See Details

Will this fit your Vehicle?

Select a different vehicle Help?
Update or Change Vehicle
Ship to: Ashburn - 20149
Sorry, please enter a valid US or CA postal code
We're sorry, zip can't be updated at this time.
Recommended Install Shops
How It Works
Install Shops are available near Ashburn - 20149

Add Local Shop Installation

Total cost of service $249.00
    Create a list
    Add to New List

    Saved - View your saved items

    We're sorry. We couldn't save this product at this time.

    or use

      Product Videos

      Hey, guys. Adam here with americantrucks.com, and today we're taking a closer look at, listening to, and installing the Flowmaster FlowFX Direct-Fit Replacement Active Exhaust Muffler, available for the 2009 to 2018 5.7 liter RAM 1500 with the Factory Dual Exhaust. And as you just heard from our sound clips, guys, this is an active exhaust that has two different modes. In terms of sound, I'm giving your on-mode, which is the quiet mode, three out of five on our loudness meter. Now, the on-mode for the active exhaust, which again is the more normal or quieter version of the active exhaust is something that's perfect for the daily driver out there. Anytime you're taking the kids to school or if you're just on your daily work commute and you're looking for a normal exhaust sound, something that's a little bit deeper than the factory exhaust without being too overwhelming, you wanna throw that exhaust switch on the on position, and you'll have it in that normal driving mode.Now because it's an active exhaust, you can hit the off button on the key fob included in the kit there to switch it into the loud mode. Off means it's gonna adjust the butterfly valve in this muffler here to make it louder. And for that mode, I'm giving it four out of five on our loudness meter. Now, the active exhaust mode with it off, which is the louder mode, is gonna be something that's got a deep, aggressive rumble, something that's much louder than the factory exhaust. And actually, it surprised me a bit. Sometimes with these active exhausts that you have to install in the aftermarket is something that doesn't really change up the sound too too much. But with this muffler, the difference between on and off is actually pretty drastic. It's a lot louder. It's got a lot more bass to it. It's something you can definitely feel inside the cabin. With that said the way this works is it has an extra dump muffler pipe. So, coming off this muffler, you have the dual outlet that leads to your factory dual exhaust but has this additional pipe that dumps out directly under the cabin.Now, that's where the butterfly valve is located, right here above the actuator. So, when you turn it off, which basically means it's gonna be louder, it opens up a valve and opens up this pipe. So, a lot of the exhaust gases dump right out underneath of the muffler itself. That's gonna give you that louder volume. It's gonna give you the raspier volume. It's gonna beef up that aggression. So, the nice thing about this is you get the best of both worlds. If you wanna keep it more tamed, throw it in the on position, it's great for daily drivers. If you wanna make a lot more noise, throw it in the off position, and it's gonna be a more track-inspired sound. Now, the way it works in controlling it is it's got this wireless key fob. Inside the FlowFX muffler from Flowmaster is a WAVE Technology or Wireless Active Valve Exhaust Technology. That means this is going to transmit via Bluetooth to this key fob there. And some of that wiring for the control module, I'll get to in just a little bit.So, basically, you can hook this onto your key fob, you can leave it in your cup holder inside your cabin. Either way, super easy to use. You don't have to worry about drilling in any additional switches. It's wireless. With that said, the price tag comes in right around 650 bucks. In my opinion, a worthwhile price to pay for a very different experience when it comes to an aftermarket exhaust. Obviously, this is not a full cat-back, so it may not reap all the power benefits you get from a full cat-back swap. But with a simple muffler swap, the 650 bucks is a small price to pay for a huge change-up in sound, especially when you can change on the fly. Install-wise, I'm calling this two out of three wrenches on our difficulty meter. Now, there is some splicing involved but honestly, it's a pretty simple, very straightforward process. It comes with all of the wiring necessary to get the job done. You're basically gonna install the muffler as you would any other muffler, no cutting or drilling, any of that nonsense. You'll install the active exhaust valve actuator included in the kit, and then you're basically gonna run a control module wire from behind the center console back down into the engine bay and over to the muffler itself, and you'll plug it right in.Now, I know that sounds like a headache, I know it sounds overwhelming or nerve-racking. I'm gonna walk you through that entire process that'll take two, maybe three hours from start to finish. There is some splicing involved, like I said. With all of the quick splice connectors included in the kit make it a pretty fairly simple process. I'm gonna show you what that looks like, let's get started. Tools used in the install include an impact gun, ratchet, extension, 16-millimeter and 17-millimeter deep sockets, T15 Torx bit, wire strippers and cutters, needle-nose pliers. Recommended would be a hanger removal tool, a pry bar, and PB Blaster. First off, we're gonna loosen up all three clamps holding on the factory muffler. We're gonna start here with the extension pipe that goes to your cats. Now, this guy is a 16-millimeter nut. So, I have that on my ratchet here. You can use an impact gun for this one, but you'll have to switch over to a ratchet for the other one. So, I'm just gonna start here. I'm gonna loosen this guy all the way up, and separate the clamp. Now we can repeat that for the other two.Now, we're switching over to a 15-millimeter socket and we're gonna take off these 2 holding on the tailpipes to the muffler outlet. All right, next step, we're gonna have to focus on our hangers in the factory isolators above the muffler. Now, before we do anything, I'm gonna grab WD40 and I'm just gonna spray it right inside there where the hanger connects to that isolator just to lube it up and make it easier on us. Do that for both of them. All right, next up, grab your hanger removal tool and we're gonna pop these guys out of the isolators. All right, next up we can start to try to disconnect our muffler. Now, I'm gonna start on the front side here with a pry bar. Now, it might take a little finessing on both sides to disconnect. But for now, I'm gonna use this pry bar up against the frame, I'm gonna push this out of position. So, we have the front broken loose pretty good. Now what I wanna do is start on our passenger side tailpipe. I wanna get that disconnected from the muffler and in order to do that, it may slide out of this hanger here. So, I'm gonna slide this guy out, disconnect it from the muffler and then hang it right back up. That was pretty simple. And hang it up.All right, so tailpipes are out of the way, let's just lift our muffler up and slide it off. So, we got our factory muffler off of our '14 RAM and it's on the ground here next to our Flowmaster active muffler, and I wanna take you through some similarities and differences between the two here. And I got to say, from head to toe, this is gonna be completely different. Your factory muffler is absolutely massive. The Flowmaster muffler is just about as big as my hand. And it's got this resonator/bullets down muffler there that leads into the dual split exit for your factory dual exhaust. But it's also got this side dump here with the active valve. Now, the active valve, needless to say, is something that does not come with your '14 RAM off the factory line. So, this is gonna be a huge improvement to not only sound but also performance. Now, the way this works is you see this little active valve actuator on the side here that we have to pre-assemble on the muffler before we get to the installation. But first what this is gonna do is basically with your wireless key fob, it's gonna activate this butterfly valve that'll open and close.When it's closed, under normal driving conditions, all of your exhaust gases will push out normally as it would just like your factory exhaust. Still, it's gonna have an improved sound thanks to this new Flowmaster FX muffler, but it's gonna be closed off for the dump. Once you activate that exhaust valve, it's gonna open up this side dump here and exhaust gases will pass through both sides, and that's gonna open up volume tremendously. And that's what you heard from our sound clips earlier on. So, that side dump is going to dump out right underneath the truck while continuing to dump out of the rear as well. Now, this assembly here is gonna attach to a 3-inch TIG-welded exhaust that's coming from Flowmaster and this is a 409 stainless mandrel-bent tubing. The 409 stainless is gonna be that middle-of-the-road option. It's gonna help keep costs down but it's still gonna be corrosion and rust-resistant, especially more so than aluminized steel. So, pretty good quality stuff here from Flowmaster with a pretty affordable cost with that 409 stainless.Now, the active exhaust actuator is controlling a WAVE Technology or Wireless Active Valve Exhaust built into the Flowmaster muffler alongside their Power Chamber Technology which produces that sound there. Now, the WAVE Technology is gonna be something that we're going to have to kind of assemble on top of the built in technology, so let's get to work on that. We have a couple of spring actuators we have to install along with some brackets and some gaskets, so that's next. Now, the first step here for the assembly is to install our bracket and gasket. The bracket is going to install just like this. There are two pre-drilled and pre-threaded holes on the bracketing system welded to the exhaust. Now, you wanna make sure you're installing this bracket in the correct orientation. So, not going this way, it's gonna flip around this way here. You wanna make sure that the 90-degree elbow tab is facing the rear of the exhaust. But you also wanna make sure that you're installing the included gasket on the underside. So, that's gonna go just like this and attach into the system like that.So, once we have that set up there, take the longer Phillips head screws, install the gasket washer over those as well. They should come pre-installed with some split washers. You just wanna add the gasket washer, pick up the gasket and bracket assembly, and we're gonna drop this guy right in place. Take those longer screws and tighten them down. All right, you wanna grab a Phillips head screwdriver and tighten them down. Next, you wanna take the spring itself and you wanna insert it underneath and it snaps on to the fitting at the bottom there. All right, just like that. It really goes...it only goes on that one way there with the hook on the bottom. And now we can install the actual actuator. The actuator only goes on one way. But you wanna make sure that this little tab there is hooking on to the top of the spring you just installed. So, you wanna make sure that they're oriented the same way. Drop that guy on. You might have to get low in order to see it line up. All right, make sure you're grabbing those longer screws, once you have everything set in place there with the actuator. I'm gonna thread all three of them in by hand just to make sure that everything is lined up, and then tighten them down with your Phillips head.Now, before you go any further, just make sure that your spring at the bottom is seated correctly at the bottom of it and at the top where it connects to the actuator. All right, so next up is the installation. We're gonna slide these hangers into the isolators above the frame there and then connect our pipes.It definitely helps if you lubricate those guys. Once you have them split in, bring the pipe up and connect it. Slide this guy back and now we're gonna tighten down this clamp. Grab a 15-millimeter deep socket and tighten that guy down. Next up, we're just gonna grab the 2.5-inch clamps and just slide those guys on.And now we can finish up with our tailpipes there. All right, so I'm gonna start on my driver's side, put this over axle pipe through, connect the hangers, and then connect it to the muffler outlet. Next up grab your passenger side over axle pipe, slide that guy over top, connect with the hanger and the muffler outlet just like we did on the driver's side. Next up, tighten down both of those clamps. All right, now that the exhaust portion is out of the way we can focus on wiring, wiring inside of the front driver's seat here. What we're gonna do is basically work on getting the center console off which isn't that difficult.You're gonna grab a knife, and you're gonna just pry up, just a touch, on the rubber flooring there on this little control panel. From there, there are 2 small T15 Torx screws you're gonna get off. I'm gonna use my impact gun but you can also use a ratchet and just get those two out. There's one here and one there. All right, there's one, and there's two. Now, if your model has a plug here, you may have one more screw in this little compartment. Ours does not. So, at this point, we can grab on both sides and pull straight back on the center console trim, you may wanna grab up here as well, just like that, and that guy pops off. Now we can carefully just prop that down. Now that we have that console down, we have to worry about this 12-volt DC socket. We're gonna disconnect the harness at the back here. Now it's a pretty awkward angle. If you can get your finger in there to disconnect the harness, that's great. If not, I recommend using that same knife you used earlier, you can kind of pry that knife in there to press on the release clip on the left. And once you have that pressed down, you can pull on the wiring and pull it up to disconnect the socket. Just like that, and bring that out here.All right, so now what we have to do is basically cut away enough of this wire rack that we have enough wire to tap into. So, I'm gonna use my knife again. And with this, you wanna be very careful not to cut the wires themselves. I'm just gonna make small incisions into the wire wrap until it's easy enough to kind of rip open a little bit more. All right, so we're just...we're basically ripping that apart. I know that can be tough to see, just enough to get into some of that wiring. All right, next up, we have to do some wire stripping and wire splicing. Now, this is our fuse holder. You wanna make sure first of all that you're popping that guy open and verify that the fuse is in there. If it is not, the fuse is included in the kit. So, just pop the fuse in there and shut that guy down. Next, what we're gonna do is just strip one end. They're both red wires, so we're just gonna pick one, grab our wire strippers, insert that guy in there, and strip that open. You wanna get enough just to make your life a little easier, just so you have enough wire to work with. Something like that looks good. Twist the wires together to make sure they're nice and tight.Now you wanna grab your control unit, which is this big mess of wires here. On one end, you have a black and red wire. The black and red will have these little hooks on the end. The red one, we're actually gonna snip off and splice into the fuse holder. So, I'm gonna put these two together, red to red. So, what I'm gonna do now is use wire cutters, and I'm gonna cut that end off because we don't need that kind of connector. Just like that. Strip this wire just like we did the other one. And now you can take this butt connector, and you're gonna insert one end from the red wire on the control unit into the butt connector. You wanna make sure that guy is going neatly in there. You might have to, again, twist the wires together. All right, so we're gonna insert that guy into one end, and clamp that down. I'm gonna use needle-nose pliers for this guy. Once you clamp it down, you just wanna give it a tug to make sure it's nice and secure. So now we can insert the fuse side, the fuse holder side that we stripped, into the other end of the splice connector. Make sure that's inserted there and clamp it down. Now for this, we've got a little bit extra wiring that we don't really need. So, I'm gonna cut some of that guy off. Now we can insert. And again, clamp it down.Give it a tug, make sure it's secure. You don't want any of that coming out there. And now that side is done. Now we can focus on the other side, which we'll tap into the 12-volt DC connector socket that we removed. Next, let's strip the other side of the fuse holder, same red wire as we did before. Again, we don't need too, too much stripped away, just enough. Now we can splice it into that 12-volt DC blue line. Okay, so next we're looking at this DC socket that we disconnected. Under our center console, there's a black and a blue wire. The blue wire is what we're focusing on. That's the power. We don't need to focus on the black ground. So, take that blue wire, you're gonna take the quick splice connector included in the kit, this blue guy here, and you're gonna clip it right onto that blue wire. So, you're just gonna insert the blue wire through that side there. Now, each side has two holes. One side of them, one of the holes is blocked. So, we don't wanna focus on that one. In our case, the hole that we're gonna focus on is on the inside here. So, you're gonna grab the fuse wire, the red one, the other side of the red one, and you're gonna insert it into the other end of that blue connector. Just like that.You're gonna push it all the way through so that it holds itself in. Now we can grab pliers and clamp down on the metal bar on top, and it's gonna connect the two wires, and splice them together. Again, I'm gonna use needle-nose for this. Clamp that guy down just like that. Again, give each side a tug to make sure that they're in securely. And then you can close the top. Now, that's spliced in. Now, the instructions say to bolt this guy to the frame in order to ground it. Now, that is one option. It may be a little bit difficult to find a nice spot for it on the frame from the center consoles area, so what I'm actually just gonna do is do the same thing we did to our red version of this, is cut it off and splice it into the back of the 12-volt DC, onto the ground side of the black wire. So, I'm gonna cut this guy again, just like the other one, strip it, and repeat. So, now we can take that guy and plug it back in. All right, so now we got the fuse holder there. And what I recommend doing is maybe just trying to tuck this fuse holder thing right into that hole where that wiring is, that way it's not interfering with the center console mount.I'm gonna tuck this guy straight to the back here just so it doesn't interfere with the center console again, like I said. All right, and now we can start running this wire. Next what's gonna happen is this wire here with what looks like a coaxial cable, you're basically gonna feed this through the center console, pull it down under the driver's side dashboard where your pedals are, and then run it to the grommet behind the battery that will lead to under the hood. From there, it'll plug in to the accessory wire that will then run under the truck to your muffler. Now, there's not a ton of wiring here. So, you may need to run the wire through the battery grommet, back underneath of the dashboard to plug in, instead of vice versa. But you're not gonna be able to see this, it's so tucked up under the dash that it's difficult to film. So, just run this down, feed it next to your pedals and then run it under the hood through the grommet. All right, from here, we can now mount our console back up and continue. All right, when we're all done, we'll come back and screw those two back in.So, next one under the hood. We're looking at these wires included in the kit here. One side is the female end of that coaxial-looking cable, the other end is gonna plug into the actuator on our muffler. Now, the actuator side, this guy here, we're actually just gonna feed down through the engine bay behind our battery on our driver's side until it's just all the way underneath of the engine bay. That way, it's easy to get toward the muffler. Again, so you're just feeding that guy down, just straight down to the bottom. You can let it fall under the engine bay. Once you have that guy all the way through, and you're just left with this side, this, you're gonna push through the grommet behind your battery on the firewall. That's gonna be this grommet here behind the battery. So, I'm just gonna take this guy, and the grommet is already not completely seated into that hole so there's a little bit of a gap there, and I'm just gonna push it through. With that through, again, I told you this is gonna be difficult to see under the dashboard, so you're just gonna have to grab this from under the driver's side dashboard and plug it into the wire that you fed through the center console.Now, this is an exaggerated view. I pulled a lot of the excess wire through just to show you guys under the dashboard what it looks like. So, you basically plug these guys in just like this. Make sure they're nice and snug. Push them all the way together. It's pretty tight. And then you're basically just gonna screw this guy down so that they can't disconnect. Now, you'll have to pull this side of the wire that's coming through the grommet behind the battery. You'll pull all the excess back out of the engine bay and down toward your muffler. And make sure when you're doing that, this tucks up underneath of the pedals. Now, again, we can't show you that because it's so tight up in there. But make sure that you're tucking all this wiring back. There are zip ties included in the kit if you feel like you need to zip-tie it out of the way. Just make sure it doesn't interfere with any of the pedals. So, now the wiring harness fell through the engine bay. What I'm basically gonna do and what I recommend doing is running the wiring harness along the brake lines on your driver's side, then going over the crossmember right above the muffler to the other side.Now, there is a wiring harness extension also included in the kit to make it easier for you to reach that muffler. So, I'm just gonna feed this guy over that crossmember there. And again, there are zip ties included in the kit to help you with this, but you're basically just gonna secure it to those brake lines, and wrap it all the way back to the muffler, go over the gas tank, and over the crossmember. All right, so now we can go over that crossmember and plug it in. All right, so once you have that connected, you're good to go. Just make sure all the wiring is zip-tied back. That's gonna wrap up my review and install for the Flowmaster FlowFX Direct-Fit Active Exhaust Muffler, available for the '09 to '18 5.7 liter RAM 1500s, with the Factory Dual Exhaust. Now, if you don't have a factory dual exhaust, obviously, this one's not gonna be for you because it's built with a dual outlet. But there are other options out there for you in the category. Either way, get yours right here at americantrucks.com.

      Product Information

      Features, Description, Reviews, Q&A, Specs & Installation

      Features & Specs

      • Produces a Deep, Aggressive Exhaust Tone
      • Facilitates Efficient Exhaust Flow to Increase Horsepower and Torque
      • Direct-Fit, Power Chamber Muffler Design
      • Made From Premium 3-Inch, Mandrel Bent 409 Stainless Steel Tubing
      • Natural Brushed Finish
      • Features a High-Quality, Wireless Controlled Actuator Valve
      • Dual Rear Exit
      • Bolt-On Installation
      • Backed by a Limited Lifetime Warranty
      • Made in the USA
      • Designed for All 2009-2018 5.7L RAM 1500 Models With Factory Dual Exhausts

      Description

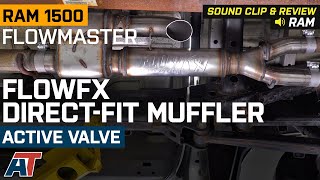
      All-Terrain Confidence. Elevate your RAM 1500’s powerful presence by letting out a fearless exhaust sound through the Flowmaster FlowFX Direct-Fit Muffler with Active Valve. This muffler is designed to produce a deep and aggressive exhaust tone, and features a constant power by means of a push button that regulates the wireless controlled actuator valve.

      Performance Boost. The FlowFX Direct-Fit Muffler offers superior capabilities in scavenging and refocusing of the exhaust gases. Its Power Chamber and W.A.V.E technology™ (Wireless Active Valve Exhaust™) innovatively regulate precise phase shifts to maximize power gains. Furthermore, the resulting increase in horsepower and torque provide the truck with a significantly improved overall vehicle dynamics, both on and off the road.

      Reliability and Toughness. Flowmaster ensures long-lasting functionality of this FlowFX Direct-Fit Muffler by using high-grade 409 stainless tubing. This fully welded, 3-inch tubing is engineered to resist corrosive attacks and handle extreme temperatures. Moreover, the full, seamless welds and the premium band clamps eliminate leak paths and offer extra durability.

      Seamless Compatibility. This exhaust system installs directly into the factory mounting points of your vehicle. It includes all the necessary hardware for a hassle-free installation process that requires the use of simple hand tools with moderate mechanical skills.

      Application. The Flowmaster FlowFX Direct-Fit Muffler with Active Valve is specifically designed to fit all 2009-2018 5.7L RAM 1500 models with Factory Dual Exhausts.

      Shop All Truck Parts And Accessories

      Shop All Truck Exhaust

      Shop All Truck Mufflers

      Fitment:

      Details

      Flowmaster 717900

      CA Residents: WARNING: Cancer and Reproductive Harm - www.P65Warnings.ca.gov

      Installation & What's in the Box

      Installation Info

      What's in the Box

      • (1) Muffler With Valve Assembly
      • (1) Actuator Mount Assembly
      • (1) Valve Assembly
      • (1) Actuator Assembly
      • (1) Key Fob
      • (1) Three-Inch Band Clamp
      • (2) 2.25-Inch Band Clamp
      • (1) Wire Assembly
      4.6

      Customer Reviews (73)

        Questions & Answers

        10 More Questions

        Will It Fit My Ram 1500

        • 5.7L V8 - 09, 10, 11, 12, 13, 14, 15, 16, 17, 18