Talk to a Ram 1500 Sales Tech
1-888-706-1096
M-F 8:30A-11P, Sat-Sun 8:30A-9P
$20K Sweeps! 10 Chances to Win! Enter Daily >

Diablosport Trinity 2 Platinum Tuner and Modified PCM Swap Kit (2018 5.7L RAM 1500 w/ 8-Speed Transmission)

Item R111666
Verify parts fit and get product recommendations.
Ram 1500 Sales Techs: Connect Now M-F 8:30A-11P, Sat-Sun 8:30A-9P
$0.00
Our Price

$1,332.95 (each)

FREE Shipping Market Price $1,532.99 You Save 13% ($200.04) Up to 10% off for Military & First Responders! See Details

Will this fit your Vehicle?

Select a different vehicle Help?
Update or Change Vehicle
Out of Stock

Ship to: Ashburn - 20149
Sorry, please enter a valid US or CA postal code
We're sorry, zip can't be updated at this time.
    Create a list
    Add to New List

    Saved - View your saved items

    We're sorry. We couldn't save this product at this time.

      Product Videos

      Jake: Jake here for American Trucks, and today we're taking a look at the DiabloSport Trinity 2 Platinum Tuner with the modified PCM swap kit, fitting 2018 5.7-liter RAM 1500s with the eight-speed automatic.The DiabloSport Trinity 2 is gonna be perfect for the 2018 RAM 1500 owner who wants to get the most performance possible out of their truck. Whether you've got simple bolt-ons, a ton of mods, or even if you're just looking to optimize your stock truck, this is a complete tuning setup that can be used as a plug-and-play system or one that can even accommodate for additional custom tunes. So it's about all you're ever gonna need to extract the full potential out of your Hemi.Manufacturers tend to keep their stock tunes a bit on the conservative side for a number of reasons. And if you've added any type of performance mods to your truck, you know that they're not always gonna get the advertised results either. But the Trinity 2 Platinum Tuner from DiabloSport is gonna give you plenty of options to unlock some hidden potential in your truck and in its modifications.Now, the unit comes preloaded with some calibrations from DiabloSport that are gonna be pretty well-matched to your truck right out of the box. So you can install everything, upload a tune, and be on your way. You're also able to customize those tunes further to match your particular truck setup as well. Plus the unit can accept other custom tunes should you choose to go that route. It also features the ability to modify other parameters within the ECU, such as top speed and rev limiters, shift points and firmness in the transmission, and your spark timing or air-fuel ratio, just to name a few.And beyond even those things, you have the ability to disable active fuel management and ESP. There's even the ability to adjust the sensitivity of the throttle pedal essentially negating the need for a throttle controller. But believe it or not, there is still more. In addition to all those parameters that you can modify, the unit also has the capability to record performance data, things like 0 to 60 or 1/4-mile times, and there's even an onboard data logger so you can monitor the ECU and all those different pieces of information while you're going for a rip. Diagnostics are also included, so if you happen to get a check engine light, the unit can also read and reset codes.Now, this kit comes with an unlocked PCM unit as well, making swapping in over a cinch. Now that PCM that's included is ready to accept custom tunes, it's already unlocked, and it's a plug-and-play swap with your truck. Now, there's no core exchange here either, so you can hang onto your stock one in the event that you want or need to return the truck to completely stock. Now, the Trinity 2 unit itself is comprised of a high-resolution 5-inch capacitive touchscreen with swipe functionality. So it makes it very easy to navigate and program, and there's a minimal learning curve.It's also a nice-looking display that you can mount in your truck for easy access and some additional engine information while you're out on the road. Like I mentioned earlier, you can have that display set up to display additional information while you're driving. There's also built-in WiFi that allows for over-the-air updates so you can keep your truck and the system up to date without any fuss, and, of course, you can update it with a hardwired connection too. Now, with all this good stuff baked in, you can bet that this one isn't gonna come cheap.Pricing for this setup is going to come in at about $1,400, putting it at the top of the category. That old adage, you get what you pay for, comes to mind here when I look at this, and you're getting a lot for your money, so think it holds true in this case. There's also no need to worry about being able to return your truck to stock should the need arise either, so you're really getting a nice complete setup. Installation is gonna get a one out of three on our difficulty meter, and it should take you about an hour to complete.Now, the process itself is essentially plug-and-play, but keep in mind that you do have to swap out that stock PCM for the one that's included in the kit. So it is gonna take a little bit longer than simply plugging in a throttle controller or a code reader. And to show you just what's involved, let's throw it over to one of our AT customers.Nick: Right, tools used during this build. All right, from left to right, I have a magnetic tray to put my bolts in, I have a ratchet, a 7-millimeter, a 10-millimeter, and then an extension. If you don't have those, you can always use a 7-millimeter or a 10-millimeter drive, and a screwdriver, a Phillips screwdriver. You'll need the Phillips screwdriver if you don't have a 7-millimeter socket or drive. And then a trim removal tool or a flathead screwdriver if you don't have that. Also, use a pair of snips to trim up your zip ties once you get those installed. A light is always handy to help out, and you will need a computer whether it's a PC or a Mac. Inside the engine bay, you're gonna be using the 10-millimeter, either a ratchet or the drive. And then inside the cabin, you're gonna need the 7-millimeter or the Phillips screwdriver and either your trim removal tool or a flathead screwdriver.Hello, my name is Nick Falcon. And today we're gonna change out the powertrain control module and install a Diablo Trinity 2 Tuner into a fourth-gen RAM 1500 with a 5.7-liter Hemi. The powertrain control module or PCM needs to be changed on these because Dodge/RAM lock them to an everyday driver performance standard. And if you want to get the most out of this engine, you need to unlock that PCM and install a tuner.The first step is to disconnect the negative battery terminal. You're gonna use a 10-millimeter socket or drive to do that, and you wanna do this so you don't cause any shorts within your system. After you loosen that, go ahead and remove it, push it to the side, so it is out of the way. The PCM on the fourth-gen RAMs should be on the left-hand side next to the firewall. If you have a stock air intake, you may want to take that out, but since I have a cold air intake installed, that is aftermarket, I have the room to work here.To remove the stock PCM, the first thing you need to do is unhook the cables for the terminals. And to do that, there's a little black button here, you push in on that with your thumb, then lift up the red lever until it disengages, and then just wiggle it off, and push that to the side. Then you will do the same on the other terminal. To remove the PCM from the firewall, you're gonna either use a 10-millimeter socket or a 10-millimeter drive. I use a drive because it's a little bit easier to get in here. And then you're simply gonna unscrew. There are three screws, there's one on the driver's side, then two on the passenger side, one on the top, and one on the bottom here. Make sure you unscrew those, and collect those because you will need these later. I have a magnetic tin here that I use, and I'll put those in there.As you get that third one off, you see it moved a little bit on me, so I'm just gonna reach in, make sure I support it so it doesn't fall because we want to save our stock PCM in case something goes wrong and I need to take this back to the dealership. I can put the stock PCM on if I need to. Right, then after that last one is removed, you can see it free-falls off and comes right out. Here, you can see the PCM sitting side by side. On the left is a stock PCM. On the right is the unlocked PCM from DiabloSport. They are almost exactly the same. The only way I can tell them apart is that my stock PCM is a little bit dirty, it has some wear and tear on it while the unlocked PCM is nice, shining, and new-looking.One way that you can try to tell them apart is to put some sort of marking on your unlocked PCM so you can identify it and you'll know which one will be that unlocked PCM, and you want to have that unlocked PCM marked because if you ever want to sell your truck or take in to a dealership, you may want to put the stock PCM back on it. So you're gonna want to take this one, set it to the side somewhere where it's nice, safe away from the weather so you have that later. To install your new PCM, it is the exact opposite of the uninstall. You're just gonna take your three bolts and reinstall them.Line your PCM up, and start your bolts, number one on the driver's side, two on the passenger side, and I will hand-tighten them, and then I will bring in my driver and firm them up to where they are snug. And you don't have to crank these in there, they're going to be overtight. Just make sure they're nice snug so they're not gonna come out accidentally. And give them one little quick. And then your last step is to plug in these outputs. You simply push it in, and they're matched up, they're color coded so you have a tan and a tan. You're just gonna push that in as far as they'll go and then rotate that red handle down until you feel it click. Then you give it a little tug, make sure it doesn't come off, same thing, gray to gray, push it in, rotate that handle down until it clicks, and it won't come back up, give it a little pull, and good to go.Next, you can go ahead and reinstall your negative battery terminal. Go ahead slide it on, push it down, and tighten it up. After installing the unlocked PCM, you need to go into the cab of your truck, insert your key if it's key-driven, or if it's a push button, you want to push the start button twice for the push button without hitting the brake, and that'll put it into the ignition mode. For the key-driven, insert your key, and move it to the run position for at least five seconds. Right after that, turn your key to the off position, or if it's the push button, press your start button again. And then after that, you can start your vehicle. As you could hear, when I push the accelerator, my engine revs quite a bit. Still feels like the stock right now, but that should change after I install and update a tune.For the next step, you're gonna need a computer, it could be either a Windows or a Mac-based computer, and you're gonna want to go to DiabloSports.com/downloads and download the update agent. If you scroll down, you'll see you have one for PC here on the top then one for Mac. You're just gonna click that and accept, let it install, download, and then open the execution file. Right. And I already have it installed on my computer. But you're just gonna follow the prompts and make sure that you get the most up-to-date update agent.Right after it's installed, you're gonna find the update agent icon, it's a red with kind of like a starburst on the right-hand side, and open that up, and it's gonna tell you to connect the device. So you're gonna take your USB cable, plug it into your computer. And then you're gonna plug it into the tuner itself, and that plugs in on the bottom in the center right here, and you just plug that in. Right after that, the DiabloSport emblem comes up, and it's telling me the software will locate the device once connected. That emblem comes back up again, shutting down, seems like it's doing something here. The screen just changed colors, shut off, and my computer's telling me it's setting up the device right now. It is checking for an update, it's reading it, and I have here on the device itself a warning and agreement telling me that DiabloSport's not liable for anything or third-party tunes, and if I agree, and I'm gonna hit yes.The update agent is telling me that I have updates available for my device, and I am gonna click yes because I do want to install them, and then it's gonna download the files. All right, and I wanna make sure that I have the most up-to-date software for the update agent and for the tuner to ensure that everything works smoothly because as DiabloSport and RAM find out issues, they can potentially fix them through the tune. And all the files are now downloaded, and they are installing into the device.All right. It's telling me that the update's been installed and to follow the instructions displayed on the device. Then you can see the screen changed on the tuner itself. Kind of looks like the files have installed, and the unit is restarting itself. All right. And the update agent is now telling me that my device is now up to date, and then if there's any optional downloads, they'll show here. But as you can see, there are no optional downloads for my device.After that, we can go ahead remove it from my computer, and shut down the update agent program, and start the install into the truck.The next step to install the Trinity tuner is to remove a couple of pieces of trim. First piece we're gonna remove is right here inside the driver's side door, the side dash panel, and you can either use a trim removal tool or a flathead screwdriver. If you use a flathead screwdriver, make sure you're being careful so you don't nick it up. This is fairly tight. To remove this, since I have a trim removal tool, I'm gonna use that. All you gotta do is find a spot where you can get underneath it or right down here on this bottom. It doesn't seem like the kick panel goes down all the way. So you can kind of get down underneath there, get your tool underneath it, and then just slide it up, and you'll feel and hear those pieces come out. Rotate it towards the front of the truck, and then you can kind of pull it out of there. And you see there's five spots here for those go in.And one of these little plastic guys did not come out. You can leave it in there if you want. It should go back in, but I'm not gonna risk it. I'm gonna take it out and reinstall it here. And this will give you access for you to install your cable up the side here and then out onto your dash. We'll go over that a little bit later. You really don't have to do this if you don't want to, but it does make for a cleaner install. All right, so I'm just gonna take that piece and set it to the side. All right, the next piece of trim that we're going to uninstall is going to be the kick plate. Here, the knee plate, there's two bolts/screws I need to remove. One is here next to the OBD-II port, and the other is on the inside, next to... I have the console, so it's up here next to that console. Those are a 7-millimeter or a Phillips-head.All right. To undo those, we're simply going to use that, either a ratchet, or a driver, or a screwdriver, to get those out. Then once those are off, it should come out fairly easily. There's a few clips in there and some wires. If you want, you can remove these so you can pull that piece completely out. But we do not need to do that for this install. All right, so the next thing we're gonna do is install the OBD-II gateway bypass. And to do that, the first step is to take the white plug of these two, and you're gonna plug it into any of the open ports that is on this green box. There's usually a couple in here, you can see I have one here and one here, and then this green cable is not used at all for the install on the Dodge RAM. Right after that, we can go ahead and reinstall our kick panel. Installing the kick panel is the exact opposite of when you uninstalled it.Take your OBD-II port and run it up here through the center. Make sure none of the wires are in the way, and we will clean that up a little bit later once we have everything installed, and we can settle things in the way we want. These yellow tabs here slide into these multiple holes, and you're just gonna take that up, and find them, and you start just pushing those in, and they will click into place. After that, take your two screws and reinstall them back into the appropriate holes. Next, you're gonna take the OBD-II bypass cable, and you are gonna plug it into your OBD-II port.Right. Then after that, you can take your cables and wind them up, get them outta your way so they're not in the way of your clutch if it's a manual or your brake or gas pedals or your parking brake for your automatic vehicles. We'll do that later after we get all the other cables installed. We'll zip-tie this up out of the way because I don't know how I wanna run my other cables yet. All right, the next step is to install the OBD-II cable to the tuner. To do that, I'm gonna go to my side panel, I'm gonna feed my OBD-II port down the side, find it, kind of weave it through there to wherever it's usable for you to get it so you can feed it out to the OBD-II port underneath.And then I'm going to take the other end of my cable here, and I'm just gonna run it up underneath the dash here as far back as I can get it, or if you've got really small hands, you can try to feed it up through here behind this little brace. I don't have those little small hands, so I'm just gonna feed it up through there as far as I can. And once again, I'm just gonna let this hang for now until I figure out where I'm gonna mount my tuner to the dashboard, and then I will clean up my cables after that. Right. Once you get that ran, you can go ahead, come down here to your OBD-II port, and you're just gonna take the tuner here and plug it in to your OBD-II gateway bypass.Next, we're gonna install the tuner onto the window. To do that, you're gonna use your suction cup mount and the alcohol pad. Go ahead, clean your window wherever you're gonna mount it. Make sure you have somewhere good where you can view it, get all the debris off. To operate the mount, it's this little lever here. You're gonna take it, stick it up to your window, and then push that lever up, and it changes the shape of the suction cup to help it suction to the window. Once you have that installed, to adjust the view on your tuner, there's a little ring here, and you can turn that to tighten or loosen the mount for it. if I can get it right, loosen it up, moves freely, then when you get in position, you can tighten it into place to how you like it. And then it has like a little firm where you can do your micro-adjustments after that. All right, but I'm gonna keep kind of loose until I get it where I want it.Go ahead and take this, put it up to my window, and flip that little lever up. Right. The next step is to take your tuner, and you're gonna plug the HDMI cable from the OBD-II port into this HDMI socket here and plug those in, and then you're gonna slide the tuner over the post in the mounting bracket. All right, and then once I have it where I can view it fairly well, I am going to tighten that down. Right now that the tuner is installed, we are going to install a tune. You're gonna do that by hitting tuning. It's gonna gather your information, and I am going to tune my vehicle. You can figure out some more information about your tunes here by hitting these information buttons here. I'm running 93 octane gas, and the lowest I ever run is 91 octane. So I'm gonna do the Diablo tune. I also want to tune my transmission, so this will do the TCM as well as that PCM.And for the performance tune here, as for stock to mildly modified vehicles, I would say mine's mildly modified, else I have really for performance installed is this tuner, and some custom exhaust, and a cold air intake. All right. Or you can modify your stock tune if you're into that. So I'm gonna select a performance tune, and I'm gonna tune it as is. And I've hit install, and it's telling me I'm doing the Diablo tune and the performance trans tune, and I did not adjust any of the settings. I'm gonna accept and install. And it is writing the tune to the PCM. All right, telling me to turn the ignition to off and press the screen to continue. All right. Right now that the tunes are installed, you can go ahead and start your engine.Right, I'm already noticing a big difference. You can go ahead and load different gauges here as well. As I touch on the gas, you guys can hear a roar as well. I'm getting almost immediate response from the throttle much better than over the stock. To install a tune, it's fairly simple. Put your key into the run position and then select tuning and then tune vehicle. Since I run either 91 or 93 octane, I'm going to do the Diablo tune, and I'm gonna do performance trans tune. On any of your tunes, you can look here on this right-hand side, right? And back on the performance tuning, the engine tunes has it again, where it'll give you more information about them. Select the Diablo tune and the performance trans tune.And I wanna make sure I do both so I get the best performance out of my engine, and select my performance. And then it's gonna ask me if wanna continue. Yep. And it's gonna read the factory data and the original data, and it will make a backup of it. And this is important, to have this backup, in case you ever want to go back to your completely stock system and those setups. Right now that my TCM is backed up, I am going to install the tune as it is. Once again, I have the Diablo tune, and the performance trans tune. I'm gonna accept and install, and then just follow the prompts on the screen. All right, so let me turn my ignition off. So I'm gonna turn it off, and press screen to continue. It's gonna continue writing the tune, tells me to turn ignition back on to run. Do not start your engine, and press the screen to continue.All right. And it says it's been successfully tuned, and press continue. Takes me back to the main menu. All right, now that the tune is installed, I am going to go to the gauges and logging. And then after that, we will start the engine to see what kind of quick performance we get out of it as far as how much better our throttle response is, and maybe we can hear a little difference in the exhaust as well. So it's given me a tutorial to kind of go through, and we'll disable that. So, now, we'll just start it up real quick, and we'll see how responsive the truck is. So here, if you double press that, you can change what that gauge does. And I wanna show you guys RPMs here, so we will do that here.As you can see, there's a ton of different things that you can pick for each of your different items, and we'll see if that is our... Yep, okay. So the engine speed is your tachometer on here, so we'll save that. All right, so in the middle here is our load, how much throttle we're giving it. And then you'll see the tachometer there on the left-hand side. Let's go ahead and start this baby up.Jake: That's gonna wrap it up here for our review and install of the DiabloSport Trinity 2 Platinum Tuner and Modified PCM Swap Kit for 2018 5.7-liter RAM 1500s. Thank you for watching, and remember, for all things RAM, be sure to keep it right here at americantrucks.com.

      Product Information

      Features, Description, Reviews, Q&A, Specs & Installation

      Features

      • Improves Horsepower, Torque and Overall Performance
      • Platinum Version - Supports Custom Tuning
      • Holds Up to 5 Custom Tunes - Available Separately
      • Pre-Loaded with Pre-Configured DiabloSport Tunes
      • High-Resolution Capacitive Touch Screen Display
      • Easy to Understand Graphic Interface
      • On Screen Gauges, Data Logging and Monitoring
      • Performance Testing
      • Reads/Clears DTC Trouble Codes
      • Not CARB Certified
      • Updatable via WiFi, Mac, Windows or Linux
      • Includes Trinity 2 Platinum Tuner and Modified PCM
      • No Core Exchange Required
      • Fits 2018 5.7L RAM 1500 w/ 8-Speed Transmission Models

      Description

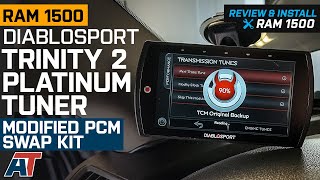
      Increase Power and Performance. Further enhance the performance of your vehicle with a Trinity 2 Platinum Tuner and Modified PCM Kit. The Trinity 2 Platinum Tuner supports third party custom tune files and also comes preloaded with Diablosport's very own pre-configured tune files. When your vehicle rolled off the assembly line, the manufacturer programmed it to cater to the needs of the daily driver, not the performance enthusiast who adds aftermarket bolt-on modifications in the search of more power. So, if your vehicle is bone stock or if you have added a cold air intake, throttle body or exhaust mods, you should invest in a Diablosport Trinity 2 Platinum Tuner to see the full power potential your mods can make.

      User Adjustable Parameters. The DiabloSpor Trinity 2 Platinum Tuner features end user-adjustable parameters so you can further customize the tune to maximize the performance of your modifications. These parameters can be adjusted on DiabloSport Pre-Configured Tunes, custom tunes and/or the stock tune. Please note not all adjustments are available on all models/vehicles.

      • Calibrate Speedometer for Gear Ratio
      • Calibrate Speedo for Tire Size
      • Cooling Fan Control
      • Disable ESP
      • Throttle Booster
      • Fuel Rich/Lean Adjustment
      • Spark Timing Advance/Retard
      • Idle RPM
      • Top Speed Limiter
      • Rev Limiter
      • Shift Points/Firmness - Automatics
      • Disable Active Fuel Management

      Performance Testing. Another really cool feature of the Trinity 2Platinum Tuner is that it allows you to measure your 0-60 time, 0-100 time, 1⁄8 mile elapsed time, and 1⁄4 mile elapsed time, all with just a push of a button. By keeping track of your 0-60 and 1/4 mile times you can see the difference your latest go fast mods have made.

      Built-in WiFi. The Diablosport Trinity 2 Platinum Tuner is WiFi-capable, meaning you will no longer have to plug it into your Mac, Windows or Linux computer to receive the latest Diablosport firmware updates, but that is still an option. Once setup with your Wi-Fi password, the Trinity 2 will download the latest firmware updates via the internet.

      Data Logging and Monitoring. With a full color, high-resolution touch screen display, the Diablosport Trinity 2 Platinum Tuner makes it easy to read the Built-In Data Logging and/or the Real Time Data, so you can view popular sensor data such as EGT, Air/Fuel Ratio or any other 0-5 Volt source.

      Diagnostics Tool. The Trinity 2 Platinum Tuner can also be used as a diagnostic code reader. Save yourself hundreds of dollars each year by reading and clearing your own Diagnostic Trouble Codes (DTCs) rather than paying a dealer to do the same. It's as easy as a few simple steps.

      Easy to Load; Easy to Restore. When you load a tune on your vehicle, the tuner automatically stores your vehicle's factory settings. To return to the original factory settings, just plug the tuner back in, select the option to restore the factory settings, and you're done. This is ideal for visiting dealerships for warranty work.

      Not CARB Certified. The Trinity 2 Platinum Tuner is not CARB certified, therefore it is not legal for use in California or any other state adopting California emission standards. Not intended for use on pollution controlled motor vehicles.

      Modified PCM Included. This Trinity 2 Platinum Tuner Kit includes an unlocked PCM, so you can tune your vehicle right away with no hassle or waiting. There is no core exchange required, so you can keep your stock PCM safe and unaltered as a backup.

      Application. This Diablosport Trinity 2 Platinum Tuner and Modified PCM Swap Kit is designed for use on 2018 5.7L RAM 1500 w/ 8-Speed Transmission Models.

      Fitment:

      Details

      Diablosport PKITDR578S18-T2

      CA Residents: WARNING: Cancer and Reproductive Harm - www.P65Warnings.ca.gov

      Installation & What's in the Box

      Installation Info

      What's in the Box

      • (1) Trinity 2 Platinum Tuner
      • (1) Modified PCM
      • (1) OBDII to HDMI Cable
      • (1) USB to Mini-USB Cable
      • Windshield Suction Mount
      • Quick Start Guide
      4.8

      Customer Reviews (43)

        Questions & Answers

        10 More Questions

        Will It Fit My Ram 1500