FREE 1 to 3-Day Delivery on Orders $149+ Details
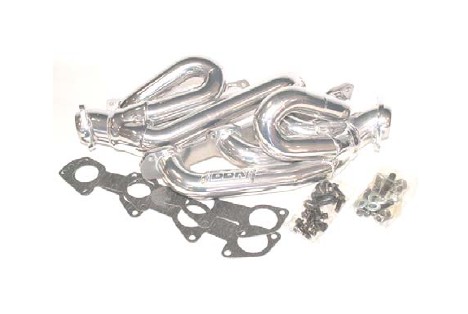
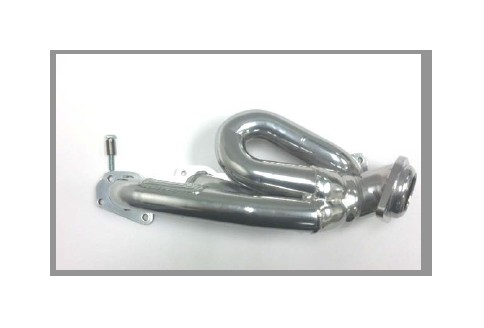
How to Install BBK 1-3/4 in. Tuned Length Shorty Headers - Ceramic on your Ram

Shop Parts in this Guide
STEP 1: Disconnect the negative battery terminal. Lift the vehicle as high as possible.
STEP 2: Unplug the 4 oxygen sensor plugs coming off the front and rear of the mid-pipe section.
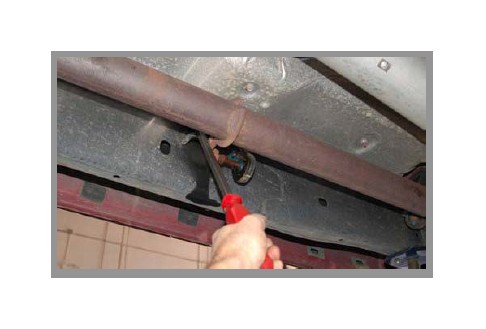
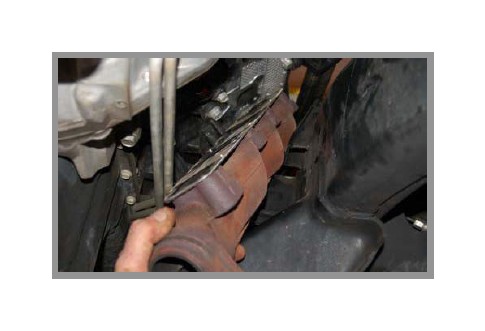
STEP 3: Unbolt the downpipes/cats from the exhaust manifolds. Using a pry bar, slide the whole exhaust system back on the metal rod hangers. Move it back far enough that the exhaust manifolds can be removed. It just takes a few inches and its out of the way. NOTE!!! Be sure to use WD-40 on the hangers to allow the exhaust system to slide back easier.
STEP 4: Remove the four nuts that hold the heat shields to the exhaust manifolds and remove them.
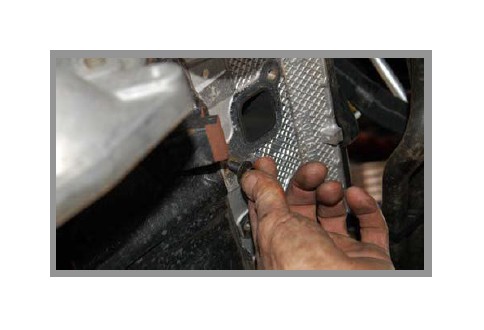
STEP 5: Unbolt both exhaust manifolds and remove from the vehicle. Also remove the stock gaskets.
STEP 6: To aid in the installation, the 2 rear bottom bolts need to be threaded halfway into the head because the tight fit of the tube will not allow them to be installed after the header is fully on. This needs to be done on both sides of the engine. Use the provided header bolts. You can install the gaskets on the head and hold them down with the pre-installed bolts.
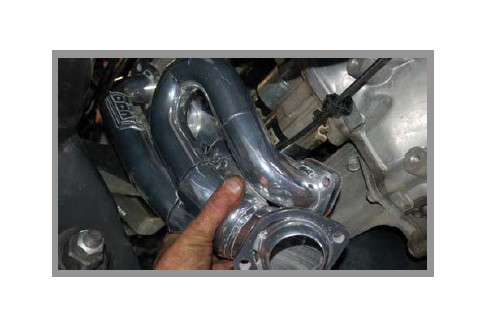
STEP 7 (Passenger Side): On the passenger side the engine needs to be lifted a bit to install the header. Loosen the motor mount bolt and raise the engine. Install the supplied gasket and BBK header and then lower the engine back down. Tighten all the header bolts from center out in an X-pattern.
STEP 8 (Driver Side): On the driver side, the steering shaft needs to be unbolted and moved to the side and the engine needs to be lifted. Install the supplied gasket and BBK Header into place and tighten in an X-pattern. NOTE!!! On 2009-2014 Models Leave the front top hole with no bolt. The longer header bolt that is supplied will be used when re-installing the dip stick tube.
STEP 9: After lowering the engine back down make sure both motor mounts are tightened. Install the provided studs into the collector flanges on the BBK Headers.
STEP 10: Work the exhaust system back up to the headers. Connect the stock exhaust flanges to the BBK Headers using the provided hardware. Tighten the collector studs on both sides, drawing the downpipes tight as you do, and reconnect the oxygen sensor plugs.
STEP 11: Check the rubber hanger on the exhaust system for proper placement after moving the exhaust back and forth, to be sure none of them are falling or came off.
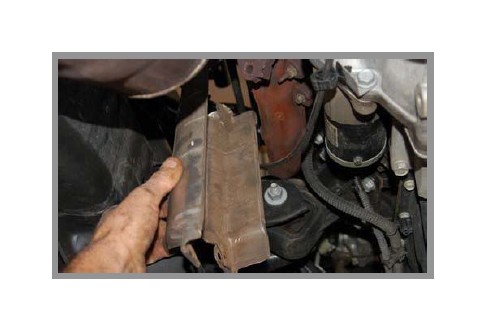
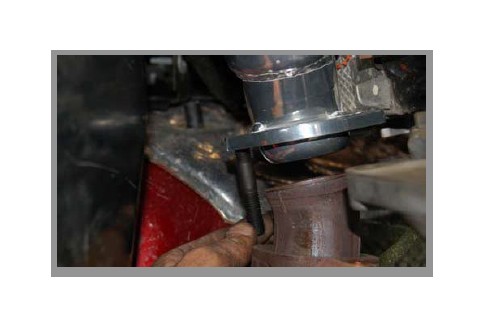
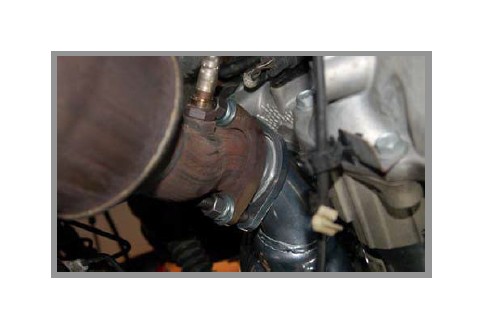
STEP 12: Lower the vehicle down and re-install the dip stick tube. NOTE!!! On 2009-2014 use the supplied spacer and longer header bolt, re-install the dip stick tube on the top front header bolt hole as shown above.
STEP 13: Re-connect the negative battery terminal. Start the engine and check for any leaks. Header bolts should be re-tightened after 100 miles of driving.