FREE 1 to 3-Day Delivery on Orders $149+ Details
How to Install Amp Research BedStep2 on your Sierra

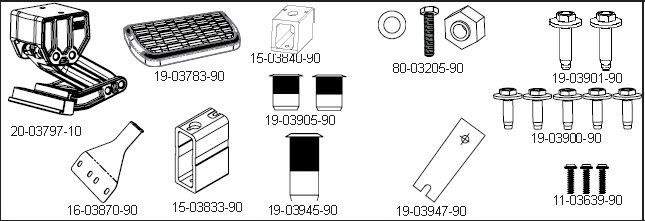
Shop Parts in this Guide
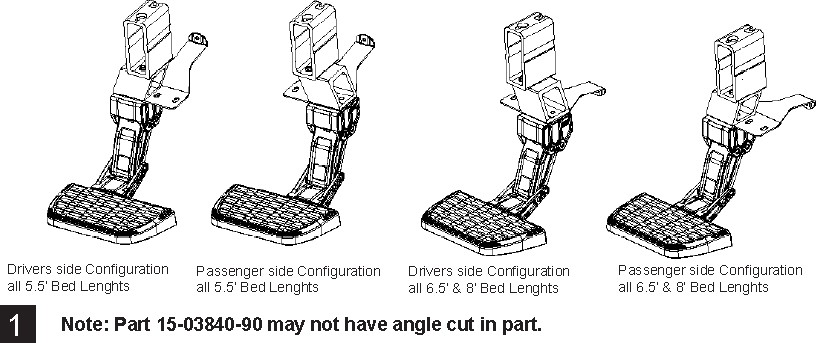
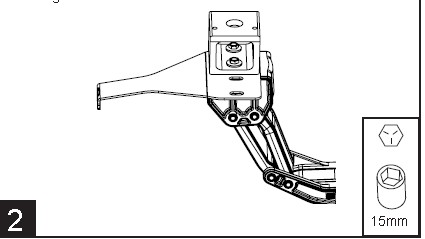
2. Using a 15mm Socket assemble Lateral Mount onto Linkage Assembly with M10 Washered Hex Bolts. Steel Frame Bracket is to be assembled between Linkage Assembly and Lateral Mount. Do not tighten bolts yet. Dirver’s side configuration shown below... see Step 1 for passenger side configuation.
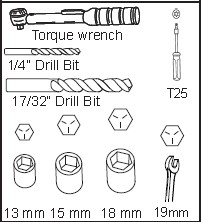
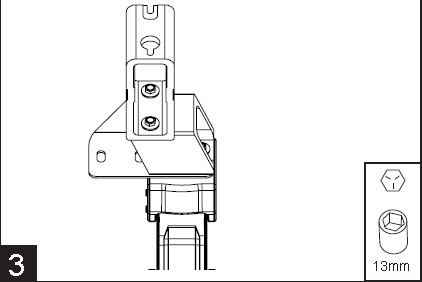
3. Using a 13mm Socket assemble Frame Mount onto Lateral Mount with M8 Washered Hex Bolts. Torque bolts to 16 ftlbs.
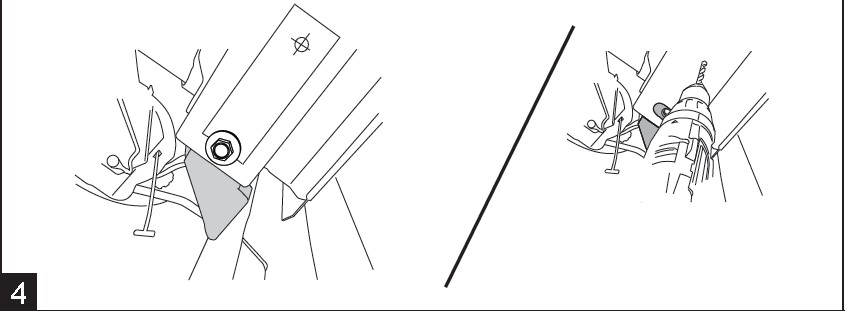
4. Using a 13mm socket, loosen M8 bolt from forward most bed channel on the underside of the truck. Loosen bolt to a gap of about 12mm (1/2”). Slide slotted end of the drill template over bolt and hold template in place with tape. Center punch hole and pre-drill using an 1/8” drill bit. Then drill to 17/32”. Apply GM Vehicle Care Super Lube to drillied surface.
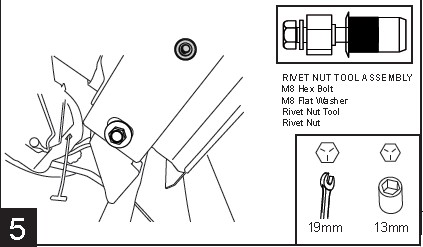
5. Install Rivet Nut onto bed channel. With Rivet nut tool held in place with 19mm wrench, tighten hex bolt until rivet nut deforms and secures itself to the sheet metal. Torque to 20ft-lbs. Remove hex bolt and rivet nut tool. See figure Figure 5a for rivet nut tool assembly. Install M8 Washered Hex Bolt into Rivet Nut, leaving gap of about 12mm (1/2”).
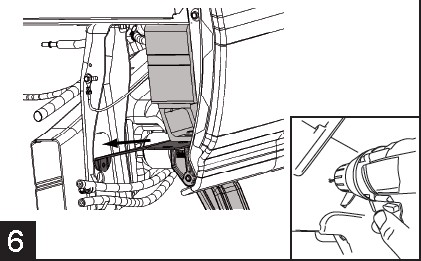
6. Lift Bedside Assist Step assembly into position, hooking Upper Mount onto installed bed channel bolts from Step 5. Snug bolts and slide Frame Bracket up to frame (in arrow direction) and mark hole location. Remove Step assembly, Center punch and pre-drill using a 1/8” drill bit. Then drill to 17/32”.
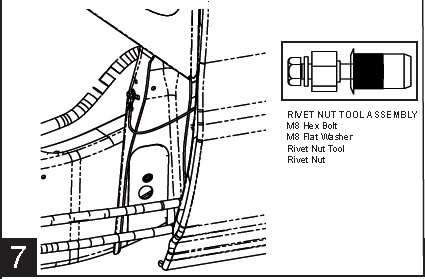
7. Install Rivet Nut onto frame rail just behind truck bed frame mount, just forward of rear wheel well. With Rivet nut tool held in place with 19mm wrench, tighten hex bolt until rivet nut deforms and secures itself to the sheet metal. Torque to 20ft-lbs. Remove hex bolt and rivet nut tool. See figure Figure 7a for rivet nut tool assembly
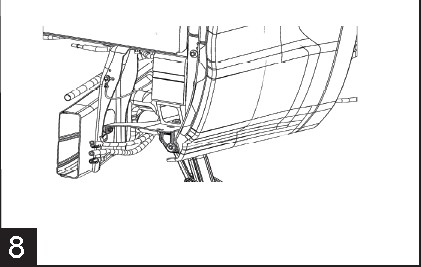
8. Lift Bedside Assist Step assembly into position, hooking Upper Mount onto installed bed channel bolts from Step 5. Install additional M8 Washered Hex Bolt through Frame Bracket and into Rivet Nut installed on frame rail. Straighten assembly and tighten bolts to 16 ft-lbs.
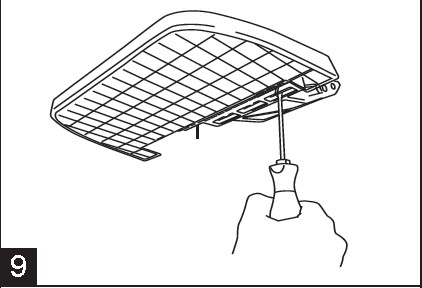
9. Place Step Pad on Linkage mounting interface. Mounting interface allows three positions, centered and offset to either side. Tighten all three screws to 5 ft-lbs. using T25 Torx Bit.
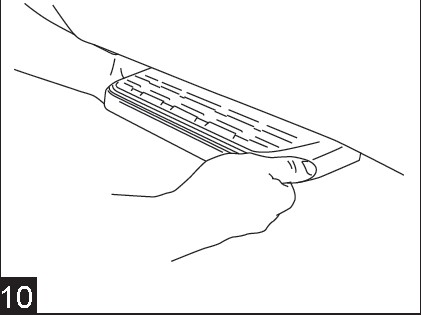
10. Adjust Step Pad to be in line with fender.
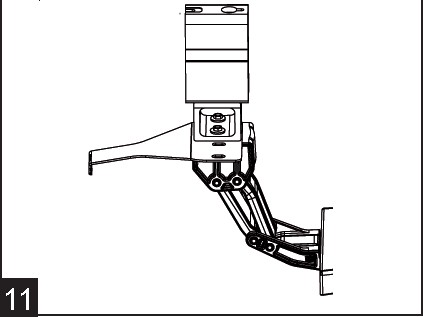
11. Tighten M10 Washered Hex Bolts using a 15mm Socket. Torque to 20 Ft-lbs.
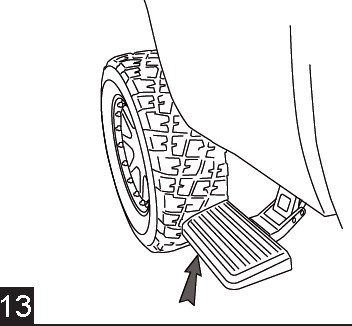
12. To deploy the step, press down using your foot on the outside edge of the step pad.

13. To retract, gently kick up on the underside of the step pad.