FREE 1 to 3-Day Delivery on Orders $149+ Details
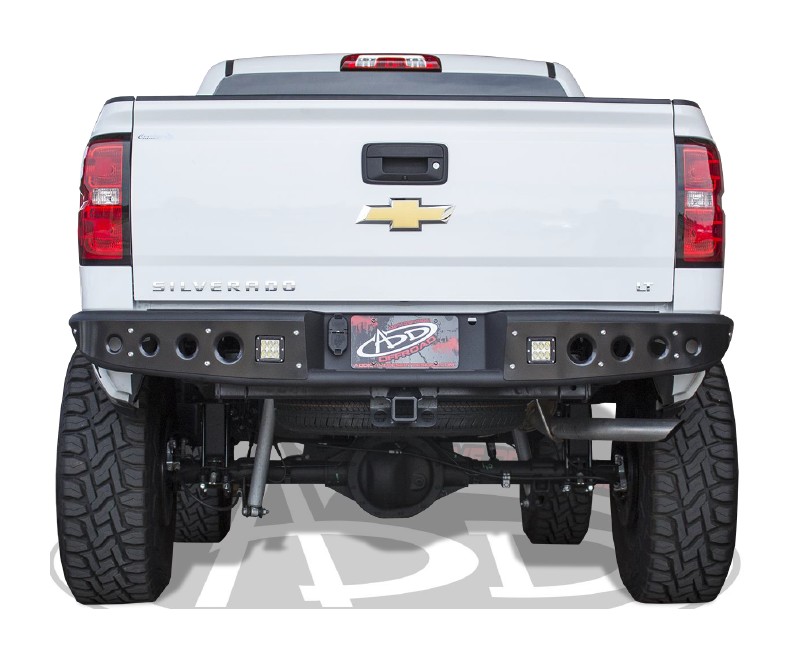
How to Install Addictive Desert Designs Stealth Rear Bumper (14-17 Sierra 1500) on your GMC Sierra
Tools Required
- Ratchet
- 13mm Socket
- 15mm Socket
- 18mm Socket
- 13/16” Socket
- Wire Strippers/Crimpers
- Zip Ties

Shop Parts in this Guide
PREPARATION
1. Disconnect the negative terminal on the battery. Park the vehicle on level ground and set the emergency brake.
2. We recommend reading through the installation instructions in whole before performing the work.
3. Estimated Installation Time: 2 Hours
4. You will need the following tools:
a. Ratchet
b. 13mm Socket
c. 15mm Socket
d. 18mm Socket
e. 13/16” Socket
f. Wire Strippers/Crimpers
g. Zip Ties
Note: this installation requires 2 people for best results
5. Included in Kit:
Reuse Stock Hardware
1 - LED License Plate Lights
REMOVAL
1. Remove your license plate.
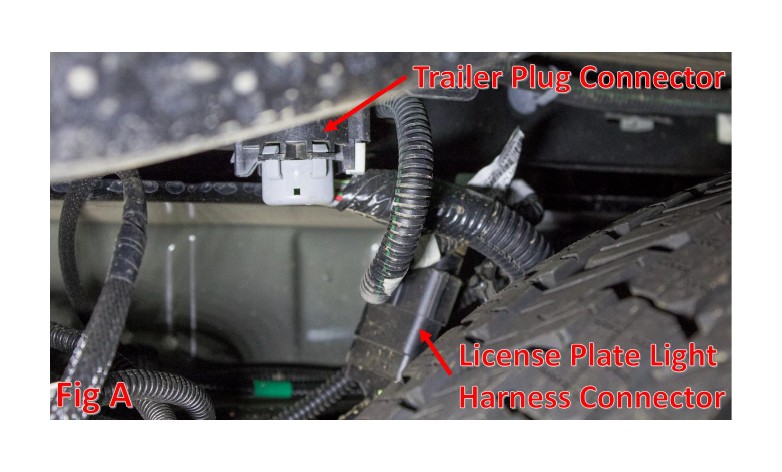
2. From underneath the truck, unplug the main license plate light harness connector (sits right next to the trailer plug connector, just above the spare tire) and the trailer plug connector. Then, remove the trailer plug from the OEM bumper by pushing metal tabs on the back side of it together and pushing the plug out the front of the bumper. (Fig A)
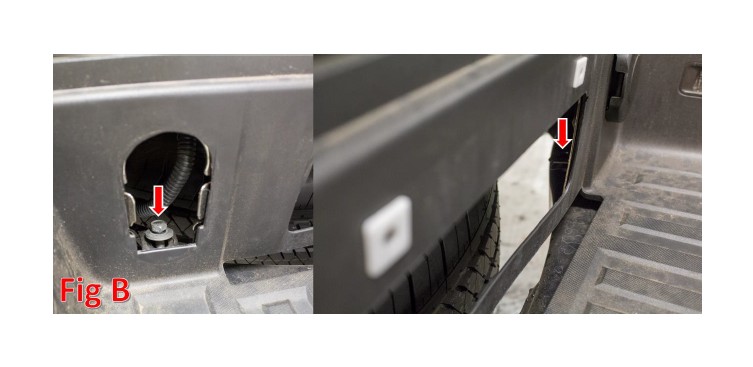
3. Remove the 13mm bolt that is directly behind the trailer plug opening. Then, remove the 13mm bolt that is in the same location on the other side of the bumper (accessible through the opening behind the license plate). (Fig B)
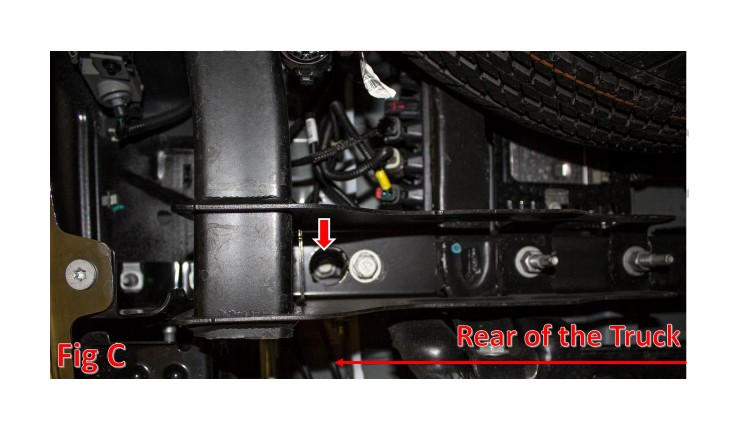
4. Remove the two 18mm Rear Bed Bolts. They are along the rear of the frame, where it meets the hitch tube. Refer to Fig C. Save these bolts for reuse.
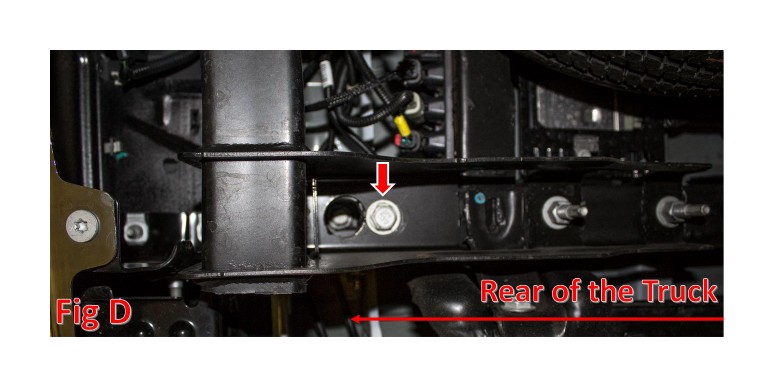
5. Remove the 13/16” Bolt directly next to each bed bolt you just removed. (Fig D)
6. Remove the two 18mm nuts and one 15mm bumper bolt per side (along the outside of the frame, just behind the rear spring hanger). Save the 18mm Bolt/Nut combination for reuse. (Fig E)

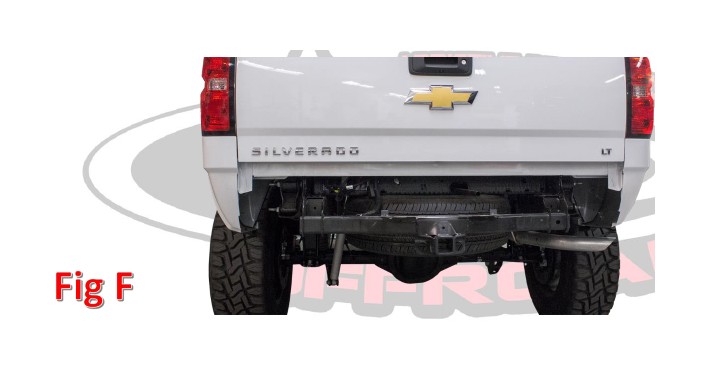
7. Lift up on the rear of the truck bed. As you have the rear of the bed lifted up in the air, slide the OEM bumper out and off the vehicle. (Fig F)
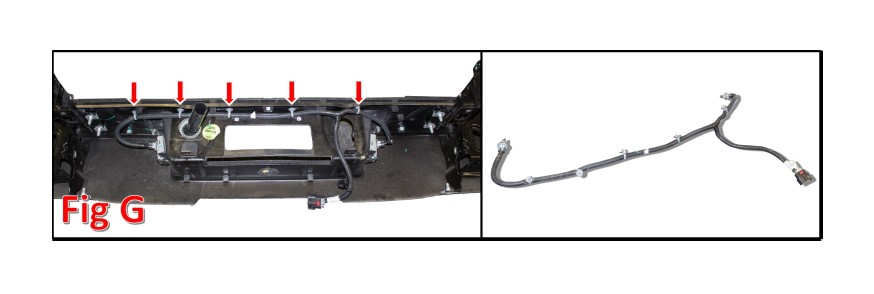
8. Remove the plastic clips holding the License Plate Light Harness on to the OEM bumper. Then, remove the harness. (Fig G)
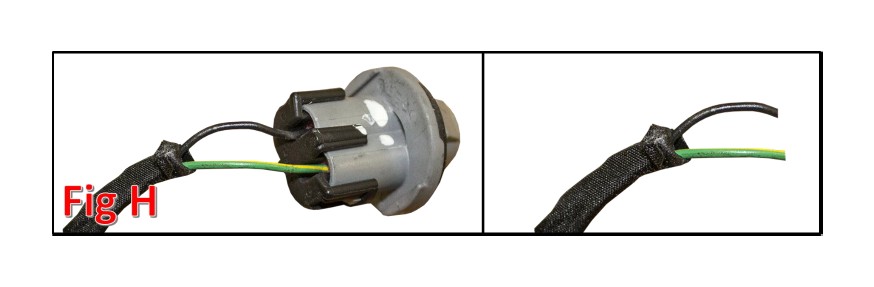
9. Cut each license plate light off the end of the license plate light harness. (Fig H)
10. Prepare to install your new ADD Stealth Rear Bumper.
INSTALLATION
1. Reinstall the OEM Bed Bolts into the same location you removed them from in Removal Step 4. Tighten these bolts to the manufacturer’s torque specification.
2. If you have any lights to install on your bumper, now is a good time to do so. Please refer to the light manufacturer’s installation instructions for wiring and mounting information.
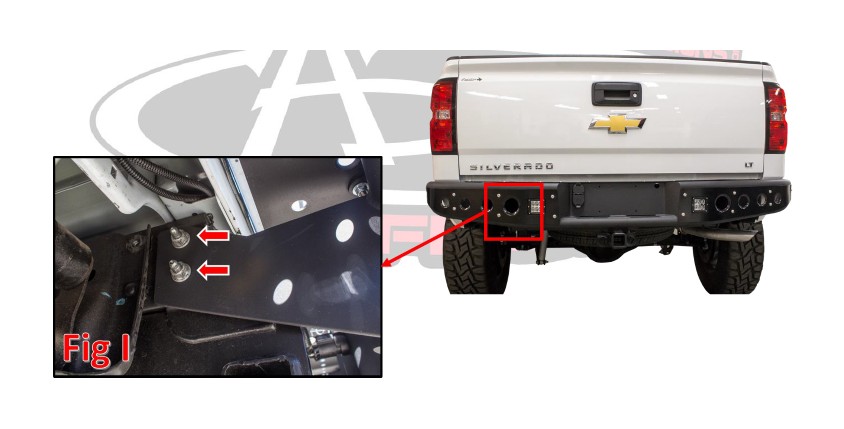
3. Set your new ADD bumper in place. Line the mounting holes on the bumper up with the mounting holes on your rear frame rails. Use the two stud/nut sets you saved in Removal Step 6 to secure the bumper to your frame. Leave these bolts finger tight for now. (Fig I)
4. Adjust your bumper to preference. Although this bumper does not have any left/right adjustment, it does have a minor amount of in/out adjustment. Set the bumper where you would like it, then tighten the mounting bolts to the manufacturer’s torque specification.
5. Install your license plate light harness onto the vehicle. Plug in the main connector, and let it hang freely for now.
6. Use the supplied LED License Plate Lights as the hardware to mount your license plate (Make sure the LED portion of the lights is facing down). Then, use butt connectors to connect your new license plate lights to the existing wires on your OEM license plate light harness. Connect the red wires from the LED lights to the green/yellow wires on your OEM harness. Connect the black wires from your LED lights to the black wires on your OEM harness. (Fig J) Once the wires are all connected, use zip ties to hold any loose/hanging parts of the harness up and out of the way.

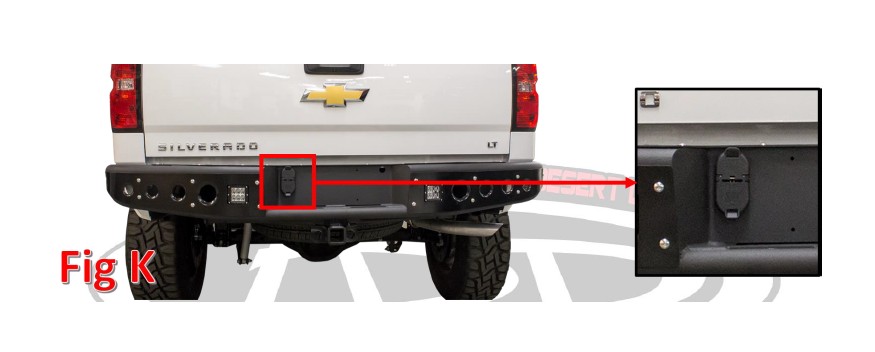
7. Push your trailer plug into its precut hole on your new bumper until it clicks into place. Then, reinstall the connector on the back side of the trailer plug. (Fig K)
8. Stand back and enjoy your new ADD Stealth Rear Bumper.
9. Check and re-tighten if needed, all mounting bolts after 100 miles and periodically thereafter.