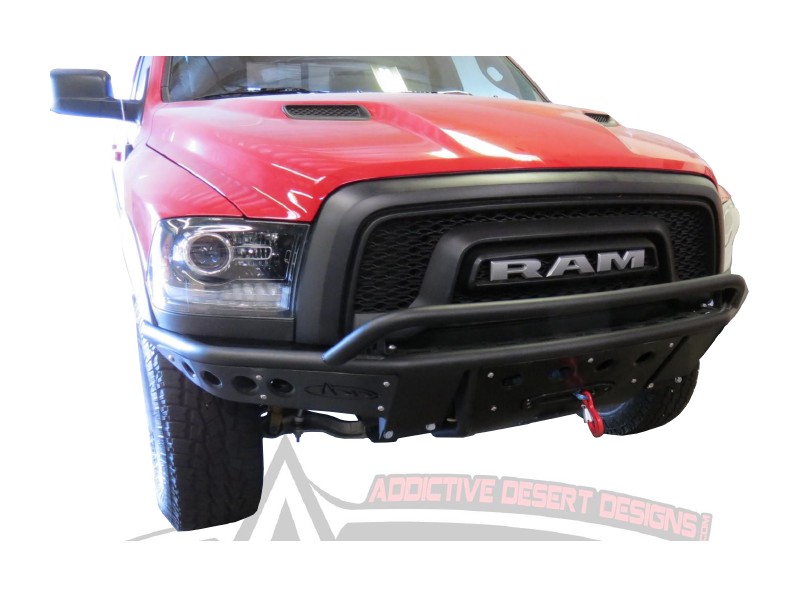
How to Install Addictive Desert Designs Stealth R Front Bumper w/ Winch Mount (15-17 RAM 1500 Rebel) on your Dodge RAM
Tools Required
- 18mm Socket
- 13mm Socket
- 8mm Socket
- 7/32” Allen Wrench or Allen Key Socket
- Ratchet
- 3/4” Socket and Wrench
- 1/2” Drill Bit
- Drill
- Cutoff Wheel
PREPARATION
1. Disconnect the negative terminal on the battery. Park the vehicle on level ground and set the emergency brake.
2. We recommend reading through the installation instructions in whole before performing the work.
3. You will need the following tools:
a. 18mm Socket
b. 13mm Socket
c. 8mm Socket
d. 7/32” Allen Wrench or Allen Key Socket
e. Ratchet
f. 3/4” Socket and Wrench
g. 1/2” Drill Bit
h. Drill
i. Cutoff Wheel
Note: this installation requires 2 people for best results
4. Included in Kit:
6 – Hex Head Bolts – 1/2”-13 x 1 1/2”
12 – Flat Washers – 1/2”
6 – Nylon Locking Nuts – 1/2”-13
1 – Button Head Bolt – 3/8”-16 x 1”
1 – Flat Washer – 3/8”
1 – Extruded U-Nut – 3/8”
REMOVAL
1. From the bottom of the truck, remove any fog light connectors, if your truck is equipped with fog lights, and move the wiring harness out of the way.
2. Remove the front portion of the inner fender liners.
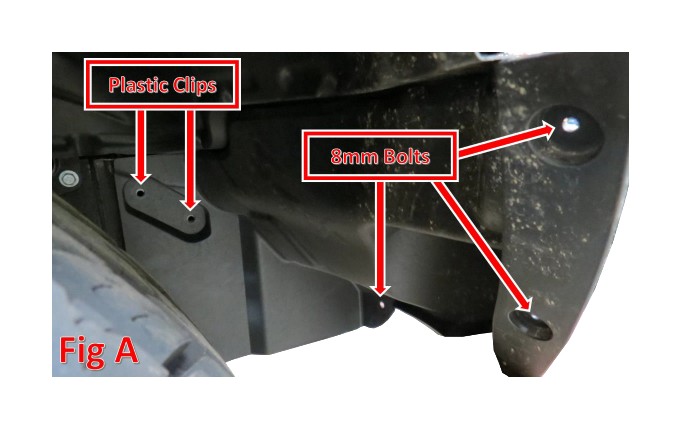
a. Remove the three 8mm bolts referred to in Fig A.
b. Remove the two plastic clips referred to in Fig A.
c. Remove the front inner fender liner portion.
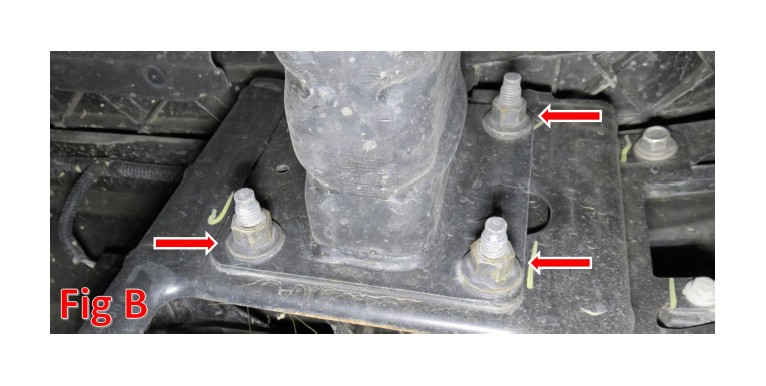
3. Remove the 18mm nuts (x6) holding the bumper to the frame horns, then remove the factory front bumper from the truck. There are three 18mm nuts per side. (Fig B)
4. Remove your tow hooks.
a. This step is optional and is only done for aesthetic reasons.
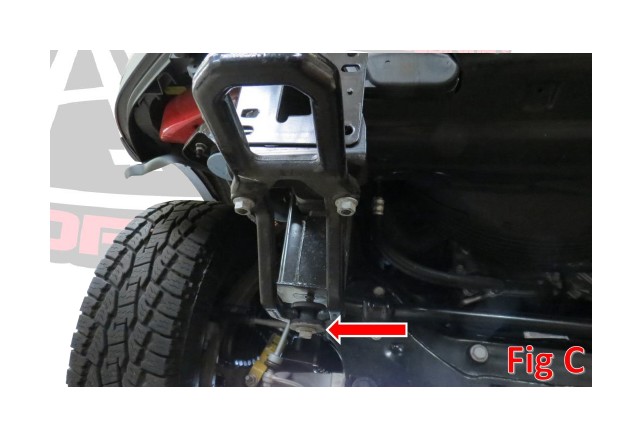
b. Remove the 18mm bolt holding the bottom portion of the tow hook to the frame and remove the hook. (Fig C)
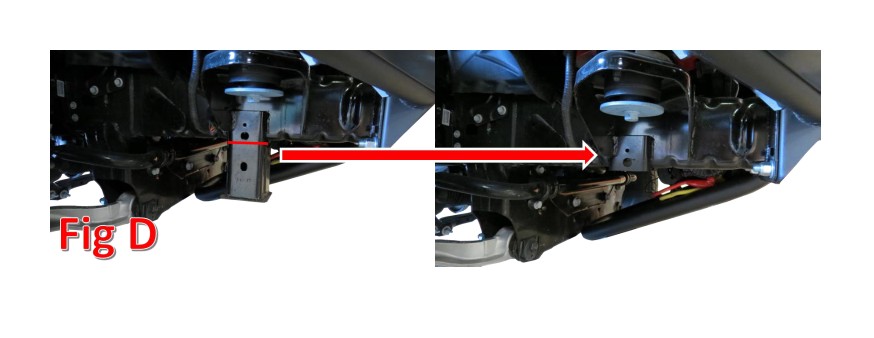
c. You can also cut the frame extensions off for aesthetics, but this could void your vehicle warranty.
d. To cut the frame extensions off, follow the line drawn in Fig D.
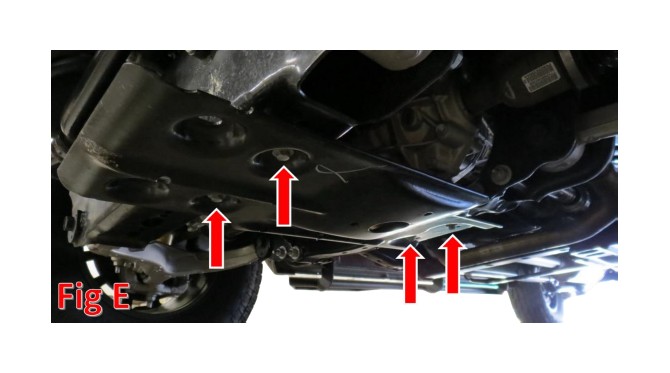
5. Remove the 13mm bolts (x4) holding the skid plate on and remove the skid plate. (Fig E) Save one of these bolts for reuse.
6. Prepare to install your new A.D.D. Front Bumper.
INSTALLATION
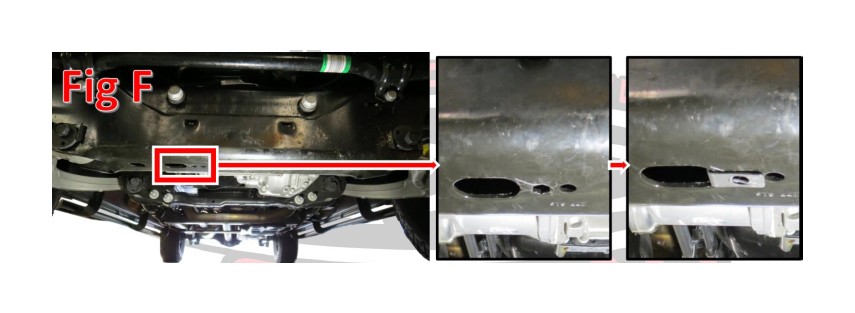
1. Install the supplied 3/8” U-Nut (x1) into the hole referenced in Fig F.
2. If you have any lights or winches to install on your bumper, now would be a good time to do that. Please follow to light or winch manufacturer’s instructions for mounting and wiring information.
3. Install your new A.D.D. bumper on your truck.
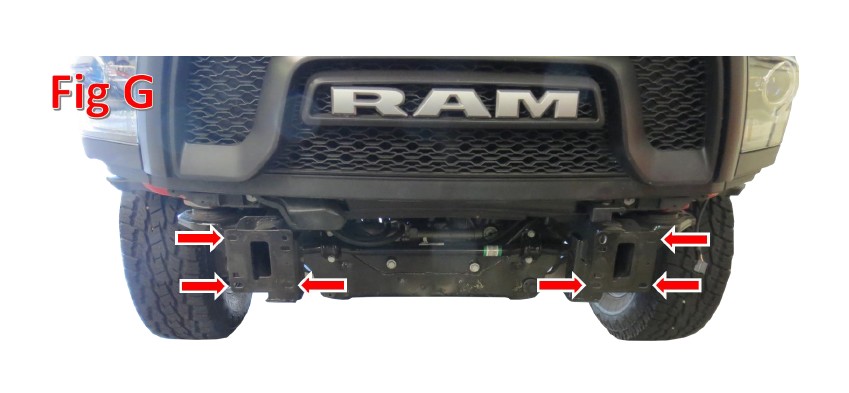
a. Hold the bumper in place so that the mounting holes on the bumper line up with the mounting holes on the truck’s frame horns. (Fig G)
b. Secure the bumper to the truck using the supplied 1/2” Bolts (x6), 1/2” Washers (x12), and 1/2” Lock Nuts (x6). Leave these bolts finger tight for now. If you are keeping your tow hooks on the truck, use the bottom two bumper mounting bolts on each side to hold the hooks in place. (Fig H)

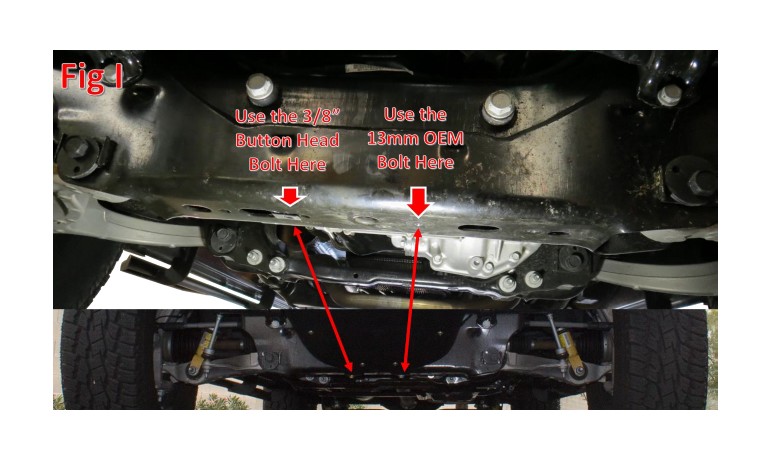
c. Install the supplied 3/8” Button Head Bolt (x1) through the tab on the bumper skid plate and into the previously installed (Installation Step 1) U-nut. Leave this bolt finger tight for now. (Fig I)
d. Install the bolt that was saved in Removal Step 5 through the other tab on the bumper skid plate and into the hole specified in Fig I.
e. Align the bumper so that it is centered left to right and aligned with the bottom of the grill/headlights.
f. Tighten the 1/2” Mounting Bolts to 70 foot pounds. Tighten the 3/8” Button Head Bolt to 30 foot pounds. Tighten the OEM bolt to the truck manufacturer’s specification.
4. Stand back and enjoy your new A.D.D. Stealth R Front Bumper.
5. Check and re-tighten if needed, all mounting bolts after 100 miles and periodically thereafter.
