FREE 1 to 3-Day Delivery on Orders $149+ Details
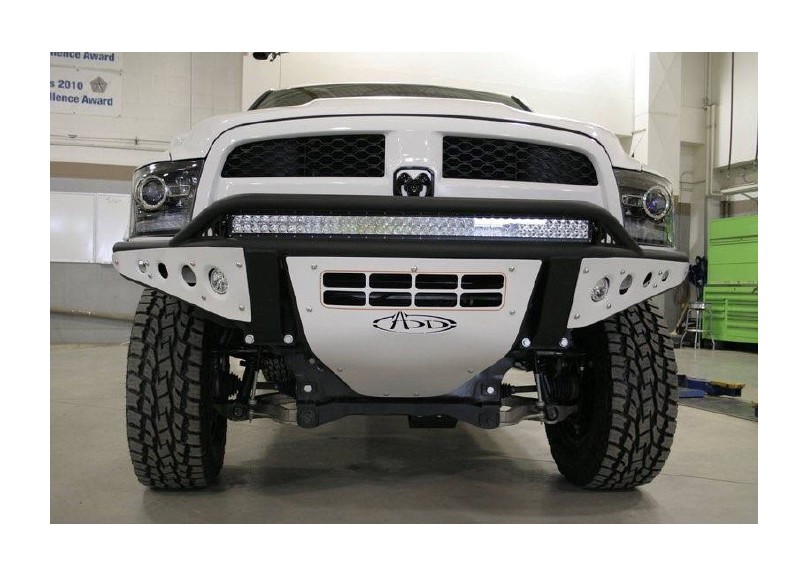
How to Install Addictive Desert Designs Stealth Front Bumper (09-17 All, Excluding EcoDiesel & Rebel) on your Dodge RAM
Installation Time
2 hours
Tools Required
- 18mm Socket
- 8mm Socket
- 10mm Socket
- Ratchet
- 3/4” Socket and Wrench
- Utility Knife
- 1/2” Drill Bit
- Drill
PREPARATION
1. Disconnect the negative terminal on the battery. Park the vehicle on level ground and set the emergency brake.
2. We recommend reading through the installation instructions in whole before performing the work.
3. Estimated Installation Time: 2 Hours
4. You will need the following tools:
a. 18mm Socket
b. 8mm Socket
c. 10mm Socket
d. Ratchet
e. 3/4” Socket and Wrench
f. Utility Knife
g. 1/2” Drill Bit
h. Drill
Note: this installation requires 2 people for best results
5. Included in Kit:
8 – Hex Head Bolts – 1/2”-13 x 1 1/2”
16 – Flat Washers – 1/2”
8 – Nylon Locking Nuts – 1/2”-13
REMOVAL
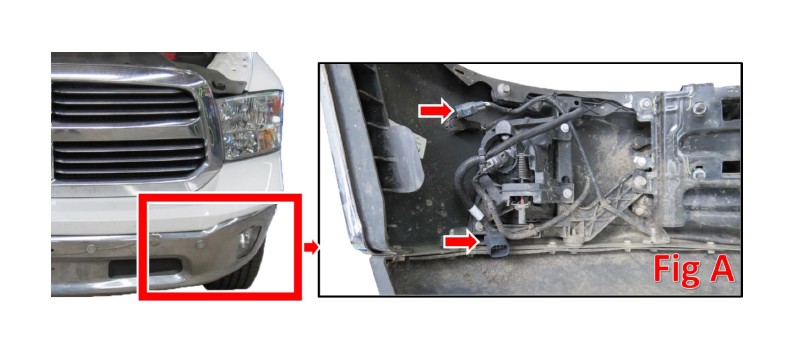
1. From underneath the front driver side of the vehicle, unplug the main fog light and parking sensor harnesses. (Fig A)
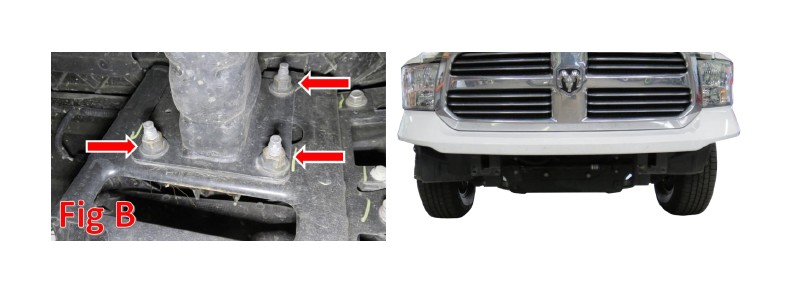
2. From underneath the truck, remove the 18mm nuts holding the lower portion of the bumper to the frame rails. There are 3 nuts per side, 6 total. Then, remove the lower portion of the bumper. (Fig B)
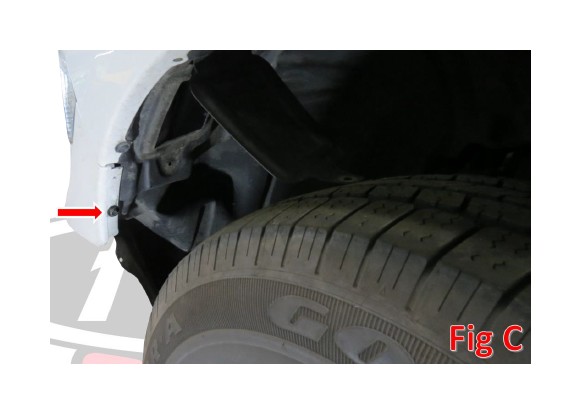
3. Remove the 8mm bolt referenced in Fig C on the inner fender well. Repeat this step on the other side of the vehicle.
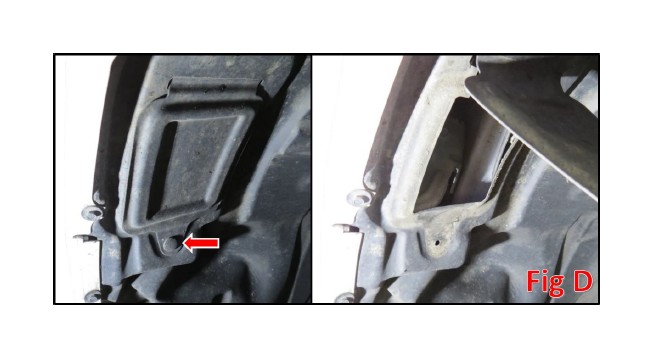
4. Remove the plastic clip holding the access panel down on the inner fender well and open the access panel. Repeat this step on the other side of the vehicle. (Fig D)
5. Remove the 10mm bolt that sits inside the access panel you just opened. Repeat this step on the other side of the vehicle.
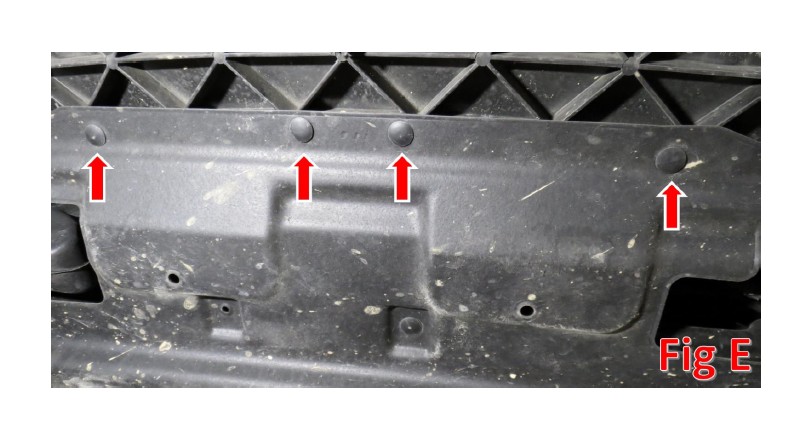
6. Underneath the front/center of the truck, remove the 4 plastic clips holding the lower rubber shroud to the valance portion of the bumper. (Fig E)
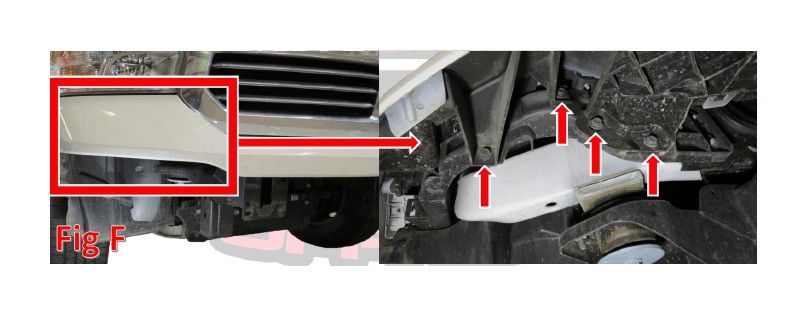
7. Remove the four 10mm bolts holding the valance structure to the truck. Repeat this step on the other side of the vehicle. (Fig F)
8. Remove the valance structure by pulling the valance outwards, starting at the corners under the headlights and working your way towards the center.
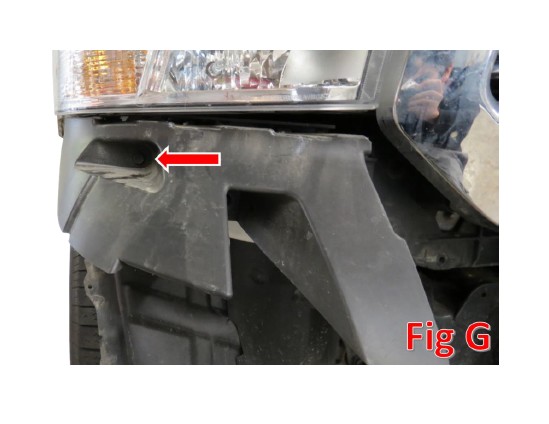
9. Remove the single 10mm bolt holding the plastic structure underneath the headlights to the truck. Repeat this step on the other side of the vehicle. (Fig G)
10. Prepare to install your new ADD Stealth Front Bumper.
INSTALLATION
1. If you have any lights you would like to install on your bumper, now would be a good time to do that. Please follow the light manufacturer’s guides for mounting and wiring information.
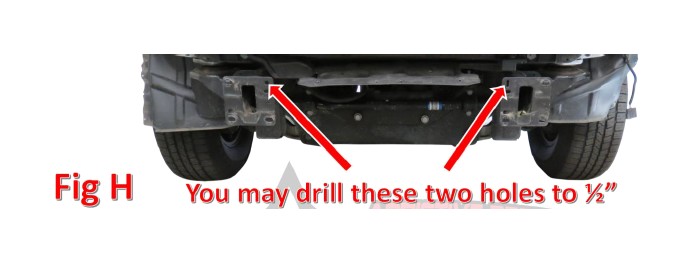
2. THIS STEP IS OPTIONAL, BUT HIGHLY RECOMMENDED IF YOU HAVE A WINCH BUMPER. The top/inner bolt holes on each frame horn are not quite 1/2” in diameter. You have the option to drill both of these holes out to 1/2”. We have provided the extra hardware to use these holes when mounting your bumper. If you drill these holes out, we recommend mounting your bumper with the remaining 6 bolts, marking out the areas to be drilled, then removing the bumper and drilling the holes out. (Fig H)
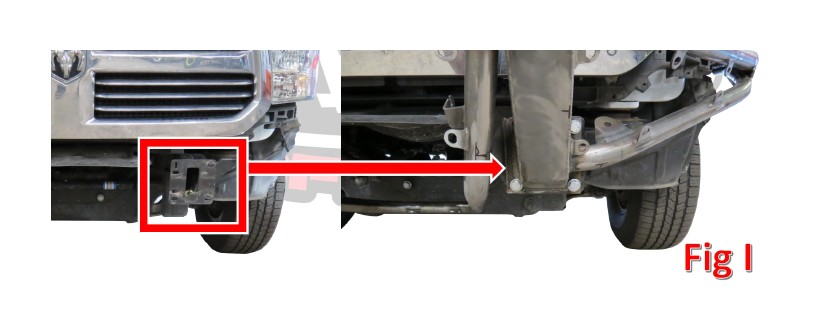
3. Line the mounting holes on the bumper mounting plates up with the mounting holes on your vehicle’s frame horns. (Fig I)
4. Secure the bumper to the frame horns using the supplied 1/2” Bolts (x8), 1/2” Washers (x16), and 1/2” Lock Nuts (x8). Leave these finger tight for now.
5. Line the bumper up so that it is centered left to right and sits straight in relation to the lower line of the grill and headlights. (This is where a second person might be necessary) Torque the bolts to 70 foot pounds.
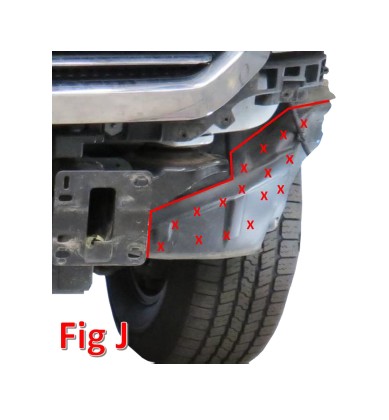
6. Using a utility knife, trim your inner fender liners to preference. We suggest following a line similar to what is shown in Fig J.
7. Stand back and enjoy your new ADD Stealth Front Bumper.
8. Check and re-tighten if needed, all mounting bolts after 100 miles and periodically thereafter.