 FREE 1 to 3-Day Delivery on Orders $149+ Details
How to Install Barricade Rattler Running Boards - Black (2019 RAM 1500 Crew Cab) on your Dodge RAM
Installation Time
60 minutes
Tools Required
- 10mm Wrench (Roughly a 3/8” in SAE)
- 13mm Wrench (Roughly a 1⁄2” in SAE)
- Surface to lay on (I used an old rug)
- Optional: Impact Wrench w/ 10mm & 13mm Sockets (speeds up installation)
- Optional: Lubricating Oil (to clean debris from studs before installation)

Shop Parts in this Guide
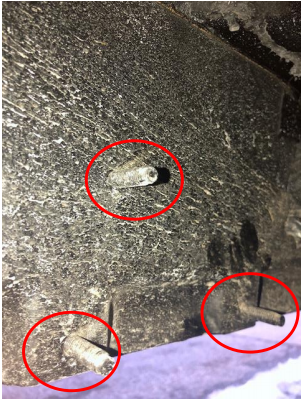
Note: This install guide is for the new body style 2019 Ram 1500 crew cab. The vehicle used in this guide was a Bighorn trim model without any pre-installed running boards from the factory. Check to verify your Ram has the factory installed studs located underneath the rocker panels (fig. 1) to ensure NO DRILLING WILL BE NECESSARY! 😊
Installation Instructions:
1. Start underneath the driver’s side door. Locate the (3) factory installed studs pictured below (fig.1) underneath the body panel. There should be 3 sets of these 3 studs on each side of the vehicle. Remove any paint/debris if necessary on the studs before use (as you can see, I had quite a bit to clean here).
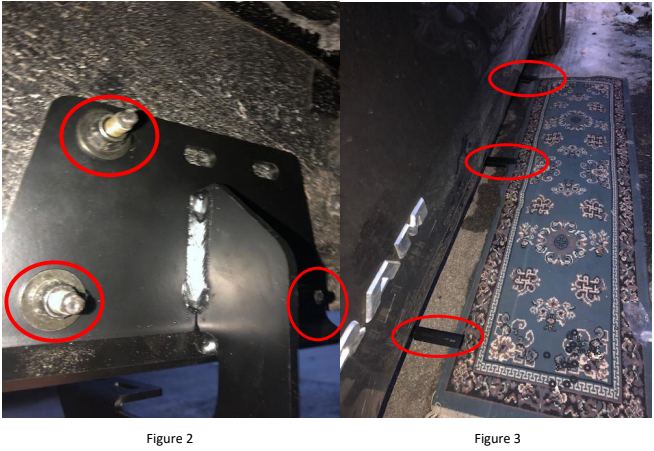
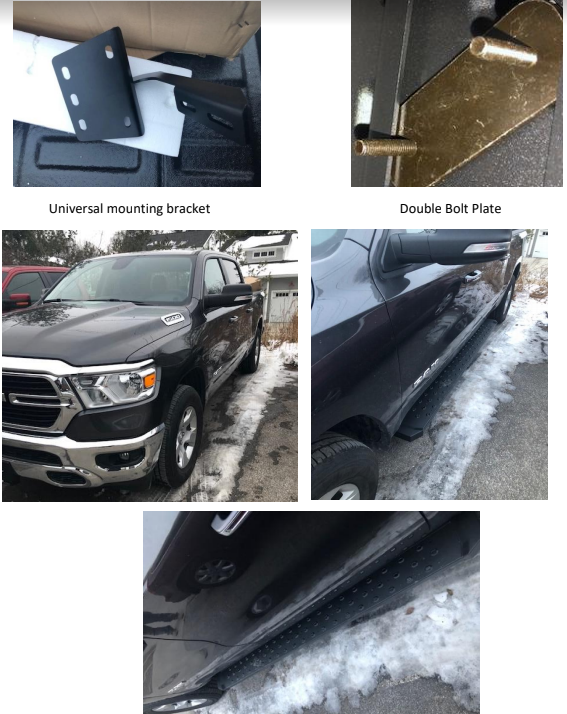
2. Choose 1 universal mounting bracket and secure to the (3) studs with 1 (8mm) flat washer and 1 (13mm) lock-nut per stud as seen in figure 2 so the supporting arm extends to the outside of the vehicle (fig 3). Tighten until snug. REPEAT steps 1 and 2 to secure the mounting brackets to the center and rear stud sets on the driver’s side
of the vehicle.
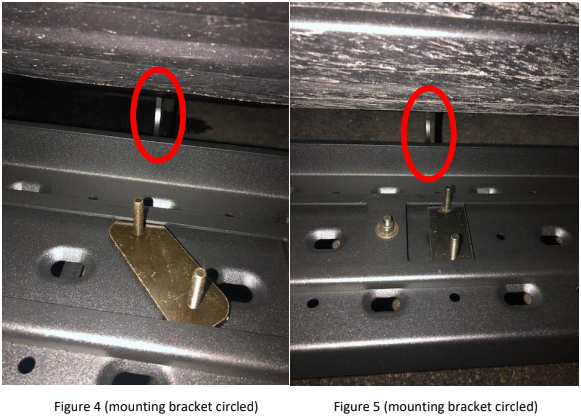
3. Select one running board and set upside down on top of the mounting brackets carefully – aligning the board to determine where the double bolt plates should be placed (figs 4&5). NOTE: Do not slide, (front to back), the Running Board on the Brackets or damage to the finish may result.
4. Locate the channel opening as shown in figure 4 on the underside the running board and select 3 double bolt plates (fig. 4). Insert the double bolt plates into the channel on the bottom of the running board starting at an angle (fig. 4) then rotating them until they are perpendicular to the running boards (fig. 5) which ‘locks’ them in place. Reassure the double bolt plates roughly align with each respective mounting bracket (shown below).
5. Carefully lift the running board up, rotating it to right side-up (the inside edge should be at a 90 degree angle facing upwards) and guide the studs from the double bolt plates down through the holes in the universal mounting bracket. (Note: I found this to be the most difficult step in the entire process so an extra pair of hands may be quite helpful here.) Before fastening, be sure to align/level running boards as needed.
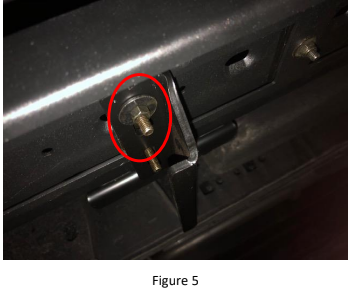
6. Select 6 (6mm) flat washers, 6 (6mm) locking washers and 6 (10mm) hex nuts and secure the double bolt plates to the mounting bracket from underneath (fig. 5). Tighten until snug and ensure running boards are still aligned and level after tightening.
7. Go back over all fastening locations, inspect and tighten fully. Note: Overtightening is not necessary for secure fit.
8. Repeat steps 1-7 for the passenger side installation. Once running boards are installed, ensure alignment is as desired and that the installed running boards are not contacting the tires in any way.
9. Throughout life of the product, periodically inspect all fastening points for tightness to prevent any issues.
10. Additional Pictures (parts & before/after):
Installation Instructions Written by AmericanTrucks Customer Aaron Wiger 01/17/2019
