FREE 1 to 3-Day Delivery on Orders $149+ Details
How to Install aFe Magnum Force Stage 2 Pro Dry S Cold Air Intake - Black on your Sierra
Installation Time
2 hours
Tools Required
- 4mm Hex Key
- 9/16 Wrench
- 5/16 Nut Driver
- 10mm Socket & Ratchet
- T-15 Torx Driver

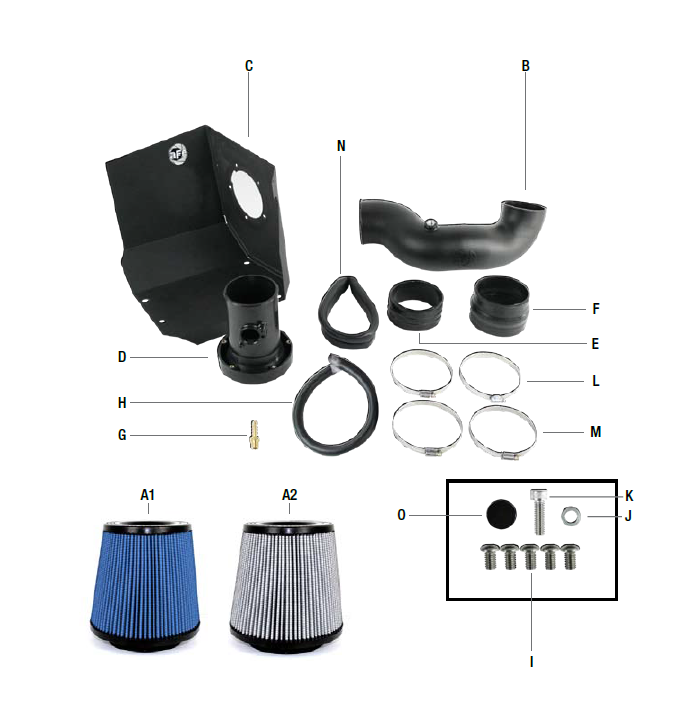
Shop Parts in this Guide
• Please read the entire instruction manual before proceeding.
• Ensure all components listed are present.
• If you are missing any of the components, call customer support at 951-493-7100.
• Ensure you have all necessary tools before proceeding.
• Do not attempt to work on your vehicle when the engine is hot.
• Disconnect the negative battery terminal before proceeding.
• Retain factory parts for future use.

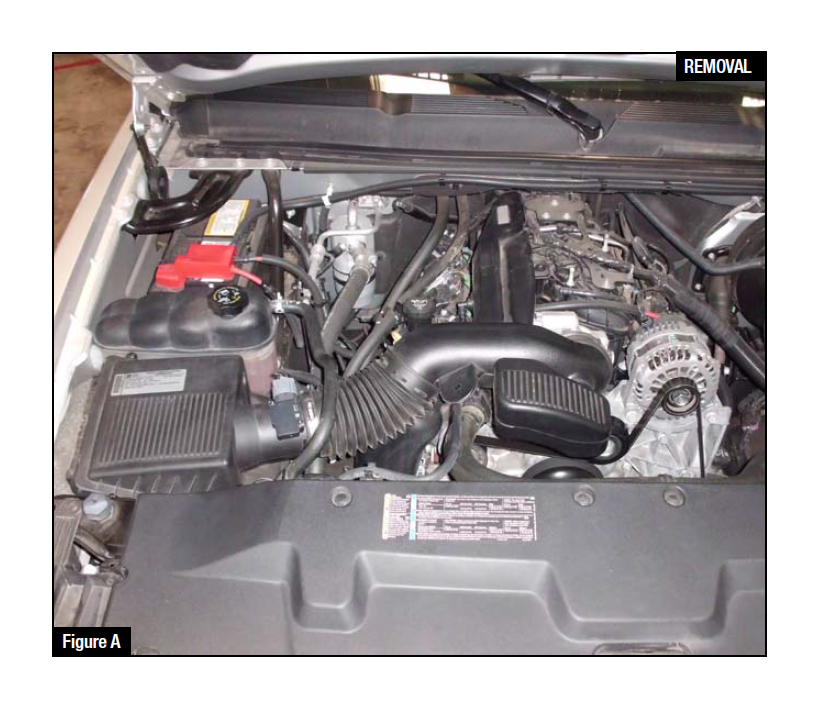
Refer to Figure A for step 1-3
Step 1. Remove Engine Cover.
Step 2. Loosen the clamps attaching the tube to the intake housing and throttle body.
Step 3. Disconnect the wire harness from the MAF Sensor.
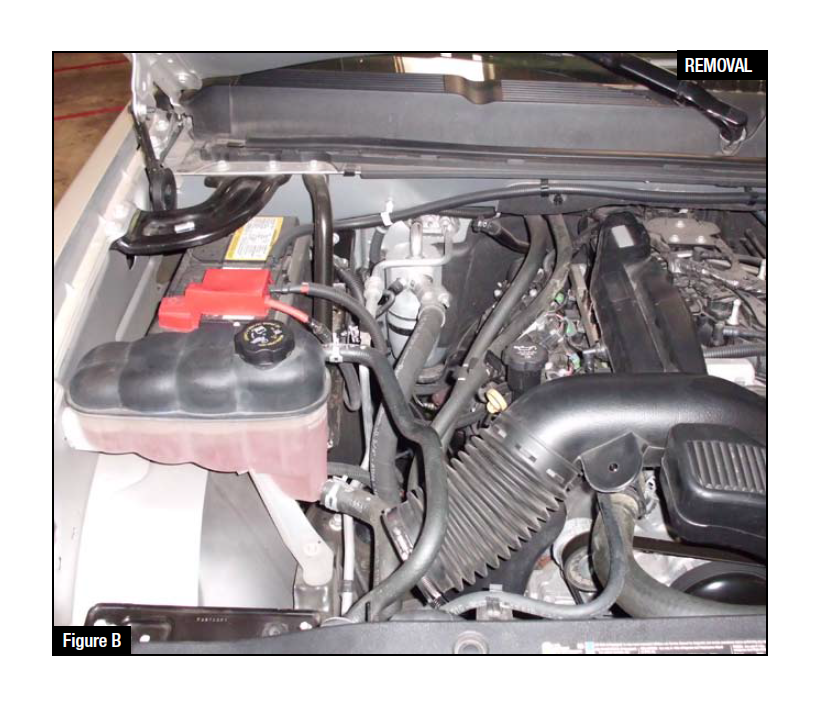
Refer to Figure B for step 4-5
Step 4. Remove the stock breather line from the engine. (Note: breather line has a push clip to remove)
Step 5. Remove the stock housing by lifting up and out.
Step 6. Detach the collant hose support clip from the stock intake tube.
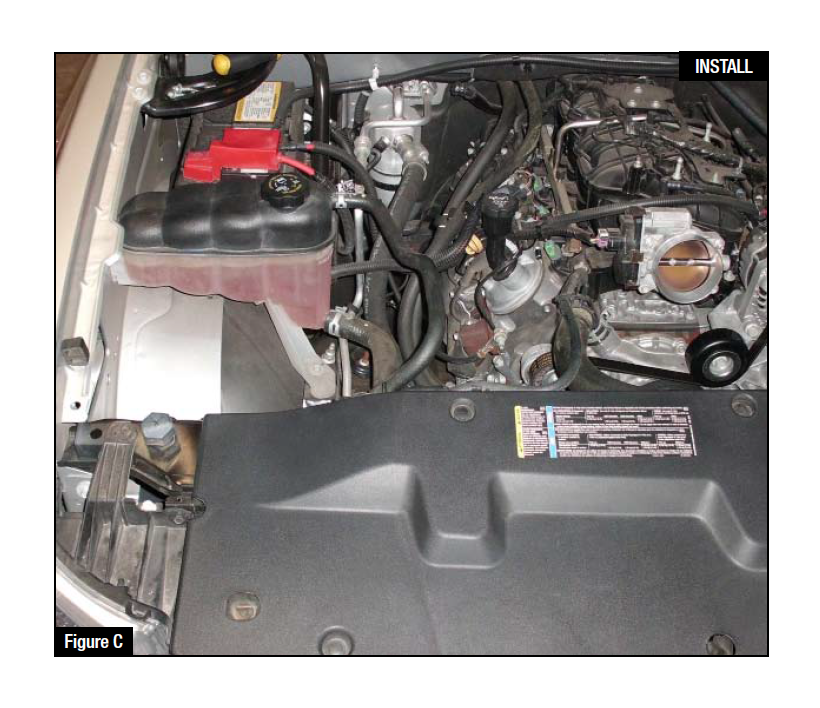
Refer to Figure C for step 7
Step 7. Remove stock intake tube from vehicle.
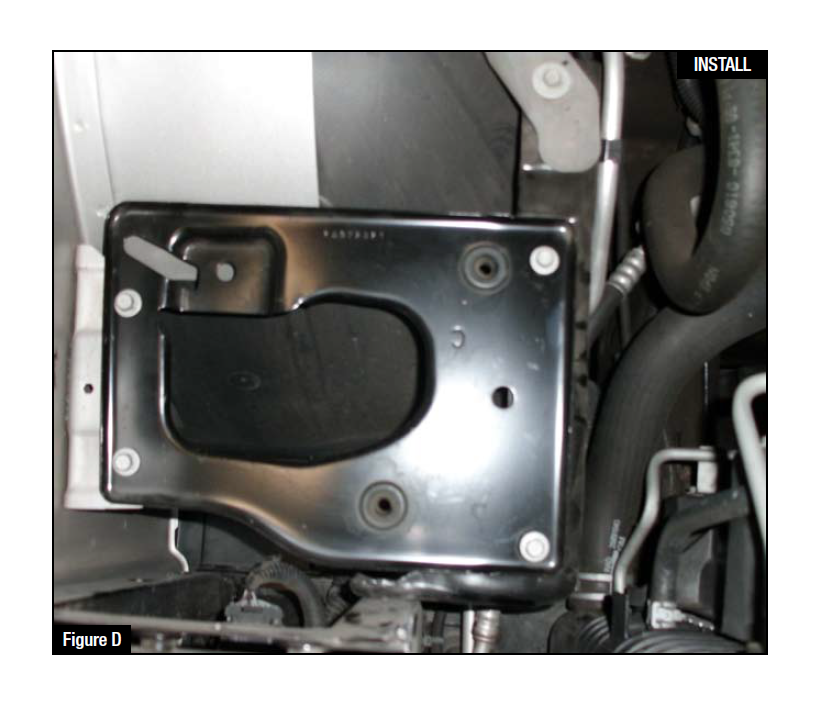
Refer to Figure D for step 8
Step 8. Remove 4 bolts from stock housing bracket and save them for later use.
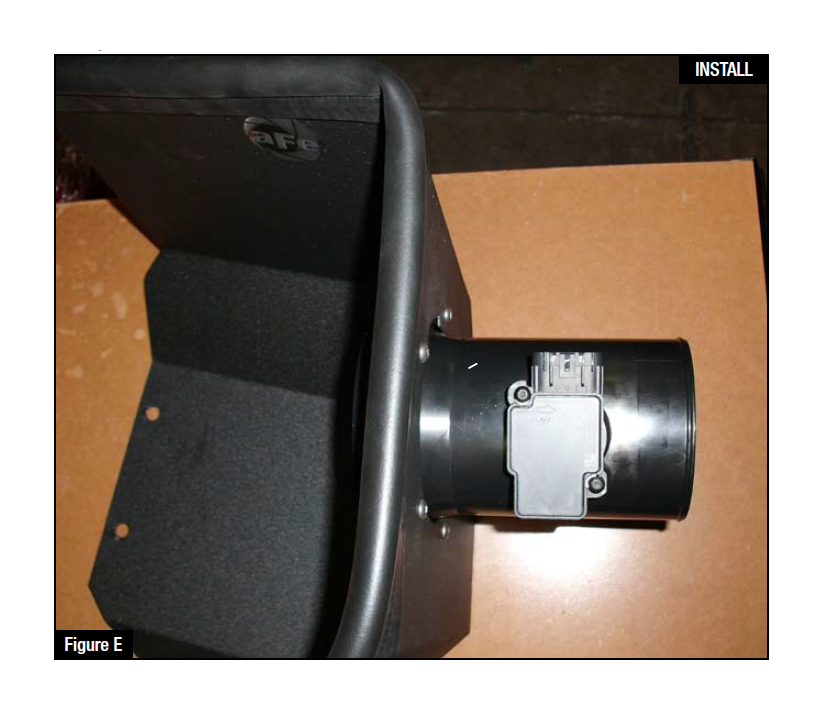
Refer to Figure E for step 9-12
Step 9. Insert the air filter adaptor into the housing by rotating the MAF Pad throught the notch in the hole pattern.
Step 10. Using (5) Button head screws fasten the air filter adaptor to the aFe intake housing.
Step 11. Remove the MAF sensor from the stock airbox using a T15 torx bit and driver.
Step 12. Install the MAF Sensor into the air filter adaptor using stock screws and a T15 torx bit and driver.
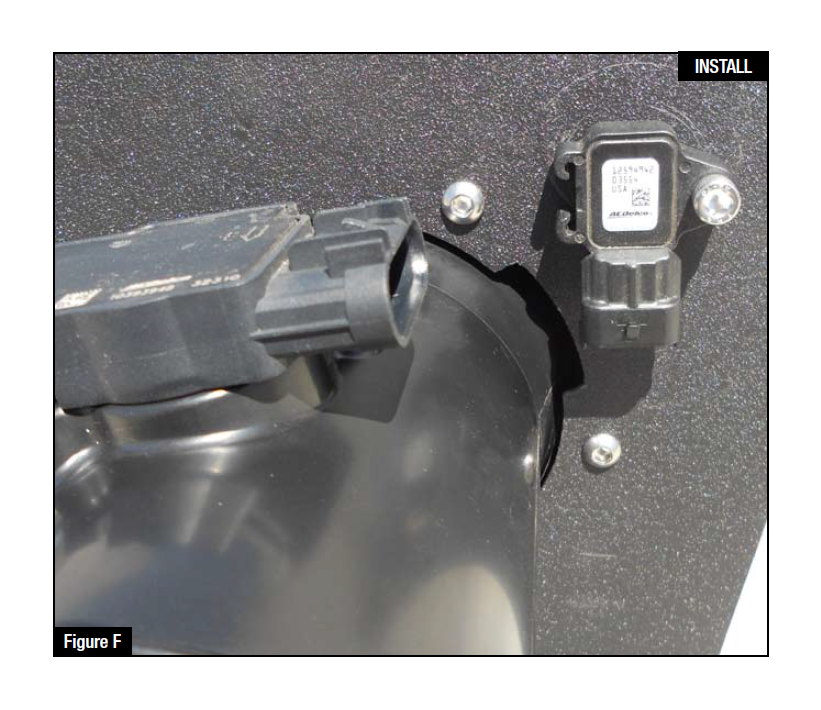
Refer to Figure F for step 13
Step 13. 2011 and newer 6.0 and 6.2L trucks have an extra sensor on the airbox. Transfer this sensor to the new aFe housing. With all other trucks without sensor, plug the unused hole with supplied plastic push plug.
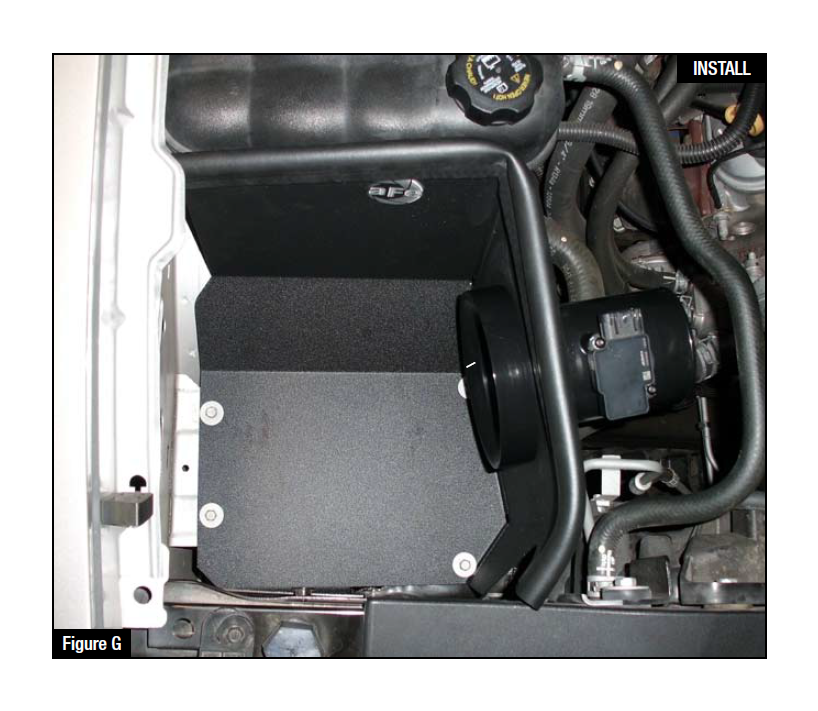
Refer to Figure G for step 14
Step 14. Using the stock 4 mounting bracket bolts fasten the aFe housing to the chassis.
Step 15. Install the trim seal on the upper edge of the housing.
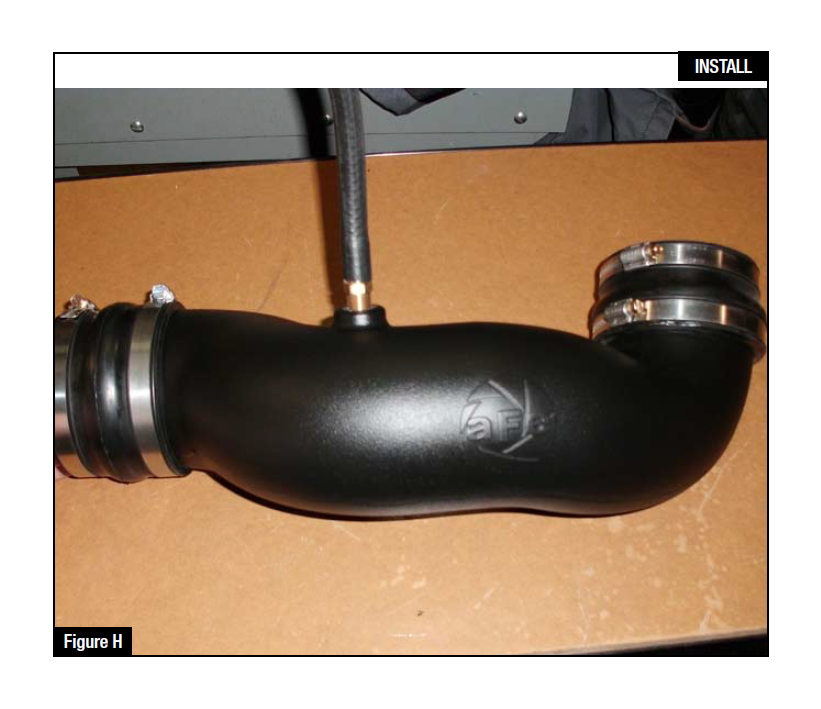
Refer to Figure H for step 16
Step 16. Install supplied couplers, clamps, brass fitting, and breather hose to the aFe intake tube. (Do not tighten clamps.)
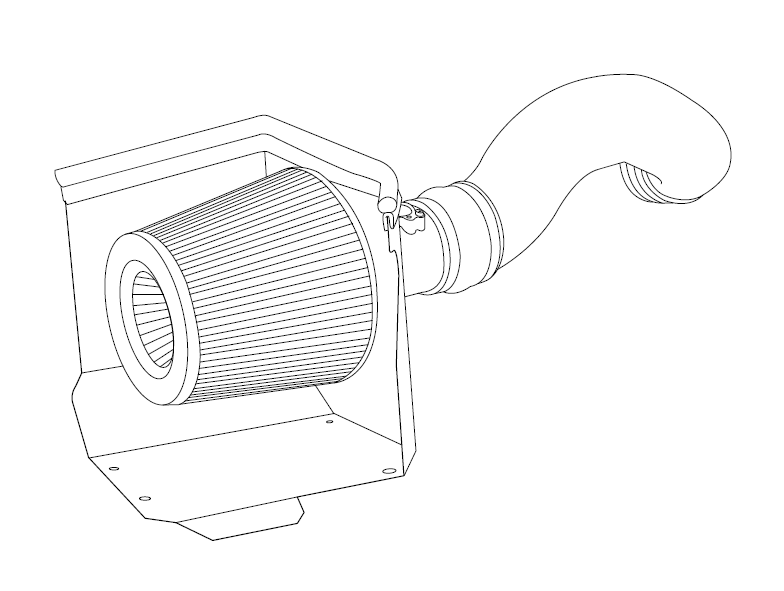
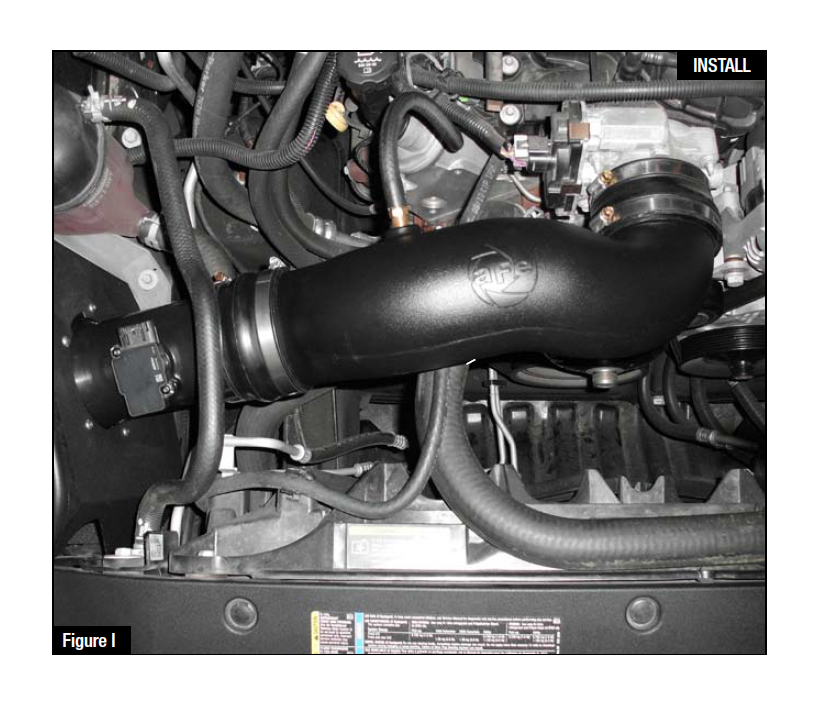
Refer to Figure I for step 17-18
Step 17. Install the aFe intake tube into the vehicle aligning between both the housing and throttle body coupler.
Step 18. Plug in the breather tube to the existing loaction on the vehicle.
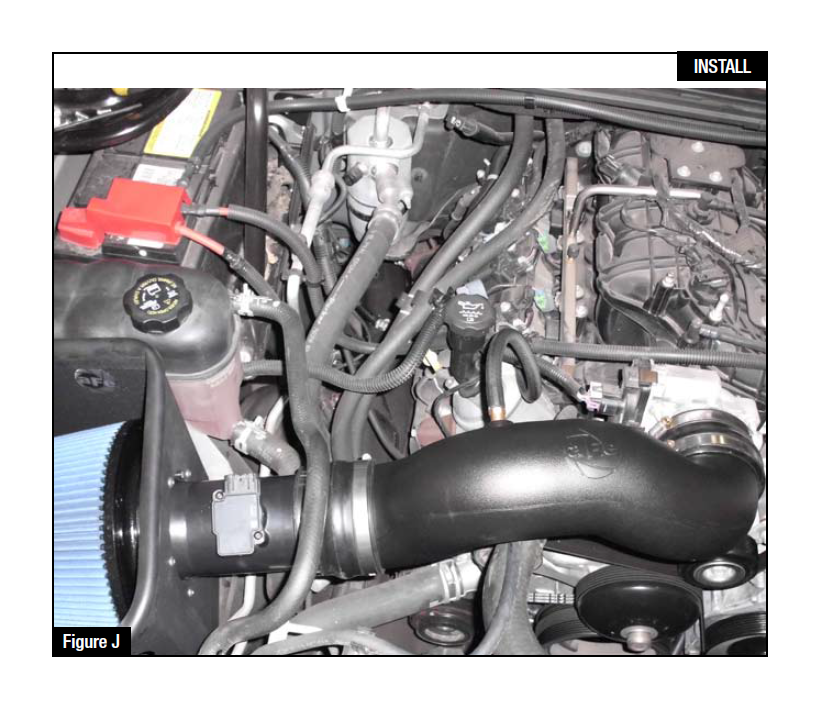
Refer to Figure J for step 19-20
Step 19. Install aFe air filter.
Step 20. Tighten all clamps.
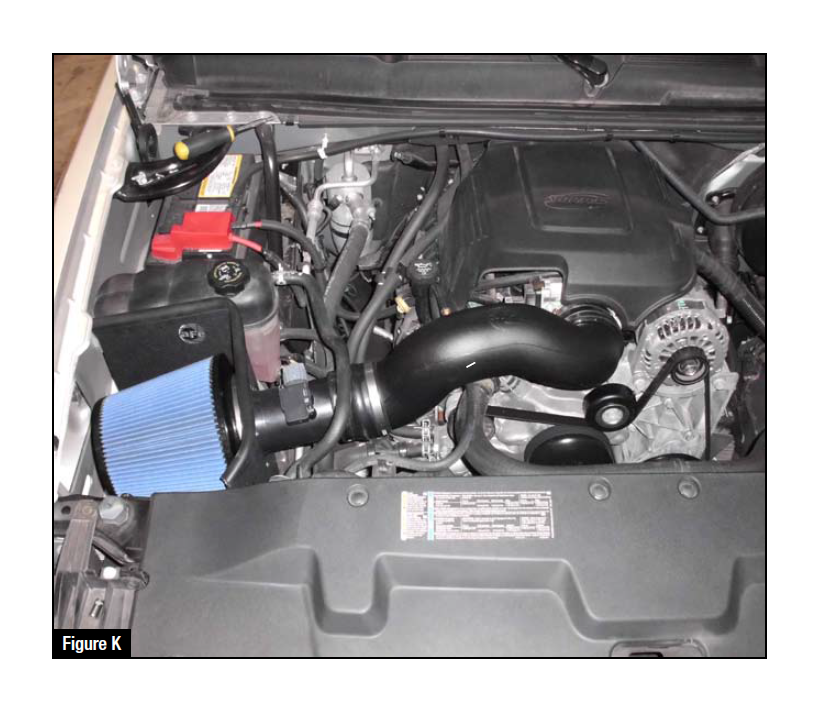
Refer to Figure K for step 21-23
Step 21. Reconnect MAF sensor harness. On 2011 and newer 6.0/6.2L reconnect the extra sensor harness.
Step 22. Re-install engine cover.
Step 23. Your Installation is now complete. Make sure to tighten all clamps and check all electrical connections.