 FREE 1 to 3-Day Delivery on Orders $149+ Details
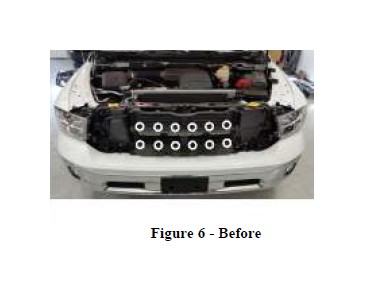
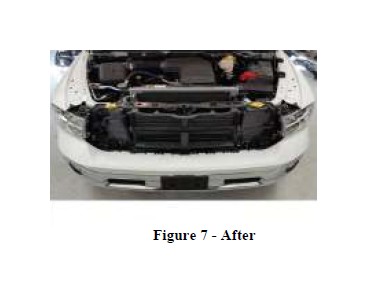
How to Install Putco Boss Mesh Replacement Grille - Black on your Dodge Ram
Tools Required
- 10mm Wrench
- Flat Head Screw Driver
- 7/16" Wrench
- 5/32" Hex Key
- Dremel Tool or File
Please read all instructions before installation and to check to see that all parts are included.
Grille Installation
1. Remove Grille from packaging. Check to see if all parts from above table of kit contents are included.
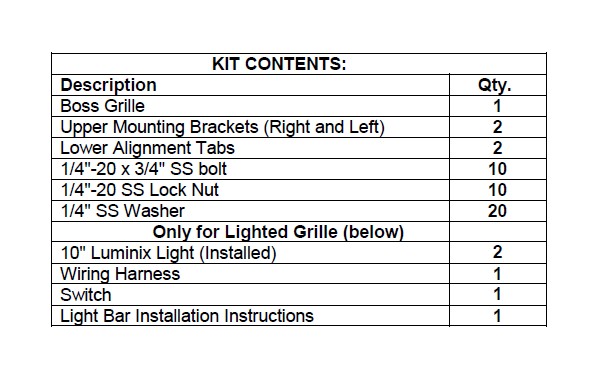
2. Use a 5/32" hex key and 7/16" wrench to install the 6 provided nuts, bolts and washers. Install the two upper mounting brackets to the 6 mounting tabs on the back side of the grille. (Refer to Figure 1 - Passenger side shown.)
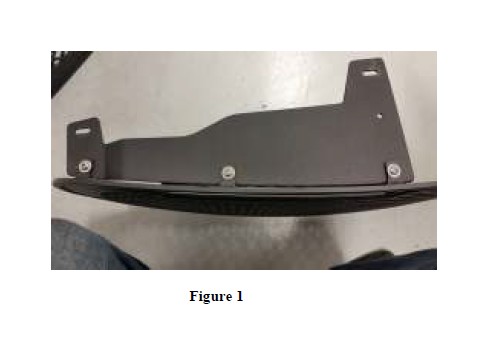
3. Use the remaining 4 nuts, bolts and washers to install the two lower alignment tabs. (Refer to Figure 2)
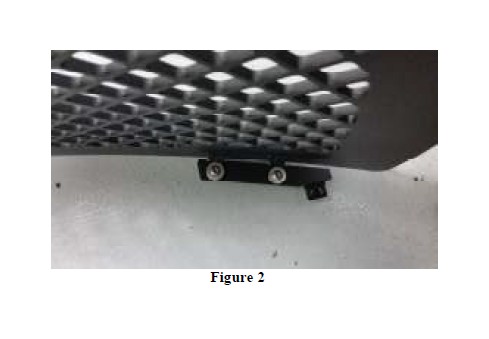
4. Remove plastic cover by removing 6 retaining clips. Use a flat head screw driver to remove center pin followed by outer retainer. (Refer to Figure 3)
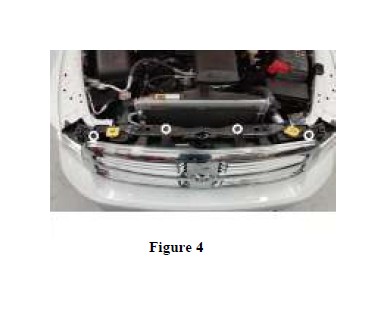
5. Once cover is removed, remove the top 4 grille screws with 10mm wrench. (Refer to Figure 4)
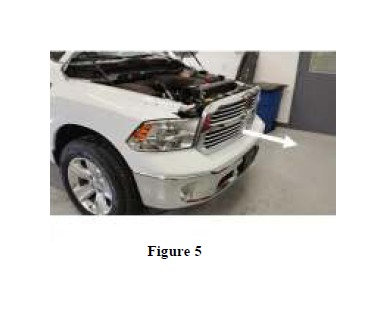
6. The grille will still be secured at the bottom with push clip retainers. To remove, pull grille firmly forward and away from the truck. (Refer to Figure 5)
7. Remove the rubber flaps from in front of the radiator by removing 12 plastic retaining clips with a flat head screw driver. (Locations shown below.)
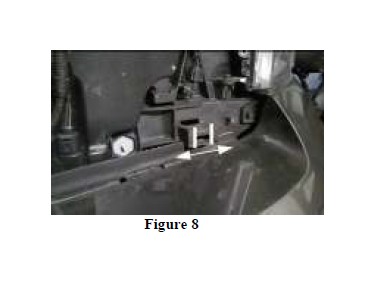
8. For HD install only: Using a file or a Dremel Tool, widen the lower tab receiving hole to 13/16". (Refer to Figure 8)
9. Set new grille into vehicle. Align the lower tabs to corresponding hole location. Align tabs as needed using the 5/32" hex key and 7/16" wrench. Push the lower part of the grille towards the vehicle to get tabs to lock into the holes.
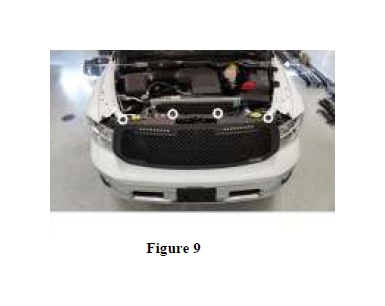
10. Reinstall 4 - 10mm bolts to secure the grille. Adjust upper brackets and grille as needed to align the grille in the vehicle. (Refer to Figure 9)
For Lighted grilles, refer to Wiring Installation on Light Bar Installation Instructions for wiring instructions.


