Talk to a Ram 1500 Sales Tech
1-888-706-1096
M-F 8:30A-11P, Sat-Sun 8:30A-9P
$20K Sweeps! 10 Chances to Win! Enter Daily >

Mammoth 2.50-Inch Front Leveling Kit (06-18 4WD RAM 1500)

Item R107248
Verify parts fit and get product recommendations.
Ram 1500 Sales Techs: Connect Now M-F 8:30A-11P, Sat-Sun 8:30A-9P
$0.00
On Sale

$99.99 (pair)

FREE Shipping on orders over $119 Market Price $108.99 You Save 8% ($9.00) Up to 10% off for Military & First Responders! See Details

Will this fit your Vehicle?

Select a different vehicle Help?
Update or Change Vehicle
Out of Stock

Ship to: Ashburn - 20149
Sorry, please enter a valid US or CA postal code
We're sorry, zip can't be updated at this time.
Recommended Install Shops
How It Works
Install Shops are available near Ashburn - 20149

Add Local Shop Installation

Total cost of service $499.00
    Create a list
    Add to New List

    Saved - View your saved items

    We're sorry. We couldn't save this product at this time.

      Product Videos

      Hey, guys. Adam here with americantrucks.com. And today we're taking a closer look at and installing the Mammoth 2.5-inch front leveling kit available for the '06 to '18 four-wheel-drive Ram 1500. You should be checking this out for your four-wheel-drive Ram if you're looking to level out your truck's appearance, getting rid of the factory rake, if you're looking to fit up to 35-inch tires comfortably, so bigger wheels and tires, and if you're looking for a little bit of added ground clearance to help with some light off-road situations. Now, this particular leveling kit, the 2.5-inch is a perfect size to get rid of the factory rake, which leaves your front end lower than your rear. Now, that's there from the factory to help with towing and hauling applications, but some guys don't really like the look of that and wanna level things out, in which case the 2.5 is a great way to do so. Having the 2.5-inch kit as opposed to a 2-inch kit is especially gonna be great for guys who may have some front end accessories sagging down that front end a little bit extra than a stock truck would be. In addition to that, you're also gonna fit larger wheels and tires. Now, with a factory suspension, fitting up to 35-inch tires will just be too tight and will leave some rubbing and some serious modification being necessary. Adding 2.5 inches to your front end is gonna raise the truck up enough to fit up to those 35s comfortably. Now, I will say depending on your offset, if you have something that isn't as aggressive and depending on if you have mud terrain tires, you may rub slightly at full lock, especially in reverse. Now, some guys may do a little bit of trimming to the interior wheel well or some mud flaps in order to get rid of that. Other guys don't mind it as much, but again it may be specific to your setup.This kit here is made from a high-quality laser-cut stainless steel making it one of the more premium quality options in the category, and it's got a nice finish on top that is sort of a texture gunmetal look. Now, that's really not gonna do much for appearance since you're not gonna see it, but it is gonna add a level of durability to this. Now, stainless steel is a little bit more susceptible to corrosion and rust, which is where that added layer is gonna come in to help with. Now, if you're located in wintery weather areas, seeing a lot of road salt like we are here on the East Coast, you may wanna consider some billet aluminum options that won't rust like steel would, but it's all personal preference and, of course, steel is gonna be much stronger.Now, this kit here is made from, again, a laser-cut premium steel, making it one of the more sturdy options in the category, which does drive the price up a little bit to right around 100 bucks. In my opinion, still super affordable. This is one of the more premium options in the leveling kit category due to the laser-cut steel. Now, this option here is gonna get two out of three wrenches on our difficulty meter. Anybody can tackle it in the driveway at home, believe it or not. There's no cutting, there's no welding, you won't even need a spring compressor. It's gonna sit right on the top of your factory strut assembly, so no spring compressor required. Now, if you have the right hand tools, you can get it done by yourself. It'll take you about three or four hours from start to finish, and I'll take you through that whole process in just a second. Know that this kid being a 2.5-inch is gonna maintain factory-like ride quality. Once you start getting into the 3-inch and above lift kits, that's where you start worrying about ride quality being affected, not really gonna be the case here. And a 2.5-inch isn't too much height difference to put stress on your CV angles and other suspension geometry and suspension components, so you shouldn't have to worry about that too much here. Now, again, I'll take you through the entire install process. What do you say we get started?Tools used in this install include an air gun, and an impact gun, and/or a ratchet, 15/16 and 21-millimeter deep sockets, 15/16 deep socket, needle-nose pliers, pry bar, hammer, and flat head screwdriver, 15-millimeter wrench, 21-millimeter wrench, 18 and 15-millimeter ratcheting wrenches are recommended.All right. To kick things off, I'm gonna show you guys how to uninstall your factory strut here on our front driver side. Now, of course you wanna get your wheel out of the way. That's step number one. We're supported on a lift, but if you're working on the floor and make sure you have a floor jack properly supporting the weight of the vehicle. Moving on from there. We'll have to disconnect the ABS lines from the knuckle end from the brake line itself just to make sure that when the knuckle drops down out of the upper control arm, we're not putting too much stress on those brake lines.All right, so for this ABS line, just follow it down to the back of your knuckle here that's connected with a plastic clip. Just gonna wiggle that back and forth until it pops up. Now, you wanna follow that guy up to the top here, that's connected to your brake line. That, you're just gonna pull apart just like that. Now, we have more slack on our brake line, so we're not putting tension on them. Next up, grab a 16-millimeter deep socket and we're gonna remove the factory nut off of our sway bar end link. All right. Set that aside.All right, next up we're gonna disconnect our tie rod end. Now, before we get started, you wanna know that this is a 21-millimeter nut. Now, in some cases, if you use an impact gun on this, the entire stud will spin in that ball joint. You may need a 10-millimeter socket and a 21-millimeter wrench to get the nut off while holding that stud steady. For our first time, I'm gonna use our 21-millimeter deep socket in my air gun and get this guy off. All right, so ours didn't give us any trouble, but that is still worth noting. Now, before I take this guy out, I'm actually gonna leave it in and just put that nut a couple of threads on just to keep the entire hub assembly from rotating while tackling the upper control arm.All right. So, next, we're gonna do the upper control arm to the knuckle. Now, Ram uses a castle nut here, which has these open gaps all the way around and through one of the gaps going through this stud itself is a metal retaining pin. Wanna use needle-nose pliers to pull that pin straight out. All right, set that aside. Now, for this, I'm gonna use an 18-millimeter ratcheting wrench. I highly recommend picking up a set of ratcheting wrenches for this install. There's a lot of different aspects of this that ratcheting wrenches will be a lot easier to use. All right. So, once we broke that loose, I can back this off with my hand. Now, big thing to remember is we have to dislodge the ball joint from the knuckle. You can see the stud didn't break free with that. So, I'm gonna leave this nut on a couple of threads, we're gonna grab our hammer, and we're gonna swing and tap against here to dislodge that. And then we'll use a pry bar to pull it down and take our nut off. Now, for this, you wanna grab a ball-peen hammer, and we're gonna tap right up against the side here of the knuckle.All right. With that dislodged, you'll see that the upper control arm moves freely in there. Let's take our nut off. Once you have the castle nut and spacer out, set those aside. All right. So, from here we can go back to the tie rod end, take that nut off, lift the tie rod end out. I like to hang it up over that sway bar end link and then put our nut back on the stud just so we don't lose it. Here we can lift the upper control arm out of the knuckle. And what I like to do is just grab the upper control arm castle nut and thread it right back on again so we don't lose it, just like the tie rod end.All right. Next up, we're gonna tackle the bottom strut bolt holding it to the lower control arm. Now, the nut here, I'm gonna use a 15/16 deep socket on my impact gun, and I'm gonna use a 21-millimeter wrench to hold the bolt head on the inside. At this point, you can grab a ball-peen hammer and just tap the end of that to pop it through. Some cases, you may be able to pull it straight out. If not, you can grab a flat head screwdriver and just stick it in there and hammer the back end of that. All right. So, now we can focus on the top three strut tower nuts. Now, grab a 15-millimeter wrench and I'm gonna use, again, the 15-millimeter ratcheting wrench. Again, this really comes in handy. We're gonna loosen up these three top nuts. All right. So, now our strut is free. I'm gonna use a pry bar here between the lower control arm and the strut body at the bottom to pry this guy out of position.All right. So, now we can start assembling our 2.5-inch leveling kit from Mammoth here. What we're gonna do with our steel spacer is drop it onto the factory strut hat. Now, it only goes on one way through these pre-drilled holes here, so if it doesn't line up the first time, just keep rotating it until it drops into place just like that. You're gonna hold this new spacer to your factory strut assembly using the factory nuts on the factory studs. The new nuts included on the kit will hold the spacer studs to the strut tower in the truck. So, it can be tricky to get these nuts on. So, you're gonna have to lift this up about halfway and start threading the nut on in order to get it on there. All right, so as you can see, trying to get it on with this fully inserted, not gonna work, lift it up about halfway, drop it on, and start threading at the same time. All right. So, now once you have all three of those stock nuts in place, you're gonna grab a 15-millimeter wrench and start tightening these down. Now, it's pretty tedious. You have to go on and off, on and off, simply because there's just no room to put a socket on there. So, that's how we're gonna do this, and then just start tightening them down. All right, and there you go. Now, we can throw it back in the truck. It's also worth noting, you can, but it's not required, you can put a dab of Blue Loctite in there before you put these down. But again, personal preference.All right. Now, before we get started, I like to take the three new nuts and I'm just gonna put them right here in our upper control arm. There's little bit of a cup there to hold that in place. Take your new strut assembly and slide it back through the strut tower. Once you get that through, grab one of the nuts and put it on one of the studs to hold it in place. And repeat that for the other two. With those three in place, we can start reassembling.All right, so the first thing I'm gonna do is pop the strut back into the lower control arm where that factory bolt is gonna go through. I like to use a pry bar for this, just to help me guide this guy back in. What I like to do is use a pry bar and a screwdriver to help line these up. So, the pry bar gets the screwdriver in there, and now the screwdriver I can use to move the strut into position to line up the bolt hole on the other side. All right, so the screwdriver is preventing it from popping loose, and I can use this pry bar to lift up and put the bolt through the inside. All right, with the stud through, grab your 15/16 nut, put that through, and now we can tighten it down with our socket and wrench.All right. So, now I have my 21-millimeter wrench on the bolt head and my 15/16 socket in my impact gun on the nut. All right. So, now we can focus on our upper control arm, getting that back into our knuckle. We're gonna take the castle nut and spacer off. From here, we're gonna lift the knuckle into place and pull down on the upper control arm. Now, you may want a pry bar in one of the coil springs just to pry this down so you get a couple of threads coming through. All right, so the goal is just to get the castle nut on at least a couple of threads to hold it in place, and then you can let go. At this point, grab your 18-millimeter ratcheting wrench or whatever you use to take this guy off and we're gonna tighten it down. I recommend putting a pry bar in the coil spring here just in case, just to make sure it doesn't pop out. Now, when you're tightening this down, you wanna make you're taking note of where that open slot is. You wanna line that up to the hole in the studs. We just have a little bit extra to go. Perfect. Now, we can put our retaining pin through.All right. So, now I have my retaining pin, I'm gonna put it in my needle-nose pliers, and this can take some finesse to get in there. It's pretty tight, everything's kinda rusty. Just wanna push this straight through. And then once you do, you can take your needle-nose pliers to bend the other side. Now, we know that that's not sliding out.All right, so next we'll do our tie rod end. I'm gonna take this nut off the tie rod, pop this guy into position on the knuckle. All right. Take the 21-millimeter nut and thread it back on and then your socket to tighten it down. All right. So, now we can take our 15-millimeter ratcheting wrench and we're gonna tighten up the three nuts to the top of the strut tower.Now, the last step of the install here is gonna be reconnecting our sway bar end link. Now, because we just added our leveling kit, the sway bar now doesn't have enough threads popping through the top to put our factory nut back on. How we're gonna beat that is lowering our truck down to the ground and use a hydraulic floor jack to jack up the bottom of the suspension assembly to bring that stud up through enough to put our nut back on. So, right now, let's lower the truck and get the hydraulic floor jack in place.All right. So, now I got my hydraulic floor jack. I'm slowly jacking up the lower control arm, and as you can see, the stud's gonna start popping its way through. All right. So, I'm gonna pop that spacer back on and then our nut. Now, we can grab our 16-millimeter deep socket and tighten that down. All right, last couple of steps. We are gonna reconnect our ABS line to the knuckle and to the brake line up here. And now you're good to go.At this point guys, you're good to repeat this exact same process on the other side, and you definitely wanna make sure you're looking up the proper torque specs for your specific gen, and your trim package, and your model because this does cover the '06 to '18s, and it can vary slightly. Once you have that taken care of, throw your wheels back on, and you're good to go.Well, guys, that's gonna wrap up my review and install for the Mammoth 2.5-inch front leveling kit available for the '06 to '18 four-wheel-drive Ram 1500. So, you can get your 2.5-inch leveling kit right here at americantrucks.com.

      Product Information

      Features, Description, Reviews, Q&A, Specs & Installation

      Features & Specs

      • 2.5-Inch Leveling Kit
      • Enhances Off-Road Experience
      • Sturdy Laser-Cut Steel Manufacture with Rust Resistance
      • Powder Coat Finish
      • Bolt-On Installation
      • Installation Hardware Included
      • Sold as a Pair
      • Fits All 2006–2018 4WD Dodge RAM 1500s

      Description

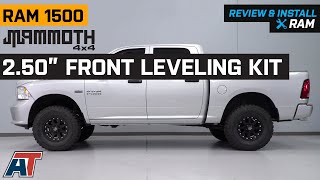
      Improve Your Off-Roading Experience. Riding on rocky or bumpy terrain can adversely affect your Dodge RAM 1500 suspension, which is why you need to get the Mammoth 2.5-Inch Leveling Kit. This kit includes a pair of spacers that lift the front of your truck by 2 inches to give you more ground clearance. Consequently, you will have better luck avoiding trail driving dangers, such as boulders and fallen logs.

      Sturdy and Rust-Resistant Manufacture. These spacers are made with laser-cut steel to strengthen them against tough terrain and weather conditions. In addition, the powder coat finish will prevent them from rusting.

      Bolt-On Installation. This leveling kit comes with all the necessary hardware to install the spacers on your RAM truck. The spacers bolt onto the installation areas, thus eliminating the need for any alterations. Expect to spend up to 2 hours installing them.

      Application. The Mammoth 2.5-Inch Front Leveling Kit is specially designed to fit on all 2006–2018 4WD Dodge RAM 1500s. It is sold as a pair.

      Mammoth 4x4

      Shop All Truck Parts And Accessories

      Shop All Truck Leveling Kits

      Shop All Truck Lift Kits

      Fitment:

      Details

      Mammoth R107248

      CA Residents: WARNING: Cancer and Reproductive Harm - www.P65Warnings.ca.gov

      Installation & What's in the Box

      Installation Info

      What's in the Box

      • (2) Strut Spacers
      • (12) Bolts
      4.7

      Customer Reviews (500+)

        Questions & Answers

        10 More Questions

        Will It Fit My Ram 1500

        • 3.0L V6 EcoDiesel - 14, 15, 16, 17, 18
        • 3.6L V6 - 13, 14, 15, 16, 17, 18
        • 3.7L V6 - 10
        • 4.7L V8 - 06, 07, 08, 09, 10, 11, 12, 13
        • 5.7L V8 - 06, 07, 08, 09, 10, 11, 12, 13, 14, 15, 16, 17, 18

            Related Ram 1500 Categories