FREE 1 to 3-Day Delivery on Orders $149+ Details
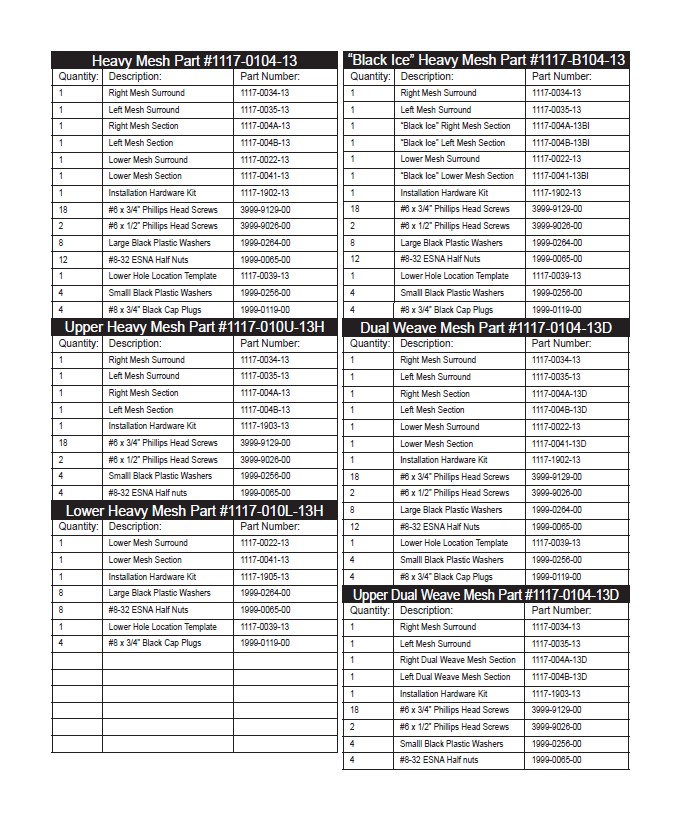
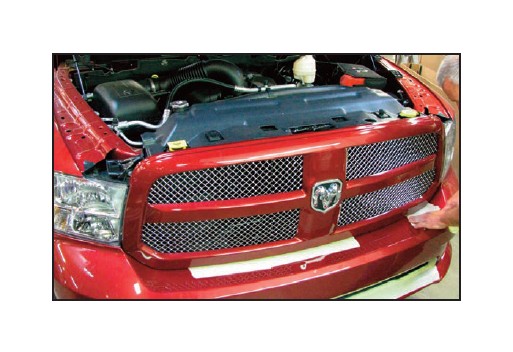
How to Install E & G Heavy Mesh Upper Grille Insert - Chrome (13-17 RAM 1500, Excluding Rebel) on your Dodge RAM
Tools Required
- Automotive grade masking tape
- electric drill
- 5/16” and 3/32” drill bits
- razor blade or X-Acto knife
- flat blade screwdriver
- phillips screwdriver
- 8mm, 9mm & 10mm sockets
- ratchet
- vise grips or pliers
- solvent
- glass cleaner and soft, clean cloths
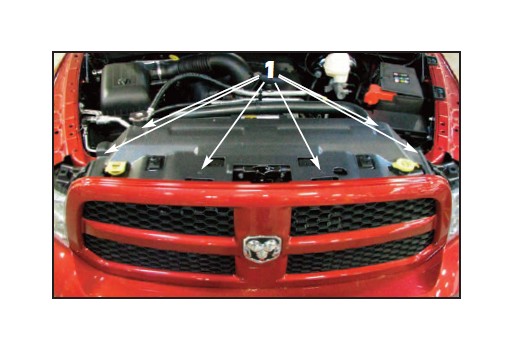
1. Simply lift up on the flexible cover to remove it from the radiator support panel and factory grille, exposing the upper mounting hardware.
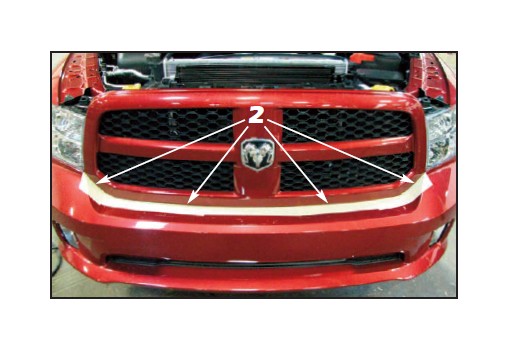
2. Apply masking tape to the top of the bumper cover underneath the factory grille as shown to protect the bumper finish during the factory grille removal.
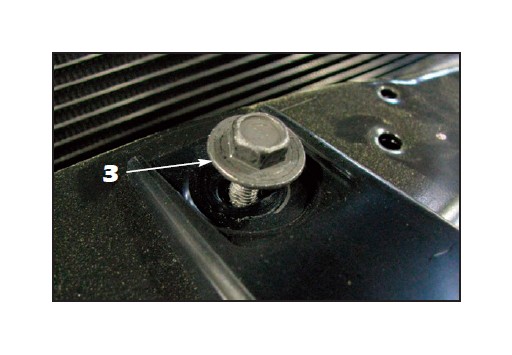
3. Remove the four (4) factory 10mm fasteners from the top of the grille.
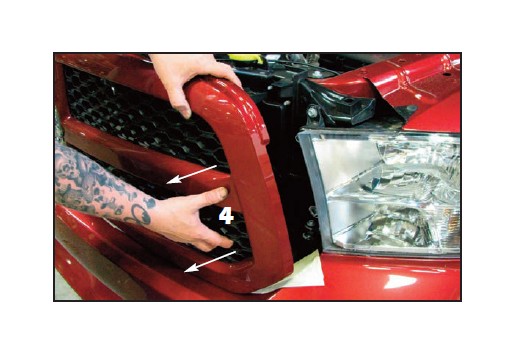
4. Pull off the factory grille from the side attaching points. Several quick, firm pulls will release the clips. Place the factory grille face up onto a clean, flat work area for factory grille insert removal.
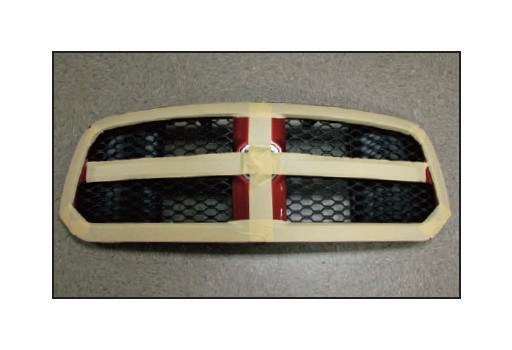
5. Apply masking tape to the factory grille as shown to protect the finish.
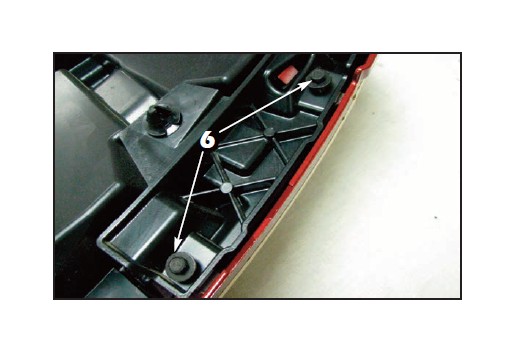
6. Remove all ten (10) 8mm mounting screws from the back of the factory grille mounting bracket and remove the bracket (save for reinstallation).
7. Use a flat blade screwdriver to unclip the factor y air deflectors from the grille inser ts.
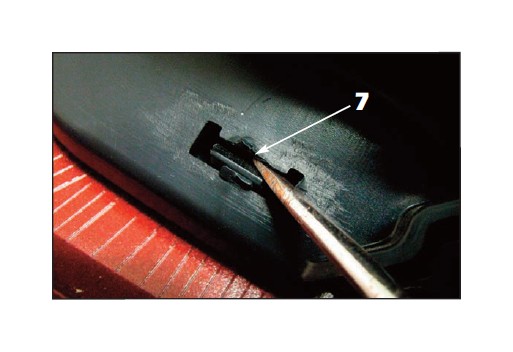
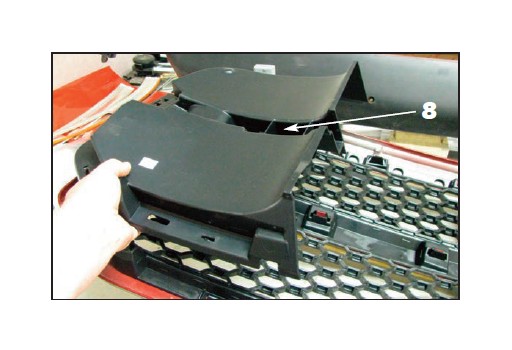
8. Once the factory air deflectors have released from the mounting tabs, remove them from the vehicle (to be reused).
9. Use a flat blade screwdriver to unclip the factory grille inserts from the grille surround.
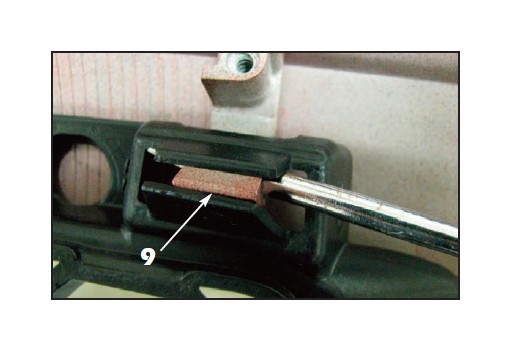
10. Once the factory grille inserts have released from the mounting tabs, remove them from the vehicle (not reused).
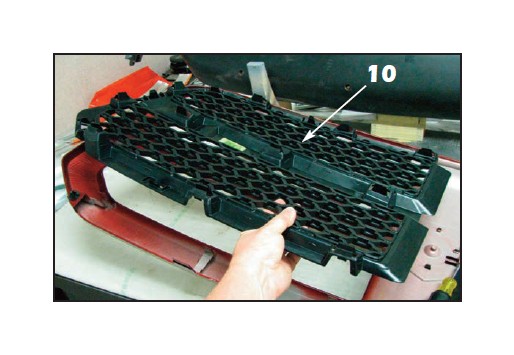
11. Align the mesh sections over the back of the factory grille.
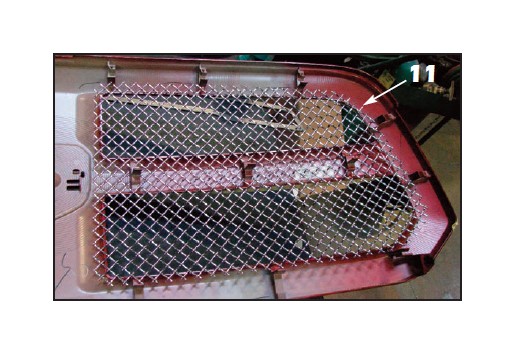
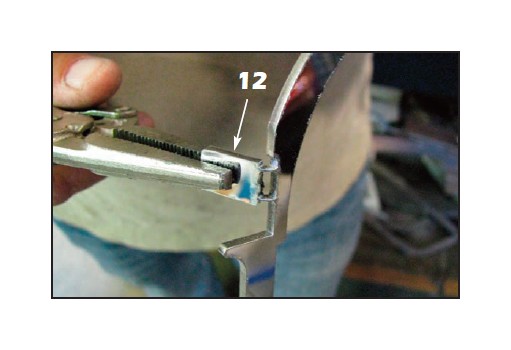
12. Using a pliers or vise grips, bend the smalll tab on the E&G upper mesh surrounds to match the angle of the mounting tabs on the factory grille.
13. Align the upper mesh surround over the back of the mesh section and use vise grips to hold it in proper alignment. The surround should hold the mesh tight against the factory grille surround.
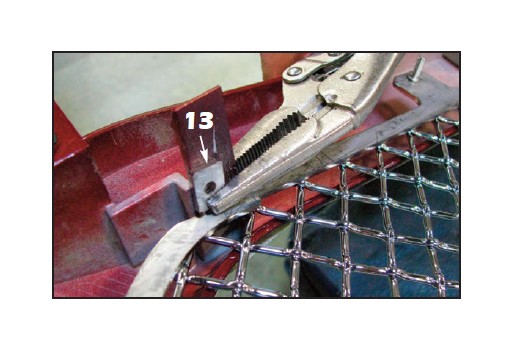
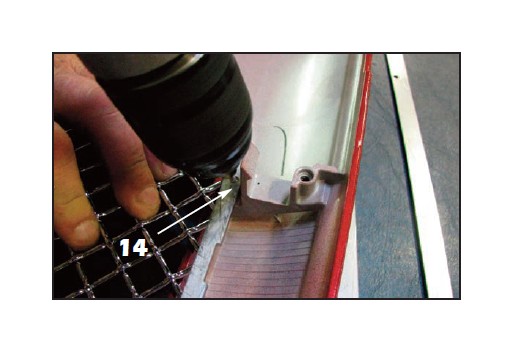
14. Use a 3/32” drill bit to drill through the existing holes in the E&G surround and through the mounting tabs on the factory grille surround. IMPORTANT: Set the drill depth short enough as to not drill through the front of the factory grille !
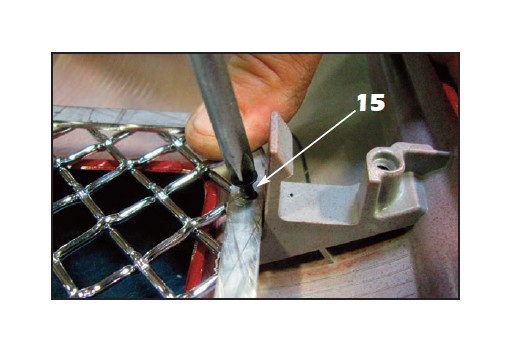
15. Install the supplied #6 x 3/4” black phillips head screws to secure the mesh and surround to the factory grille surround. IMPORTANT: Do not overtighten the screw or you will strip out the mounting hole !
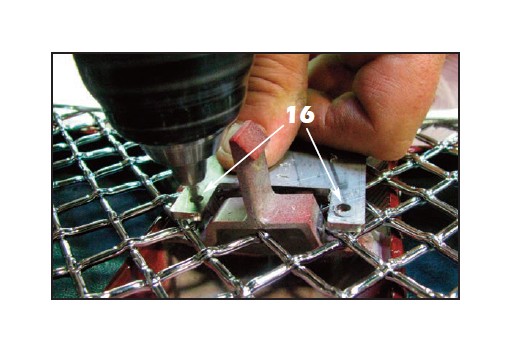
16. Use a 3/32” drill bit to drill through the existing holes in the E&G surround.
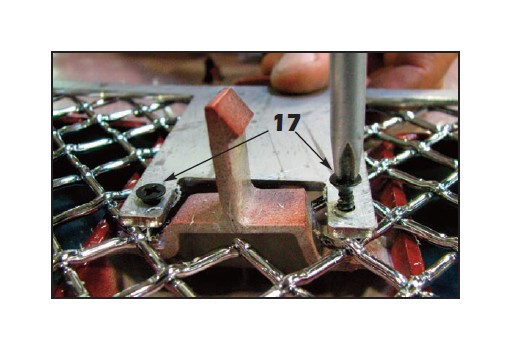
17. Install the supplied #6 x 3/4” black phillips head screws to secure the mesh and surround. Finish drilling and installing the screws around the perimeter of the surrounds.IMPORTANT: Do not over tighten the screws or you will strip out the mounting holes !
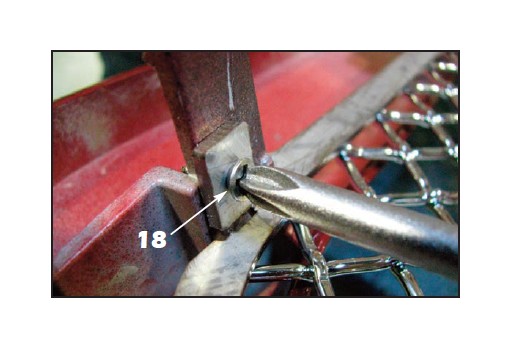
18. Drill (using a 3/32”drill bit) and install the supplied #6 X 1/2” phillips screws through the tabs bent in Step 12. IMPORTANT: Do not overtighten the screw or you will strip out the mounting hole !
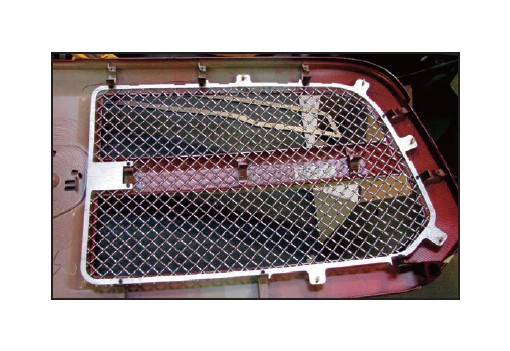
19. The finished mesh and surround installation.
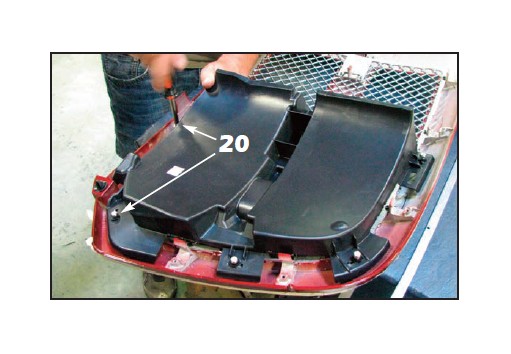
20. Carefully align the factory air deflectors, making sure that studs on the E&G surround fit through the original slots that secured the deflectors to the factory grille inserts. Install the supplied small black plastic washers and #8-32 ESNA half nuts onto the lower studs only (two per side).
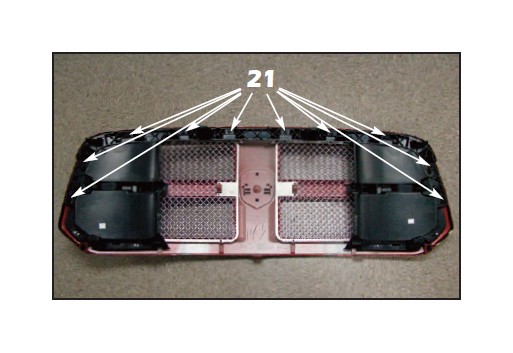
21. Install the factory inner grille mounting bracket reusing the 8mm hex screws.
22. Finish the upper grille installation by clipping it back onto the grille support and reinstalling the upper 10mm factory fasteners removed in Step 3. Replace the radiator support panel cover and remove the masking tape on the bumper cover. Upper grille installation is now finished.
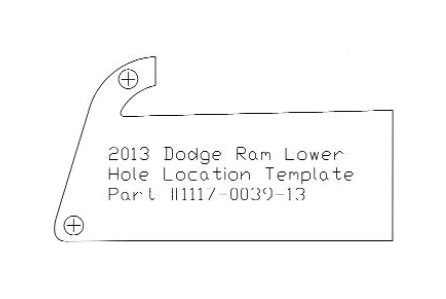
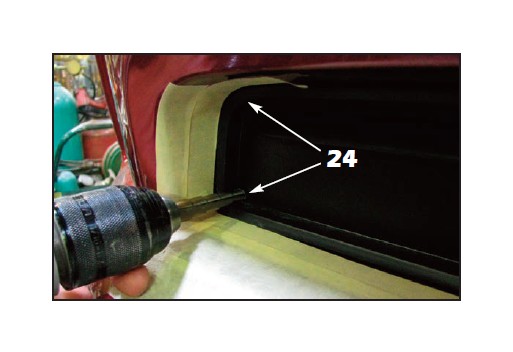
23. Raise the vehicle on a lift or use a jack with jack stands. NOTE: If using a jack, you must use jack stands. Do not rely on the jack to support the vehicle. If the jack fails, serious injury could occur. Cut out the supplied template (last page of this manual) and align it into the lower grille opening and tape it into place. Use an awl or similar pointed tool to mark the hole locations, untape the template, flip it over and mark the opposite side.

24. Using a 3/32” drill bit, drill through the marks made in the previous step. Enlarge the holes to 5/16”.
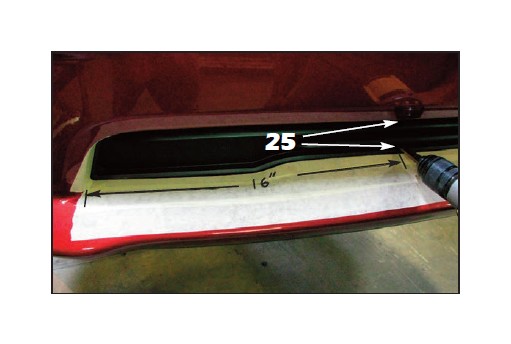
25. Using a tape measure, measure over from the outer corner of the grille opening 16” and mark the bumper cover (as shown). Use a 3/32” drill bit to drill a pilot hole through the bumper cover (where shown, same surface as the holes drilled in the previous step). Drill an additional hole above this hole in the top of the factory lower grille insert. Enlarge these holes to 5/16”.
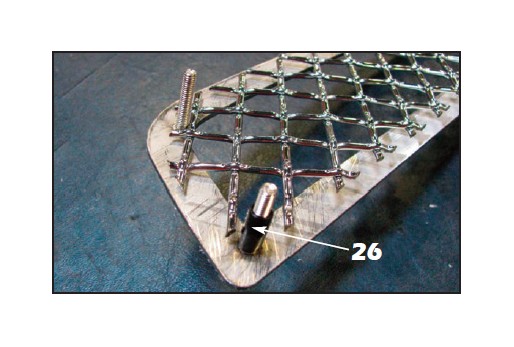
26. Trim the closed ends from the supplied black cap plugs and install them onto the lower four (4) mounting studs to help conceal them from the front prior to grille installation.
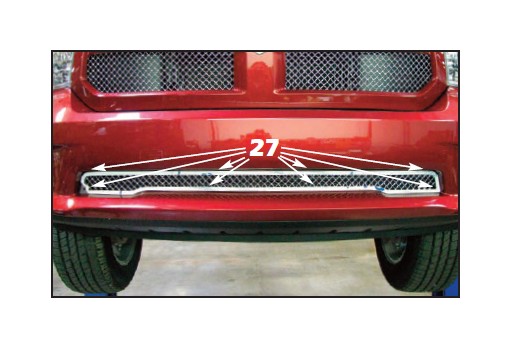
27. Peel back a small portion of the protective liner from the polished stainless steel surround prior to installing the lower grille. Align the lower mesh grille into place, making sure all mounting studs pass through the holes drilled in the previous steps. It may be necessary to elongate the mounting holes slightly.
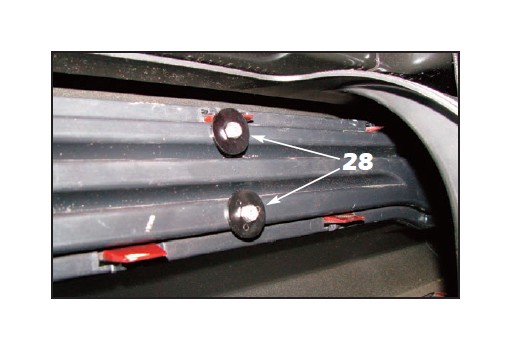
28. Install the supplied large black plastic washers and #8-32 ESNA half nuts onto each stud and hand tighten at this time.
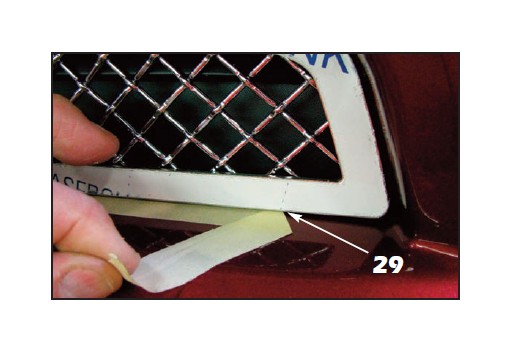
29. Remove the masking tape from around the lower grille surround by pulling back over itself to minimize tape breakage. Once the tape has been removed, finish tightening the mounting hardware until the washers no longer rotate. DO NOT OVERTIGHTEN or you will indent the lower surround at the stud locations..
30. Use solvent and a clean, soft cloth to remove any glue residue from the lower grille surround. Use alcohol or glass cleaner and a soft, clean cloth to remove any solvent residue. Lower the vehicle to finish the installation.