Guaranteed 12/24 Delivery Still Available see item page for details! available on most items - Details
How to Install Covercraft Seat Saver 2nd Row Seat Cover - Charcoal (02-08 RAM 1500 Quad Cab, Mega Cab) on your Dodge RAM
Shop Parts in this Guide
- Covercraft Seat Saver Polycotton Custom Second Row Seat Cover; Charcoal (02-08 RAM 1500 Quad Cab, Mega Cab)
- Covercraft Seat Saver Polycotton Custom Second Row Seat Cover; Gray (02-08 RAM 1500 Quad Cab, Mega Cab)
- Covercraft Seat Saver Polycotton Custom Second Row Seat Cover; Charcoal (09-18 RAM 1500 Quad Cab, Crew Cab)
- Covercraft Seat Saver Polycotton Custom Second Row Seat Cover; Gray (09-18 RAM 1500 Quad Cab, Crew Cab)
- Covercraft SeatSaver Second Row Seat Cover; Carhartt Gravel (02-08 RAM 1500 Quad Cab, Mega Cab)
- Covercraft SeatSaver Second Row Seat Cover; Carhartt Gravel (09-18 RAM 1500 Quad Cab, Crew Cab)
- Covercraft Seat Saver Polycotton Custom Front Row Seat Covers; Charcoal (02-08 RAM 1500 w/ Bench Seat)
- Covercraft Seat Saver Polycotton Custom Front Row Seat Covers; Charcoal (09-18 RAM 1500 w/ Bucket Seats)
- Covercraft Seat Saver Polycotton Custom Front Row Seat Covers; Gray (02-08 RAM 1500 w/ Bench Seat)
- Covercraft Seat Saver Polycotton Custom Front Row Seat Covers; Gray (09-18 RAM 1500 w/ Bucket Seats)
- Covercraft SeatSaver Custom Front Seat Covers; Carhartt Gravel (02-08 RAM 1500 w/ Bench Seat)
- Covercraft SeatSaver Custom Front Seat Covers; Carhartt Gravel (09-18 RAM 1500 w/ Bucket Seats)
- Covercraft Seat Saver Polycotton Custom Front Row Seat Covers; Charcoal (09-18 RAM 1500 w/ Bench Seat)
- Covercraft Seat Saver Polycotton Custom Front Row Seat Covers; Gray (09-18 RAM 1500 w/ Bench Seat)
- Covercraft SeatSaver Custom Front Seat Covers; Carhartt Gravel (09-18 RAM 1500 w/ Bench Seat)
About Your Covercraft Product
Congratulations on your purchasing decision! Covercraft Industries designed your SeatSaver® to be the very best available. With proper care, your SeatSaver® will provide years of stylish looks and maximum protection.
If you encounter any problems during the installation of your SeatSaver®, please contact our Customer Service Department, Monday - Friday, 8AM - 4PM (CST) at 405-238-9651 or by e-mail at [email protected]. You may also access help videos on the web at http://www.covercraft.com/us/en/seat-covers.
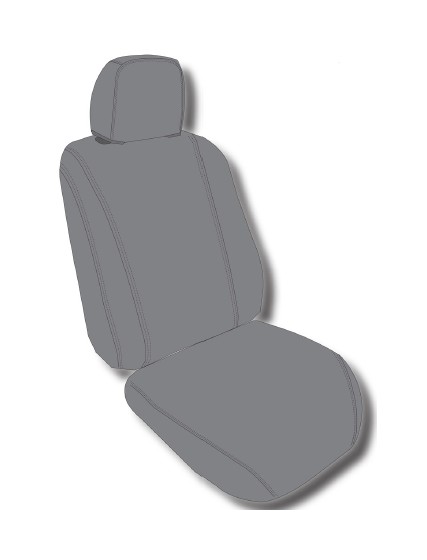
Thoroughly inspect each of your SeatSavers before installation to determine if any or all of the following special features apply to your specific seat style. Some of the information presented in this instruction sheet may not apply to your specific installation. Please be sure to use the applicable information for your installation.
SPECIAL POINTS TO WATCH FOR & CONSIDER:
1 - Contour of seat back and cushions, including separate headrest and/or armrest covers. Some sets may have additional headrest covers to accommodate optional-sized headrests.
2 - Cutouts for seat adjustment levers and buttons, shoulder harness retaining brackets and stationary seat belt harnesses.
3 - Hook & loop attachments on elastic straps sewn onto the underside of the bottom cushion.
4 - Hook & loop attachments along the bottom outside edge near the crevice area between the seat back and the bottom cushion.
5 - Cloth-type belt with hook & loop attachments. Large cloth loop.
6 - Side release buckles with webbing straps.
7 - Be sure that no hook & loop attachments are connected to other pieces prior to starting the installation.
INSTALLATION INSTRUCTIONS
If your vehicle is equipped with brackets on the outboard side of the backrest, check the covers to determine if an opening has been provided for them. If not, they must be removed before installation of the SeatSavers. If your covers have a belt loop sewn at the bottom, make sure it slips over the backrest while installing the SeatSaver.
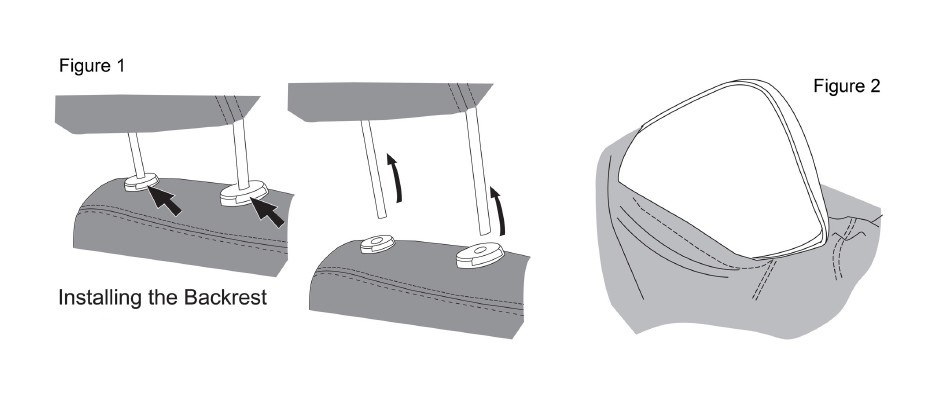
Installing the Headrest
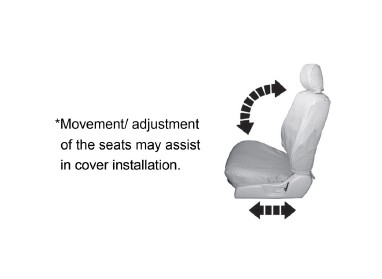
Step 1: Remove headrests, if applicable (see Figure 1). If headrests are not removable, locate the hook and loop openings in the seatcover that will allow for the headrests to pass through (see Figure 2).
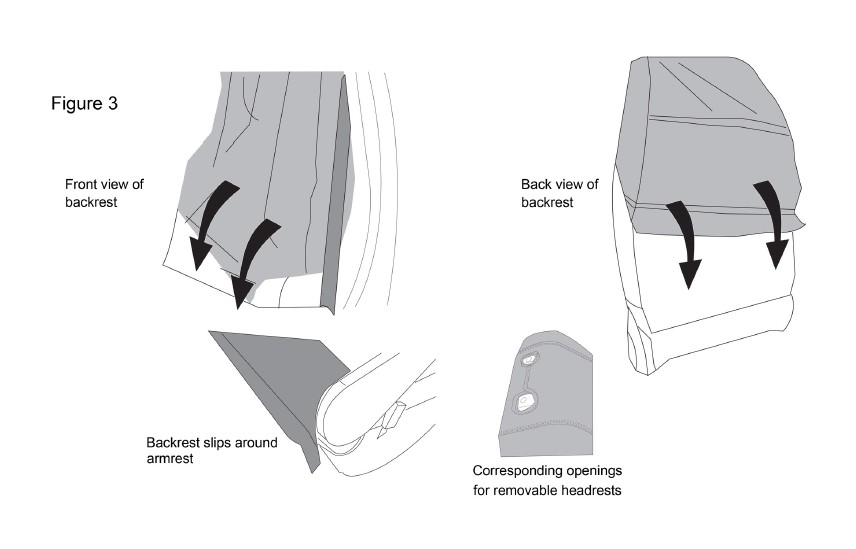
Step 2: Place backrest on first (see Figure 3) noting any seat details or features that have a corresponding opening or cutout on the cover (seatbelt, armrest, removable headrests, etc.).
Note: Fold flat seats commonly have a separate top and bottom piece.
Installing the Seat Cushion
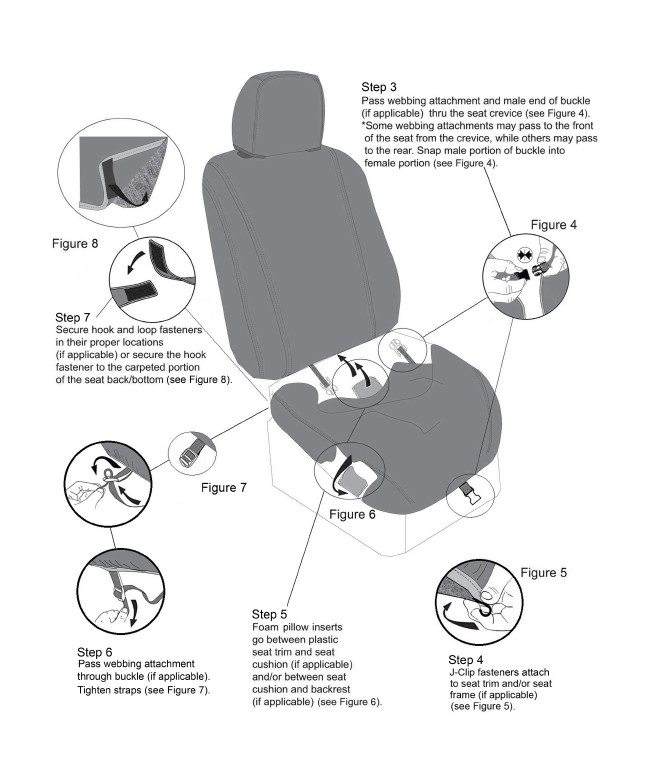
Step 8: If your vehicle has a center seat console, with or without headrests, please refer to Steps 1 through 7 and install the corresponding center console covers on your seats.
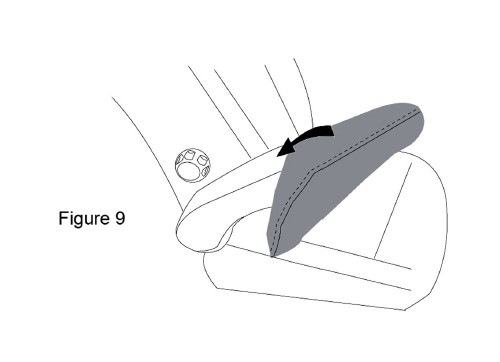
Installing the Armrest
Step 9: Determine the correct cover for each armrest by matching the contour/shape of the cover with the contour/shape of the armrest. Pull the cover completely over the armrest, securing it over the rear edge (see Figure 9). Adjust as needed.
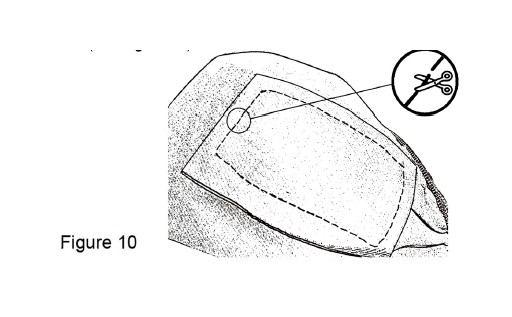
Step 10: If the seats are equipped with options such as additional levers or controls, an optional patch must be removed for ac-cess. From the inside of the cover only, cut the stitches holding the patch in place. Remove the patch and any loose threads that may remain (see Figure 10).
Installing the Rear Seats
Step 11: Remove headrests, if applicable, as shown in Figure 1 of the front seat installation. If headrests are not removable, locate the hook and loop openings in the seat cover that will allow for the headrests to pass through (see Figure 2 of the front seat installation).
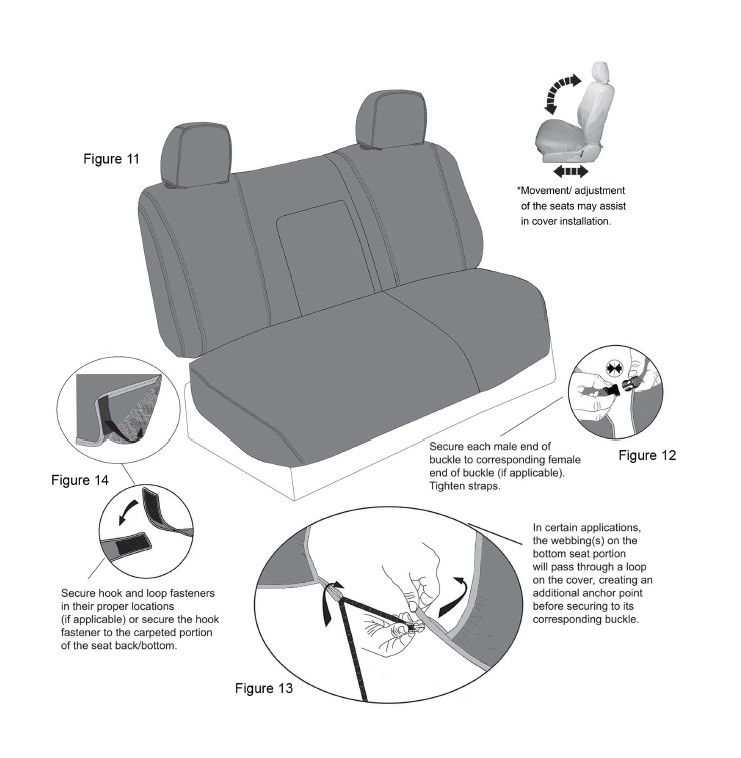
Place cover(s) over their respective part(s) (60/ 40) noting any seat details or features that have a corresponding opening or cutout on the cover (seatbelt, armrest, headrest, etc.) (see Figure 11).
*In certain applications, the backrest cover will pass under the center seatbelt.
*In certain applications, the backrest cover will have a hook and loop closure in front
or in the back to accommodate the center seatbelt.
*ln certain applications, the backrest cover will have a hook and loop closure in back to
accommodate the center seatbelt.
Installing the Rearseat Armrest/Console
Determine the correct orientation for the cover by matching the contour/shape of the cover with the contour/shape of the armrest/console.
Step 12: Pull the cover over the armrest/ console, making sure to pull the release strap through the cutout (if applicable).
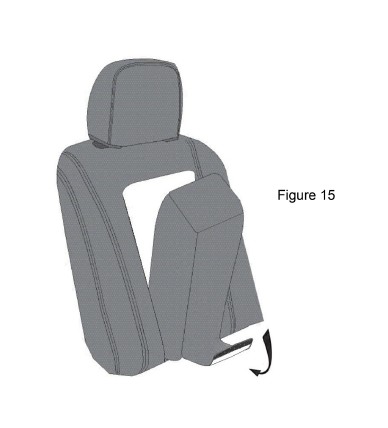
Step 13: With the armrest/console tilted, insert the rear attachment through the space between the seat back and rear edge of the armrest/console.
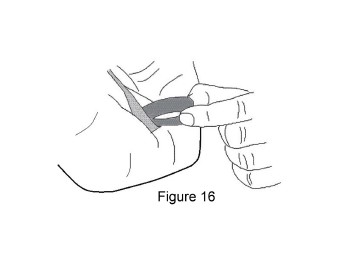
Step 14: With the armrest/console folded down, secure the hook and loop fastener at the rear edge. Adjust as needed.
CARE AND CLEANING INSTRUCTIONS
Wash your SeatSavers in a conventional washing machine, using cold water, a low-sudsing detergent and a gentle cycle setting. DO NOT use bleach or fabric softener.
Dry covers using the "air" or "low heat" setting on a standard tumble dryer. They may also be line dried, weather condi-tions and temperature permitting. DO NOT IRON.


