FREE 1 to 3-Day Delivery on Orders $149+ Details
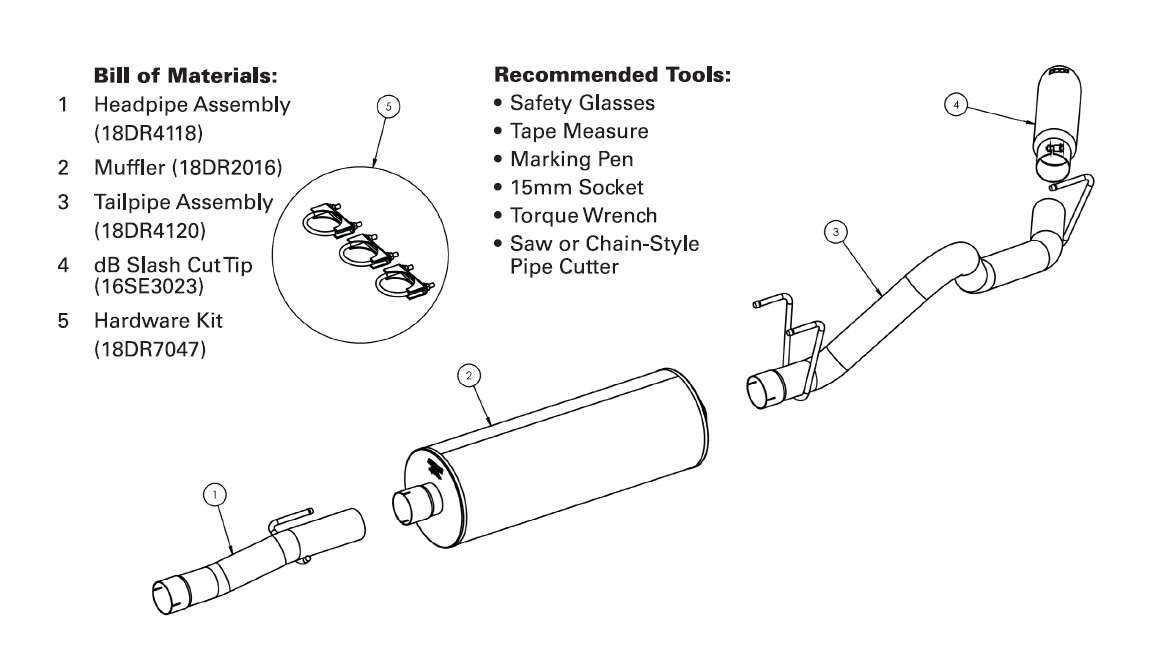
How to Install Corsa 3 in. Sport Cat-Back Exhaust w/ Polished Tip - Single Side Exit (03-07 4.7L RAM 1500) on your Dodge RAM
Tools Required
- Safety Glasses
- Tape Measure
- Marking Pen
- 15mm Socket
- Torque Wrench
- Saw or Chain-Style Pipe Cutter

Shop Parts in this Guide
Please take time to read and understand these installation instructions.
We recommend that installation of this system be performed by a qualified service center or professional muffler installer who has the necessary equipment, tools and experienced personnel. However, if you decide to perform this install, the use of a hoist and an additional person will be required.
CAUTION: Never work on a hot exhaust system. Allow time for the vehicle to cool. Always wear eye protection when working under a vehicle.
Please confirm that all parts are present before beginning the factory exhaust system removal and dB Performance Exhaust system installation.
NOTE: The supplied double edge clamps in this system will crush and permanently deform the exhaust piping as they are tightened. DO NOT tighten these clamps any more than is necessary to lightly hold the exhaust components in place, until the very end of this installation process. It will be difficult or impossible to make any positional or rotational adjustments to the exhaust system after these clamps have been tightened down.
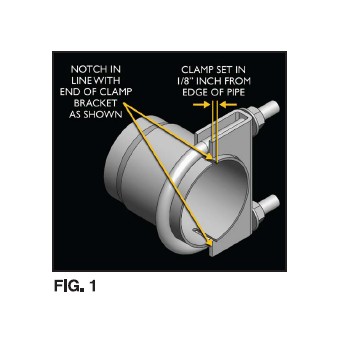
VERY IMPORTANT: Align all clamps so that the open edge of the clamp bracket is parallel and aligned with the notch in the pipe, and the outside edge of the clamp bracket is approximately 1/8" from the end of the pipe expansion. (See Fig. 1) Failure to properly position or orient the clamps could result in a weak clamping load, or even a potential leak at the clamp joints.
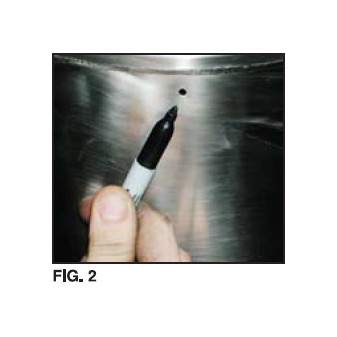
IMPORTANT: Make sure that the small drain holes in the muffler are facing down when the muffler is installed. (See Fig. 2)
Stock Exhaust Removal Instructions
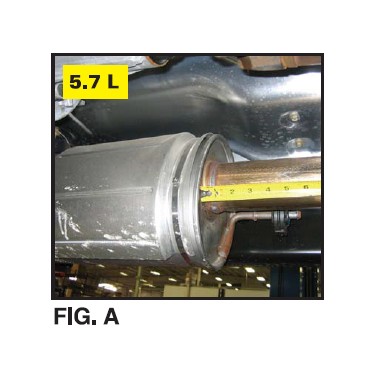
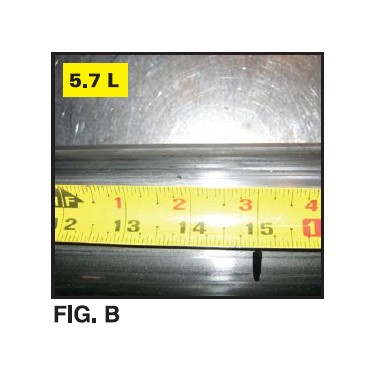
5.7L begin here:
1) Line up the end of a tape measure so that it is flush with the face of the end cap of the small factory front muffler and scribe a line on the exhaust pipe 15 inches from the face of the end cap. (See Fig's A and B). Continue to Step 2. 4.7L begin here:
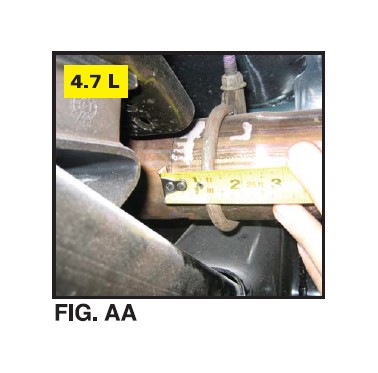
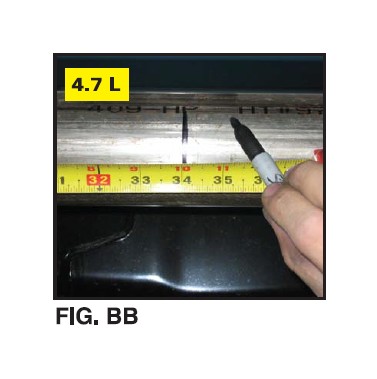
1) Line up the end of a tape measure so that it is flush with the end of the factory inlet pipe. Scribe a line 34 inches on the exhaust pipe from the front of the factory inlet pipe. (See Fig's AA and BB)
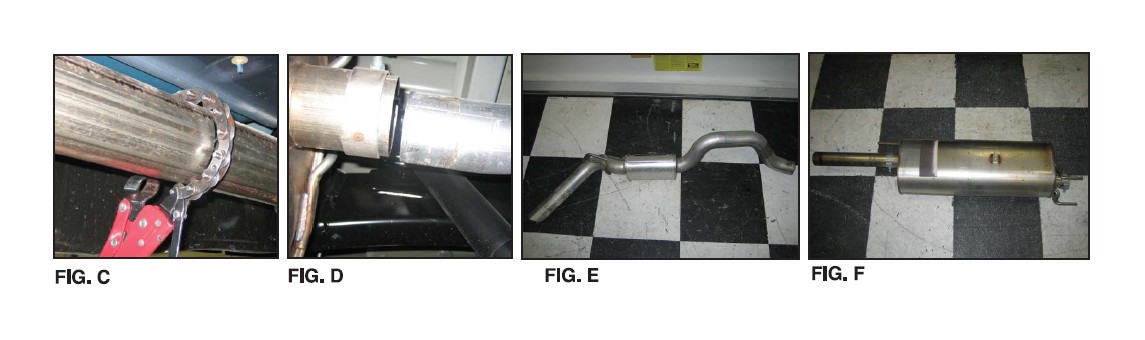
2) Line up a chain style cutting device with the scribed line made in step 1 and cut the factory pipe completely at this location. (See Fig C)
3) Loosen the clamp at the large tunnel muffler exit to tail pipe inlet location using a 15mm Socket. (See Fig D)
4) Remove the factory tail pipe assembly from the truck by sliding the tail pipe hanger through the rear most grommet then maneuvering the tail pipe rearward over the axle. It may be easier to remove the tail pipe if the spare tire is temporarily removed to allow for more clearance. Note: Spraying the rear grommet with a soap and water solution will make the removal job easier. (See Fig E)
5) Remove the factory tunnel muffler by detaching the two rear rubber grommets from the main muffler hangers. NOTE: Spraying the grommets with a soap and water solution will make the removal job easier. The removal of the factory system is now complete. (See Fig F)
All clamps should be tightened using a properly calibrated Torque Wrench. Using an air impact gun will damage the clamp and reduce its ability to effectively seal the joint. It may also cause the joint to separate thereby causing damage to your exhaust system and your vehicle.
dB Performance Exhaust Installation
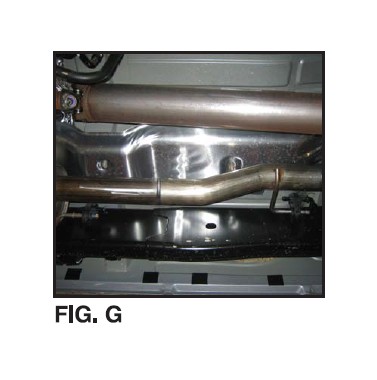
1) Locate the dB front pipe and slide the expanded end of the pipe onto the factory pipe. Next, slide the hanger through the rubber grommet.Then slide a 3" clamp over the expanded end of the pipe. Pre-tighten the clamp at this time. Leave the clamp loose enough for final adjustment later. (See Fig G)
2) Locate the dB muffler and slide the muffler onto the end of the dB front pipe. Make sure the weep holes in the muffler are facing down. Place a 3" clamp on the expanded end of the muffler. Pre-tighten the clamp at this time. (See Fig H)
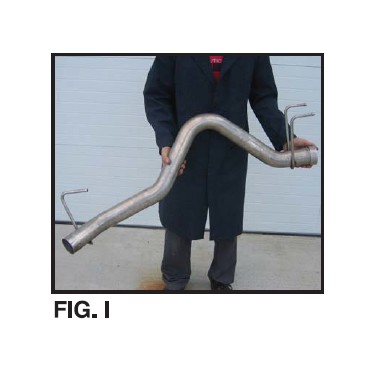
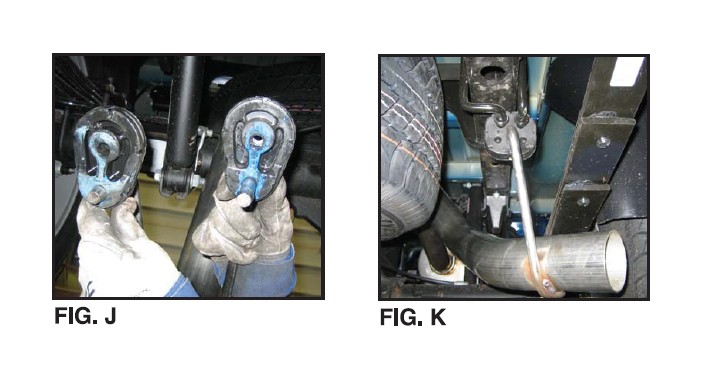
3) Locate the dB tailpipe. Slide the two rear rubber grommets onto the front tailpipe hanger as shown in Fig I, J. Note: Spraying the rear grommet with a soap and water solution will make the removal job easier.
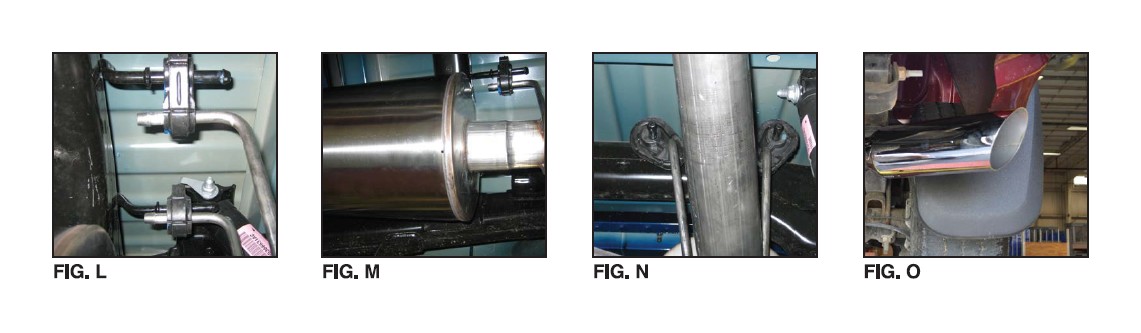
4) Slide the rear most hanger on the tail pipe through the rear most grommet shown in Fig K. Then slide the expanded end of the tail pipe onto the exit of the dB muffler. Finally, place the two rubber grommets that are located on the front hanger of the tail pipe onto the chassis hangers. (See Fig's L, M and N)
5) Place a 3" clamp on the front of the dB tail pipe. Pre- tighten the clamp at this time.
6) Locate the tip with built-in clamp and slide the tip onto the exit of the tail pipe. Align the tip so that there is about a one-half to one inch gap between the top of the tip and the bottom of the body panel with logo facing up. Pre-tighten the clamp at this time. (See Fig 0)
7) Starting from the front of the truck, tighten all clamps to 35 ft.-lbs. and tip clamp to 16-20 ft.-lbs.
8) It is strongly suggested that all clamps be checked and tightened after road testing the vehicle once the system has cooled.