 FREE 1 to 3-Day Delivery on Orders $149+ Details
How to Install Black Horse Off Road Pocket Style Fender Flares - Matte Black (02-08 RAM 1500) on your Dodge RAM
Tools Required
- Utility K nife
- # 2 Phillips D rive bit
- 7 /32 S ocket
- T4 5 Torx Bit
- Marker
- Socket W rench
FEATURE
High quality injection molding fender flares
Made from light weight impact resistance Polypropylene, non-
cracking,non-warping, 1 0 0 % UV-resistant.
Professional installation is always recommended
Step 1 : Before Installation
A.Fit: Fit of the flare to vehicle should be confirmed. Some flin-g, sanding, or cutting may be adopted for proper fit if necessary.
B.Painting: (optional) if paint is desired it must be done prior of i-nstalling flares on vehicle. Clean outer surface with a good grad-e degreaser.
C.Metal protection: Rust resistance paint of all exposed fastene-rs and bare metal should be done BEFOR installing flares. Und-ercoating the inner fender wells should be done AFTER flare at-tachments have been completed.
D .Flares may interfere with existing decals on vehicle. If you wi-sh. Remove decals prior to installation of flares.
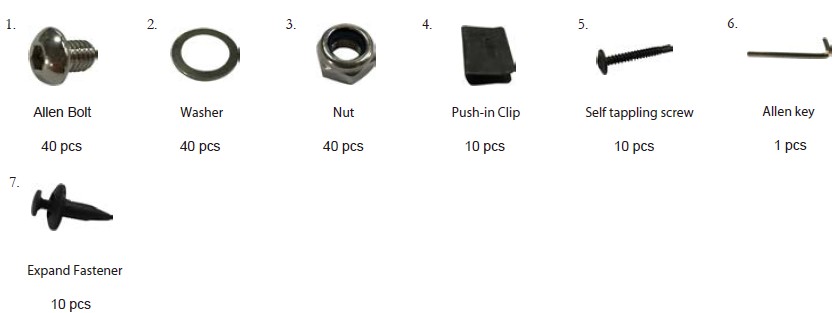
Included in Hardware Kit:
STEP 2 - Edge trim installation
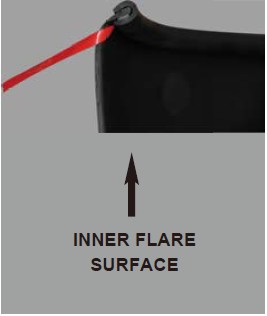
A. Peel two to three inches of red vinyl backing away from Edge Trim tape. Applying the adhesive side of the edge trim to the inner side of the flare, affix the edge trim to the top edge of the flare (the portion that co-mes portion that comes in contact with the vehicle).
B. Press edge trim into place along the top edge of the flare in one-foot increments, pulling red vinyl backing free as you continue to work your way around the top edge of the flare.
STEP 3 - Edge trim tool procedures
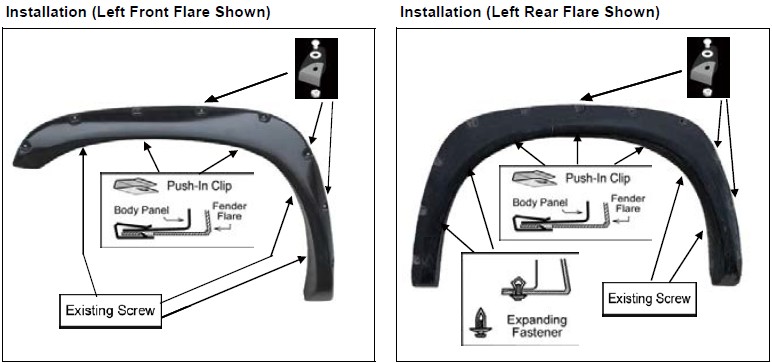
Use allen key to tighten allen bolt, washer and nut firmly on every pocket of the fender flares first then place the flare on the vehicle with best position. Apply 2 Push- In clip into the mounting slot in flare and secure it to the vehicle as shown. Fasten the existing factory screws into the original location that were previously removed.
Use allen key to tight allen bolt, washer and nut firmly on ever pocket of the fender flares first, then place the flare on the vehicle with best position. Apply 3 Push-In clip into the mounting slot in flare and secure it to the vehicle. Apply 2 Plastic Expanding Fastener into the mounting slot in flare and secure it to the vehicle as shown. Fasten the existing factory screws into the original location that were previously removed.
(Optional B;Use the included self tapping screw to instead of the Expanding Fastener.where the Expanding Fastener is not workable on the different condition of the fenger,or it may be used for extra secure when it’s needed. )


