Installation Time
(approx) 2 Hours
Difficulty Level:
Light to Moderate mechanical skill required.
Guaranteed Free Delivery by 12/24! available on most items - Details
$1,009.99 (pair)
FREE Shipping + $149.00 Oversized Item Fee Market Price $1,211.99 You Save 17% ($202.00)Add Local Shop Installation
Saved - View your saved items
We're sorry. We couldn't save this product at this time.
Buy 2 or more Barricade items of $500+, Get $50!
Eric: Hey, guys, I'm Eric with AmericanTrucks. Today, we're taking a look at this Barricade Extreme HD Front Bumper, fitting all 2019 and later RAM 1500 except the Rebel and TRX editions. You should really be checking this out if you want a more aggressive look to the front end of your truck and you also want the option of adding some off-road lighting. Now, in terms of styling, it's really quite a stunning visual difference between your factory bumper. You're going from a lot of chrome with your factory bumper to solid black here from Barricade. And not only that, but you got this angular design that is gonna give you a lot more clearance on the front end if you like to do a little off-roading with your truck. And the tapered-up edges here will provide better obstacle clearance for your tires. Now, you're also getting an upgrade and protection for the front end as well, with the durable steel construction and durable black powder coat.Now, this bumper really is ideal if your truck is kind of set up like our fleet truck is where we have blacked-out wheels and you wanna continue it that styling cue of blacked-out appearance and kind of illuminating chrome off the front end of your truck. Now, Barricade also offers an extreme HD rear bumper as well, something else you can check out here on our website if you want the matching pair. Now, as far as those off-road lighting options that I talked about, you have this large center section here where you can bolt in either some pod lights on the brackets, or the bracketry is versatile, you could also put in a long LED light bar in this area as well.And as far as versatility goes, you can also transfer over any forward-facing sensors that your truck may be equipped with. The bumper is pre-cut for those, and there are brackets on the backside that are welded directly to the bumper so that you can get a nice, solid mount with those sensors. Now, I mentioned durability a second ago, that really comes from the steel used in the construction of this bumper. The manufacturer tells us that it is 0.156 inches thick, and that is pretty thick and commensurate with a lot of other aftermarket bumpers out there right now. But it's definitely more durable and rugged than your factory bumper.Now, protecting that rugged steel is a thick, durable powder coat that is gonna protect that steel against weathering and corrosion for years to come. Now, as far as price is concerned, this is coming in under $1,000, that's pretty competitive out there if you compare it to a lot of other aftermarket bumpers right now. It is pretty straightforward. You might get some additional bell and whistles, or if you're looking for a winch mount for your bumper, you are gonna be looking at a lot more. But obviously, with more options, more features, of course, you're gonna look at a higher price.So if you're looking at a more entry-level bumper that's more friendly to your budget, this is obviously a very solid option. As far as the installation goes, guys, I'm giving it a fair two out of three wrenches on our difficulty meter. It's not the most difficult bumper installation we've done here at AmericanTrucks. There are a few tricks that we're gonna show you here a little bit in the installation portion on this video, but with some basic hand tools, you should have no problem getting this job done in about two hours time. So let's go ahead and take a look at the tools you're gonna need and move forward with the installation.All right, guys, tools you're gonna see in this installation include an electric impact wrench, a swivel socket, 8 and 10-millimeter sockets, a 1/2-inch socket, 16 and 18-millimeter deep well sockets, an Allen key that's included in the kit, 16, 18-millimeter wrenches, and an 18-millimeter ratcheting wrench. All right, guys, now, before we get into the installation, we're gonna show you a clip of how to get your factory bumper removed off your truck. And then after that, I'll be right back to show you how to get your new bumper installed.Man: So right off the bat here, you can see our truck is on the lift. I just wanted to say, you don't need a lift to do this. This is definitely extremely easy. We just do that to make it a little bit easier on our camera guy, make sure he can see everything, and get you the information that you need to know to do this to your brand new RAM. First step though, we're gonna grab the ratchet 8-millimeter socket. There's five bolts we're going to remove in the wheel well right here. We're gonna get those out of the way and that's going to allow us to remove a plastic wheel well liner that's connected to our front bumper. So now we have those three out. This piece is loose on our bumper, but it's still kind of trapped in there. So there's two more we're gonna remove, and that should pull right out.And you can see those are slotted so you only need to loosen them up to be able to pull that plastic piece out of the way. Now we're gonna come over to the other side and do the same thing. So once you've got the driver-side plastic removed, we can move on to the next step and that's gonna be this master wiring harness. We gotta disconnect that, and that'll unplug all the electronics on our bumper. First thing we're gonna do is move this switch from that position right there to the open position, and that will allow us to pop open this clamp right here, like so. And then if we just keep going with that, it should push the plug apart.Now, next up, we can actually move underneath the bumper here and disconnect this thing from the frame. There's 3 18-millimeter nuts that hold this thing on. The one that I have the wrench on right now is a little bit tough to get to with the impact gun so ratcheting wrench it is. But the other two aren't so bad so we should be able to get into those with the socket and extension to remove them. And then we're gonna do the same thing for the other side.And just like the other side, we're gonna start at the top with the ratcheting wrench, then move to the impact for the last two. Now we're gonna remove the two bolts on the outside. This is the last thing holding on our bumper so you wanna make sure you have a good handle on it before you remove these. Now this bumper is loose so we're just gonna pull it straight back and off the truck.Eric: All right, guys, now we have our factory bumper off of our truck. There is one more step we're gonna do and that is to remove the active air dam here. Because it sits a little bit low with this new installation, it might not look quite right so just in case you also wanna remove it, we're gonna show you how to do that real quick.All right, guys, now I'm underneath the truck here, and this is an electric motor that activates your active air dam. There's this wire coming down into a wiring harness. There's a gray lock tab. Just kind of push that out, and then pinch underneath. And then this whole thing backs out. Tuck it up out of the way for now. And we're gonna remove some hardware to get this off. All right, guys, we're going for these two nuts right there using a 1/2-inch socket. And we'll do the two on the other side as well.All right, guys, now that we have our factor bumper off our truck. I wanna throw up here in the rack and give you a quick side-by-side comparison. Now, obviously, the visual differences are very dramatic. You're going from a mostly chrome factory bumper to an all-blacked-out aftermarket bumper here from Barricade. And really, it's the styling differences that make up the huge difference here. And if blacked-out look is what you're going for, this is really a good option, especially considering it's going to be more budget-friendly, a lot of other options out there on the market. If you're looking to transfer over your factory fog lights, unfortunately, you can't do that with this setup. However, if you already have some aftermarket lighting in mind, whether it's gonna be some smaller pod lights or a larger LED light bar here for the center area, this is a perfect bumper to mount that onto.If your truck is equipped from the factory with forward-facing sensors, you can transfer those over to the new bumper here. There are several mounting points that are gonna allow you to do that. If you don't have that, like our truck does not, we're gonna show you there are some plugs that you can mount in these holes to kind of dress it up and give this bumper a more finished look. You're not gonna have to worry about open holes there kind of makes it looks a little unfinished and a little bit less clean of an appearance. So, other than that, that pretty much sums up the differences here. So let's go ahead and get our new bumper mounted on the truck.All right, guys, now we have our bumper up here on the table. We're gonna do a little bit of assembly work to get it ready to mount on the truck. And the main thing we're gonna have to assemble here is getting these brackets fitted to the bumper. And this is what's really gonna mate up here with the frame rails of your truck. Now there's two of these brackets, obviously, one for each side. And there's stamp. This one is stamped with the letter P for passenger side. And that's the side of the bumper we're on right here.Now, these kind of oval-shaped holes right here, we're gonna mount up right here. And as you can see, the bracket can adjust forward and back with this bracket. And then the holes are 90 degrees kind of perpendicular on the bumper side of the bracket. And that's gonna allow you to adjust up and down. So we're gonna get the hardware started. We're not gonna tighten anything up just yet. Because of this adjustability, that's gonna allow us that once we get it kind of lined up with the truck, we can align the bumper in and out or up and down so that it looks proper on the truck once it's all mounted up.So what I'm gonna do, we're gonna take these bolts. There's two sets of bolts in the kit, and the smaller of the set are what we're gonna be using right now. Some flat washers, and obviously, lock washers and a nut here. And we're gonna start the bolt from inside pointing towards the centerline of the truck leaving the nut over on this side, that'll allow us to tighten it up a little bit easier. We'll have more space to get our power tool in here to tighten up once it's on the truck.All right. Now we're gonna do the same thing for the driver-side bracket. All right, guys, now what we're looking at is the backside of the mounting for your forward-facing sensors. Now, if you're gonna be transferring those over from your truck, you're gonna be using these little half circle-shaped plastic pieces. And once you slide your sensor into place, this is basically like a backing that will mount in here like this. And there are little holes on the pegs and you'll slide into place like that. And that basically will help hold the sensor up into place. And you can also use these little foam circular pads that have an adhesive backing on them, you can stick that on the back there just to kind of insulate the sensor a little bit. We're not gonna be transferring those over on this truck. Our truck is not equipped with those so the other option you have is if you don't have sensors, you use this plug here and it basically slides into place like that.And you press that up into place. It's a little snug, but that kind of dresses up the hole from the other side gives a bumper a little bit more finished look. And when you push it up into place from the behind here, guys, like this, it's not going to sit flush, that's about as far up as it goes, but it does pinch in nice and snug and shouldn't come loose on you. And go ahead and repeat that, there's about four more of these on the bumper.All right, guys, so if you reside in a state that requires a front license plate on your vehicle to be road legal, you also have this bracket that's included in the kit. And it basically, there are circular holes on the backside, and that's gonna line up with these holes on the front of the truck, and that's gonna allow you to have kind of a nice, vertical bracket there that you can mount your license plate on. There's hardware in the kit here, these little Allen key button head type bolts that will slide in like that. And then we will match it up with flat washer. And then there are little nylon lock nuts that will tighten up from the backside.And you're gonna need a 10-mill socket to tighten up this lock nut. And to finish out the license plate bracket mounting, you have these plastic inserts that you can pop in here. So you have something to thread into when you mount your license plate.And the only other thing I wanna point out guys, as far as bracketry that's included in the kit is you have these two brackets here, and they are stamped D for driver and P for passenger side as well. And these will help allow you to mount up an LED light bar in here if that's what you're gonna do. So otherwise let's go ahead and move over to the truck. All right, guys, now I have a friend here kind of helping me line it up and getting a bolt started. That's the trickiest part of this is you can't really rest the bumper on anything. So you're gonna need maybe a little help. If you're doing this by yourself, maybe a floor jack can help you get it up into place and hold it there while you get some bolts started. And that's what we're gonna do.All right, guys, now, as you can probably tell, the bumper doesn't look quite right. We just started one bolt on each side. And as you go ahead and mount additional hardware in here, you have quite a bit of adjustability here due to the fact that the openings that you're putting the hardware through are kind of oval-shaped, and that's gonna allow you to adjust both heightwise as well as in and out like this and get it nice and tight and looking exactly how you want it to look. So let's go ahead and start getting some more hardware on here. All right, guys, now, just to get the bumper initially hung onto the frame rails, you can see here, we got a bolt started and there are two more up on the top corners of this bracket. So we're gonna go ahead and get those bolts in there, along with flat washers, lock washers, and a nut.Now the nice thing that makes this installation a little bit easier is you have a lot of room to work under here because of the design of the bumper. So, now that you have all three of those bolts started, go ahead and do that on the other side as well. And then we'll start tightening things up. All right, guys, with you a little bit of assistance here from our friend, we're holding the bumper up into place for proper alignment. If you're doing this yourself, you can use a floor jack, but you're gonna need 18-millimeter tools on both sides here to tighten this up.And then this inside one in the top corner here, I'm gonna use an 18-millimeter ratcheting wrench. It's a little bit tighter. All right. For this top inside one, guys, it's a little bit tight working up in here. So I have this cinched down as far as I can by hand. And I'm gonna use a ratcheting wrench on this one instead. Then go ahead and repeat this over on the other side. All right, guys, now don't forget we also have these bolts that are on the inside that kind of face towards the centerline of the truck. And these are 16-millimeters on both sides, both the nut and the bolt. That's the size tool you're gonna need. And again, you will get some adjustability out of having these bolts lose. So once you get your bumper lined up as you like it, go ahead and tighten them down.And go ahead and repeat that on the other side as well. All right, guys, now, as you finish up your installation, make sure you are tightening up all the bolts that we fastened earlier. And there are a couple of torque specs in the installation manual that comes with the bumper so make sure you're following those guidelines as well. So otherwise, this pretty much wraps up our review and install of this Barricade Extreme HD Front Bumper, fitting all 2019 and later RAM 1500s except the TRX and Rebel Editions. And of course, for all things RAM, keep it right here at americantrucks.com.
Subscribe to our YouTube Channel
Features, Description, Reviews, Q&A, Specs & Installation
Brand | Barricade |
Bumper Type | Full Width |
Bumper Material | Steel |
Bumper Finish | Black |
Bumper Winch Mount | No Winch Mount |
Bumper Fog Light Fitment | No Fog Lights |
Bumper Location | Front |
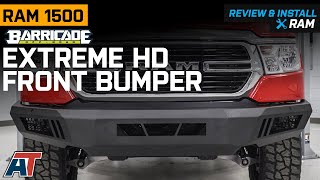
Beefs Up Front Protection. Get your non-Rebel RAM 1500 truck some prime, front-end armor with the Barricade Extreme HD Front Bumper. Thanks to its construction from cold hard steel, this bumper will prevent any brutal impact from making mincemeat out of your truck’s front fascia. Ultimately, it is a perfect addition to your truck for all your off-roading adventures or rugged worksites.
Enhances Truck Exterior with Aggressive Look. Even if you don’t need the protection, the bumper will make your RAM pickup look like a true off-road beast. Credit that to its sharp edges and wraparound design.
Super-Tough Steel Construction. This bumper is made from cold, hard .156-inch steel to guarantee that it will survive anything that comes its way. It is finished with a black powder coat to maximize its level of corrosion resistance.
Medium-Level Bolt-On Installation. This front bumper bolts onto the factory mounting areas, and it comes with all the hardware necessary to complete installation within 2 hours or more. Some assistance may be required to lift the bumper, which is rather heavy due to its steel construction.
Application. The Barricade Extreme HD Front Bumper is designed to fit 2019-2023 RAM 1500 models, except the Rebel. Does not fit RAM 1500 Classic models. It is sold individually.
Shop All Truck Parts And Accessories
Shop All Truck Bumpers
Shop All Front Truck Bumpers
Fitment:
Barricade R109856
CA Residents: WARNING: Cancer and Reproductive Harm - www.P65Warnings.ca.gov
Installation Info
Installation Time
(approx) 2 Hours
Difficulty Level:
Light to Moderate mechanical skill required.
What's in the Box
10 More Questions
Does not fit RAM 1500 Classic Models, fits the New Body Models Only.