Talk to a Ram 1500 Sales Tech
1-888-706-1096
M-F 8:30A-11P, Sat-Sun 8:30A-9P
$20K Sweeps! 10 Chances to Win! Enter Daily >

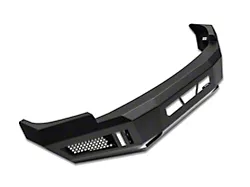
Barricade Extreme HD Rear Bumper with LED Spot Lights; Textured Black (09-18 RAM 1500)

Item R102620
Verify parts fit and get product recommendations.
Ram 1500 Sales Techs: Connect Now M-F 8:30A-11P, Sat-Sun 8:30A-9P
$0.00
On Sale

$711.99

FREE Shipping + $25.00 Oversized Item Fee Market Price $876.99 You Save 19% ($165.00) Up to 10% off for Military & First Responders! See Details

Will this fit your Vehicle?

Select a different vehicle Help?
Update or Change Vehicle
Ship to: Ashburn - 20149
Sorry, please enter a valid US or CA postal code
We're sorry, zip can't be updated at this time.
Recommended Install Shops
How It Works
Install Shops are available near Ashburn - 20149

Add Local Shop Installation

Total cost of service $429.00
    Create a list
    Add to New List

    Saved - View your saved items

    We're sorry. We couldn't save this product at this time.

    or use
      Video Review & Installation

      Hey, guys. It's Sara from americantrucks.com. And today, we have a review and install of the Barricade HD Rear Bumper with LED Spot Lights, fitting your '09 through '18 Ram 1500. This bumper features heavy-duty 3-millimeter thick steel construction with a black powder coat finish. This full-width rear bumper provides rugged styling as well as protection and includes two 3-inch LED cube lights to get the most out of your bumper. This bumper also includes a useful corner step and it is compatible with factory backup sensors and your hitch. Coming in at around $700, this bumper is middle of the road price-wise. But for your money, you are getting a bumper that allows you to keep your factory components like your hitch and also includes lighting which some other options that are lower price do not. I'm giving this install a two out of three wrenches on the difficulty meter. It can be done in approximately two hours and features a direct bolt up install. It also includes a wiring harness, which is very helpful when installing your pod lights, but it will require some minor wiring to power up your license plate light. All right, with that said, let's jump right into our install.For this install, we used an impact gun, 3/8 drive ratchet, 18, 15, 13, and 10-millimeter sockets, the included Allen key, 13-millimeter wrench, flathead screwdrivers, some spade connectors, a wire stripping and crimping tool, and a heat gun. All right, so the first step in our install is to get underneath our truck and unplug the license plate lights, as well as the trailer hitch plug connector and then we can unbolt our bumper. Let's get started.Now, you can remove the trailer hitch club connector by pressing down on this tab and wiggling it loose. Next, remove your license plate light plug by pulling back on the red tab, pressing and removing the connector. Repeat that process on the other license plate light. Next up, remove the two bolts on the outside of the bumper with a 15-millimeter socket. Repeat that process on the other side. So, with the final two bolts that hold on our bumper are behind our license plate, so grab a 10-millimeter socket and remove the two bolts holding in your license plate. With our license plate off, you can see the final two bolts that hold on our bumper, remove this with a 15-millimeter socket. Just make sure your bumper is supported because these are the last bolts holding it on.All right, now that we have our factory bumper uninstalled from our truck, we can put it side by side with our Barricade bumper, really check out some of the similarities and differences. Now, you may have noticed the Barricade bumper is quite a bit more heavy-duty than your factory bumper. It's constructed from three-millimeter thick steel, which is quite a bit more durable than our factory bumper. It also features a nice black powder coat finish which is gonna completely change the look of the rear of your truck. This Barricade bumper also has some added features like the corner steps, as well as some included lighting that we'll be installing in a minute, all while retaining the factory functionality of your bumper.So, before we can prep our new bumper to go on our truck, we do wanna remove this trailer plug connector so that we can reuse it on our new bumper. Either by hand or with a flathead screwdriver, push in the metal pins. With the plug removed from our factory bumper, we can now install it in our new bumper. Just line it up with the hole, with this circular part facing upwards and press it in. Next up, we can install our license plate light. We will have to wire this in a little bit later. Run the wiring through the bumper. Make sure to position the light with the open side facing the license plate and press it in. At this point, we wanna rock our bumper forward, so we can plug the holes that would have your sensors.Since our bumper does not have factory sensors, we're gonna be using these plugs. If yours does, this would be the time where you transfer over those sensors. Grab this plug and press it down into the bracket on the bumper. With the tabs on the outside, press it down and in place. Repeat that for the rest of the sensor holes. At this point, we can mount the light pods to the bumper. But first, we need to install these brackets. Lining them up to the back of the pod, squeeze them a little bit and slide them into these holes. Now we are gonna mount it in the up position like this so it can bolt to the bumper. With your bolt lined up, guide the nut down into the slot. A screwdriver with some tape on it may help in the situation, and get it threaded on. Grab the hardware for the other side and repeat that process. Line up the bracket on the other side and install the hardware. Grab the included Allen key and tighten these down. Repeat that process with your other pod light.Now, that we have the brackets mounted to our pod lights, we can put it in position on our bumper. Now, there are several slots under here so you can sort of choose your mounting location. We're gonna go for the center one on this one. Make sure before you mount up your light, you pass the wiring harness through the most open hole that should be towards the top of this mesh. Grab the hardware that's included with this pod light. Line up the bolt to the backside of your bracket. You may need to rotate the bracket in order to get the bolt in. And then with the bolt in place, line it up to the slotted bracket on your bumper. Grab your lock washer and nut, and get it over top the bolt from the other side. Make sure your pod light is lined up nicely in the slotted hole. Grab a 13-millimeter wrench and tighten this down. Repeat that process on the other side. Once your bolt is clear, place your lock washer and nut on the opposite side. Grab your 13-millimeter wrench and tighten it down.So, the last step before our install is to wire up our license plate light. We're gonna do this using spade connectors and tap into our existing license plate light harness. Grab your stripping tool and strip back the ends of these wires. Make sure you twist the ends of these wires nice and tight before placing your spade connector over at the end. With that in place, crimp this. Just double-check that it's on tightly. Repeat that process with the ground wire. So, the speade connectors we used do have heat shrink so we're gonna heat shrink them now.So, at this point, we can lift our bumper onto our truck. You may wanna grab a friend for this step. Once it's resting on this plate here, we can get underneath and bolt it up. Grab the included nut plate, slide it behind the bracket on the bumper, line it up with both the holes on the frame of your truck, and thread your hardware into the nut plate. Repeat that process on the other side. Now, that there's hardware in both sides, just double-check the fitment of your bumper. There is quite a bit of adjustability. And then grab your 18-millimeter socket and tighten them down. Repeat that process on the other side.So, we have our wiring harness here. We're gonna hook it up to the battery and then run it down the frame rail to the lights on our bumper. Starting with the positive terminal on our battery, using a 10-millimeter socket, we're gonna remove this nut, so we can hook up our positive lead. Tighten this down. Using your 13-millimeter socket, remove the nut on the negative side of the battery.Next up, we're just gonna mount this relay somewhere in the engine bay that's close to the battery. I think this stud that holds your windshield washer line here will work just fine. We just removed this pop clip here and just gonna replace it over the end of this stud. At this point, we're gonna grab the end that has the switch on it and disconnect the white connector. Grabbing this end, we're gonna run it through the rubber grommet on the firewall. So, now we can reach under the dash and pull out our cable that we sent through the firewall and hook it up to our switch. You can mount this wherever you'd like on the dash. I'm gonna go for this section right here. And I'm gonna run this side of the wiring harness right underneath the steering wheel here. When it's plugged in, you should see it light up red. And then when you press the button, the green light will illuminate signaling the lights are on. Make sure this end is tucked up underneath the dash and out of the way of your pedals.All right, so, we ran our wiring harness from our battery down the frame rail to the back of the truck. We can now get underneath and plug everything back in. Reconnect your factory trailer hitch plug connector, this will be 180 degrees out of where it was when we took it off. Connect the wiring harness for your pod light and then tuck away the excess. Connect the spade connectors that we installed on our license plate light. The power should be connected to the stock, blue, and white wire, and the factory ground will be black. Tuck away the excess wires. Connect the wiring harness to your pod light and tuck away the excess wire. This way, we can finish installing the last couple items on the outside of our bumper. We can start with this trailer hitch plug. Next up, put these license plate plugs here in the bumper, so we can install our license plate. Line up the license plate with the two plugs we just installed and reinstall your factory bolts. Grab your 10-millimeter socket and tighten these down. All right, so that is gonna do it for the review and install of our Barricade Bumper. Remember for all things Ram, keep it at americantrucks.com.

      Product Information

      Features, Description, Reviews, Q&A, Specs & Installation

      Features & Specs

      • Rugged Styling and Protection
      • Full Width Rear Bumper
      • Heavy Duty 3mm Steel Plate Construction
      • Premium Two Stage Textured Black Powder Coated Finish
      • (2) High Powered 3" LED Cube Fog Lights Included 
      • Compatible with Factory Back-Up Sensors
      • Direct Bolt-On Installation
      • Fits all 2009-2018 Dodge RAM 1500 Models

      Description

      Rugged Styling and Protection. If your 2009-2018 Dodge RAM 1500 pulls double duty on the street and on the trails, you may want to replace that inferior stock rear bumper with one that can handle the extra abuse. This Barricade Off-Road Extreme HD Rear Bumper will provide excellent protection from all kinds of off-road hazards while giving your RAM rugged off-road styling. Featuring integrated high powered LED lighting, this heavy duty Barricade Bumper is perfect for those who don't shy away from adventure.

      Integrated LED Lights. This RAM Rear Bumper includes two 3 inch square LED Fog Lights. They're equipped with 5 Watt CREE LEDs and are designed to provide intense 6000 K light. Each light is rated IP67 providing reliable waterproof performance, thanks to a tough aluminum housing sealed with a polycarbonate lens.

      Heavy Duty Construction. Barricade Off-Road manufactures their Rear Bumpers to precise specifications from 3mm thick steel plate for superior strength and rigidity. Barricade then completes their Bumpers in a two stage finish using epoxy pre-coating and high-grade textured black powder coating for long lasting durability.

      Easy, Bolt-on Installation. Barricade Off-Road Rear Bumpers were engineered to be a direct bolt-on upgrade replacement for your RAM's original stock bumper reusing the factory mounting points. There is no cutting or modifications required for a simple straight forward install. With the help of a friend and a set of basic hand tools this Barricade Extreme HD Rear Bumper can be installed in about two hours.

      Application. This Barricade Off-Road Extreme HD Rear Bumper with LED Lights is designed to fit all 2009-2018 Dodge RAM 1500 models. This Rear Bumper is designed to work with models that are equipped with or without rear mounted backup sensors.

      Freight Notes. Freight items can only be shipped within the continental 48 states, no expedited methods. What is freight shipping? Your Answers are Right Here!

      Barricade Off-Road

      Shop All Truck Parts And Accessories

      Shop All Truck Bumpers

      Shop All Rear Truck Bumpers

      Fitment:

      Barricade R102620

      CA Residents: WARNING: Cancer and Reproductive Harm - www.P65Warnings.ca.gov

      Installation & What's in the Box

      Installation Info

      What's in the Box

      • (1) Rear Bumper
      • (2) Mounting Brackets
      • (4) Sensor Hole Plugs
      • (2) LED Lights
      • Hardware
      4.5

      Customer Reviews (500+)

        Questions & Answers

        10 More Questions