 FREE 1 to 3-Day Delivery on Orders $149+ Details
How to Install AEM Brute Force Cold Air Intake - Gunmetal Gray on your Ram
Shop Parts in this Guide
PARTS LIST
Read and understand these instructions BEFORE attempting to install this product. Failure to follow installation instructions and not using the provided hardware may damage the intake tube, throttle body and engine.
1. Preparing Vehicle
a. Make sure vehicle is parked on level surface.
b. Set parking brake.
c. If engine has run in the past two hours, let it cool down.
d. Disconnect negative battery terminal.
e. Do not discard stock components after removal of the factory system.
2. Removal of stock system
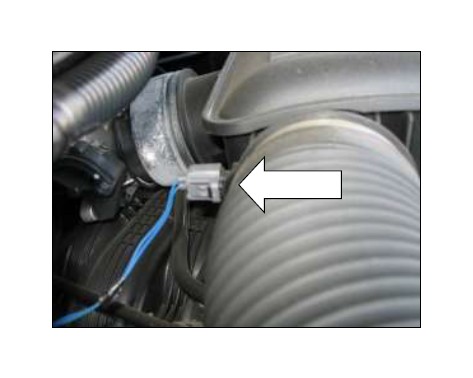
a. Disconnect the PCV breather hose at the air box lid.
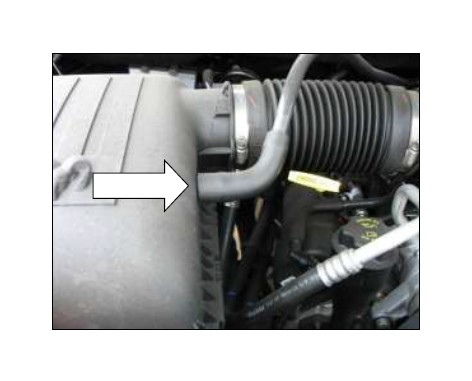
b. Loosen the hose clamp securing the throttle body coupler.
c. Disconnect the inlet air temperature (IAT) sensor harness connector.
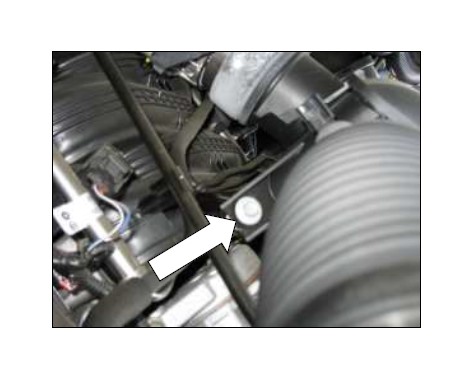
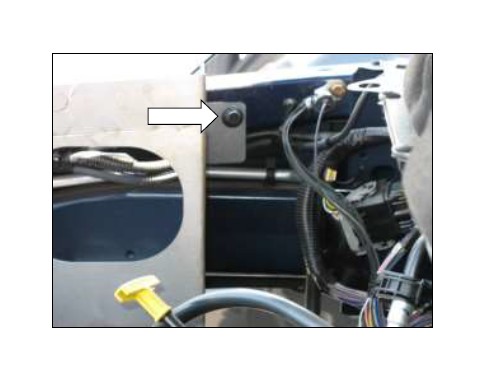
d. Loosen and remove the mounting bolt to the intake plenum.
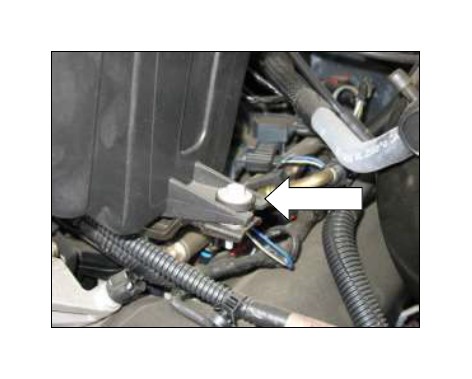
e. Loosen and remove the remaining mounting bolt.
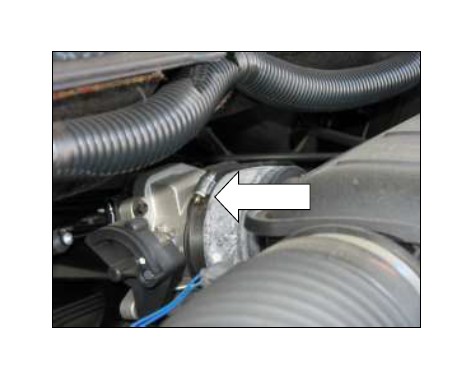
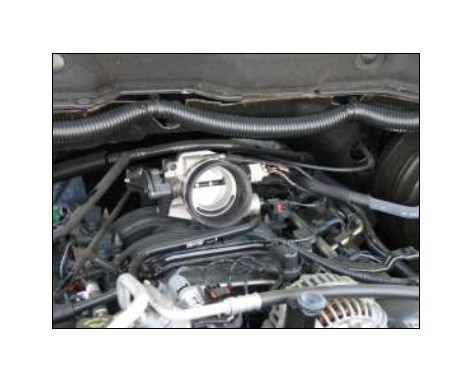
f. Loosen the hose clamp at the intake plenum.
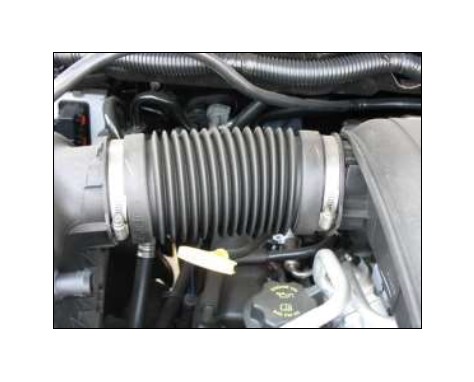
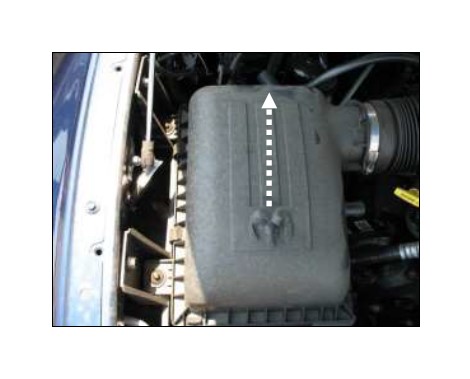
g. Pull the air box straight up along with the inlet tube. Remove the intake plenum and the coupler attached to the throttle body.
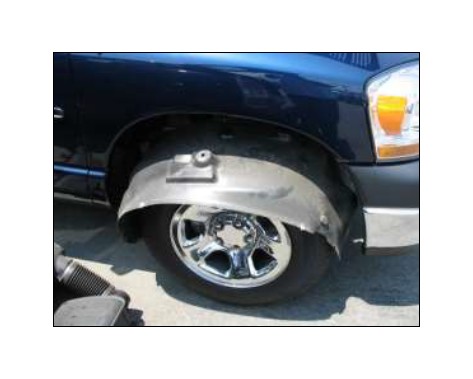
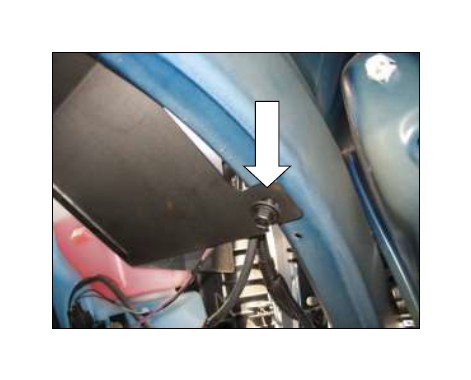
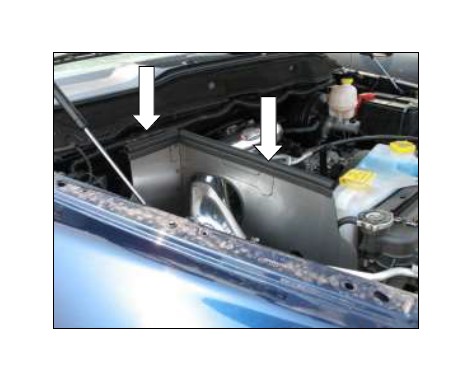
h. Remove the fender liner on the passenger side to access the air box mount.
i. Loosen and remove the air box mounting bolts from the air box mount at the fender.
j. Loosen and remove the lower two remaining mounting bolts.
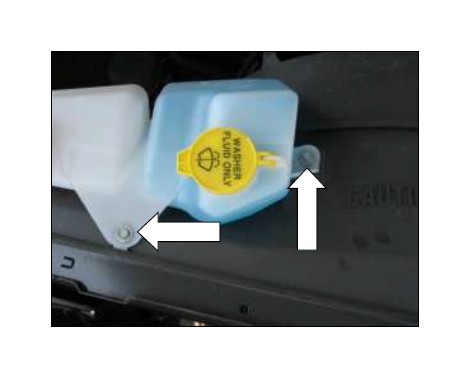
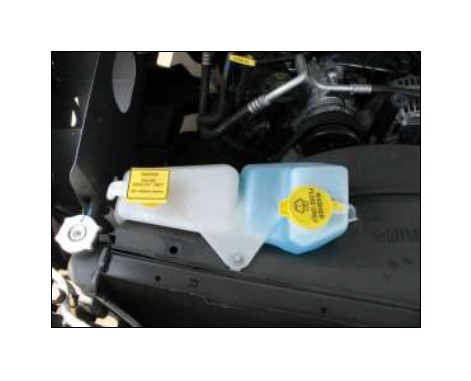
k. Loosen and remove the washer/coolant overflow reservoir mounting bolts. Disconnect the overflow hose from the reservoir.
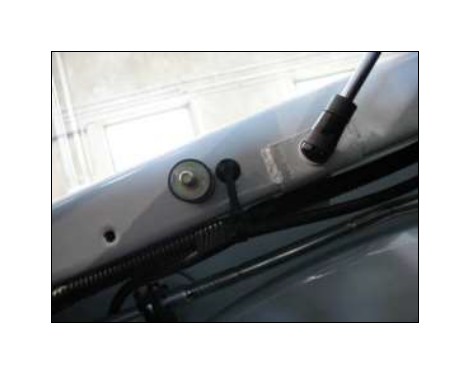
l. With the reservoir removed, loosen and remove the fan shroud bolt.

3. Installation of AEM® intake system.
a. When installing the intake system, do not completely tighten the hose clamps or mounting hardware until instructed to do so.
b. Install the supplied rubber mount into the passenger side fender.
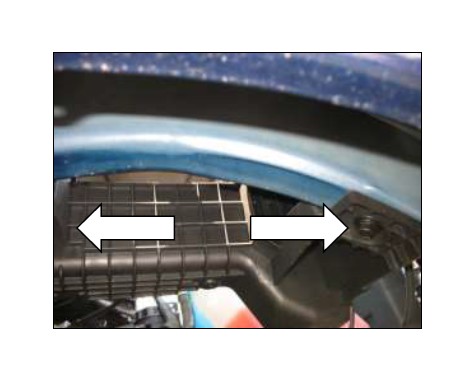
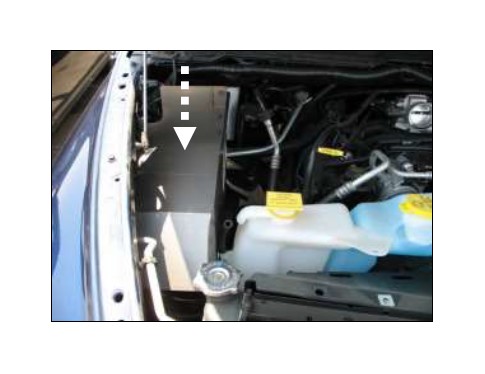
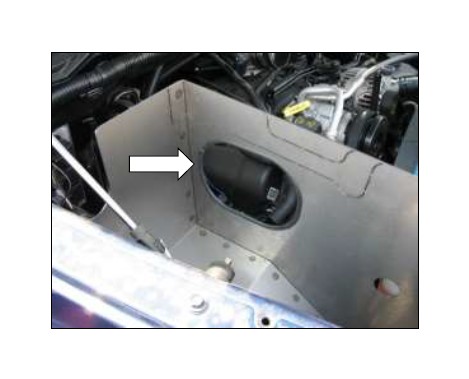
c. Insert the heat shield as shown.
d. Secure the heat shield with the bolt from step (2I).
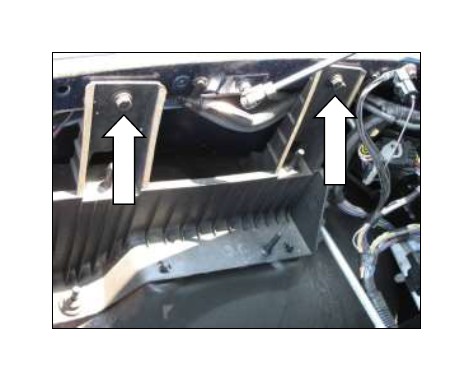
e. Secure the rear heat shield mount.
f. Secure the lower heat shield mount.
g. Reinstall the washer/coolant overflow reservoir.
h. Attach the coupler to the throttle body and secure with the #56 hose clamp.
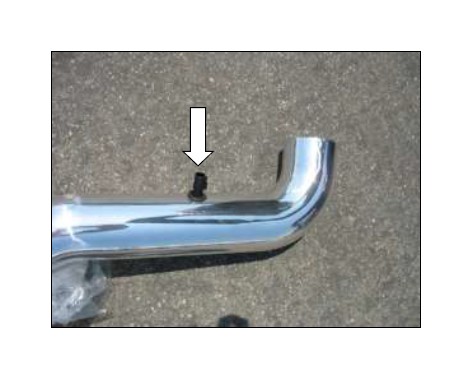
i. Insert the rubber grommet into the inlet pipe.

j. Remove the IAT sensor from the intake plenum by twisting the sensor counter clockwise. Gently pull out the sensor and remove the o-ring.
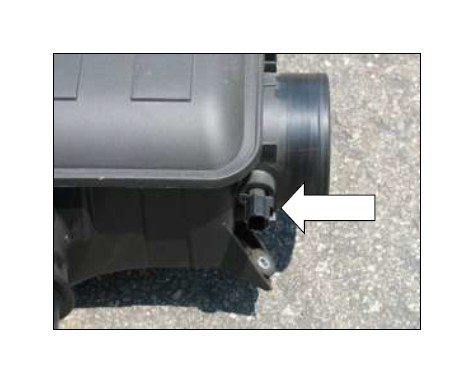
k. Insert the IAT sensor into the inlet pipe.
l. Attach the rubber edge trim to the heat shield opening.
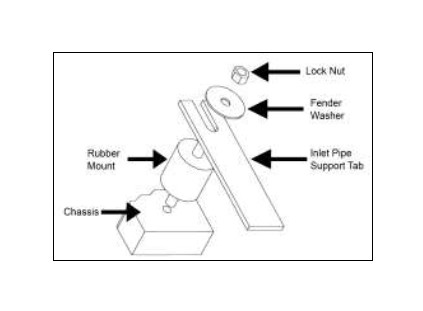
m. Insert the inlet pipe as shown. Secure at the throttle body with a #60 hose clamp. Align the bracket with the rubber mount. See diagram for proper assembly.
Proper rubber mount assembly
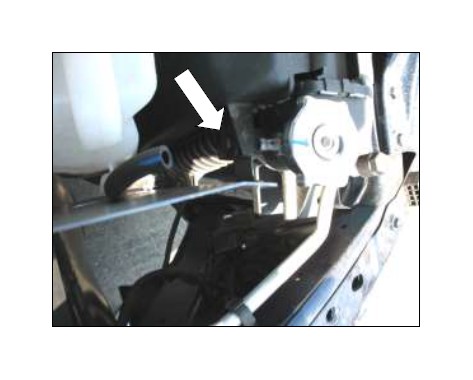
n. Attach the breather hose to the inlet pipe as shown. Secure with the provided hose clamp. Make sure that the rubber elbow is not kinked for air flow.
o. Attach the air filter as shown. Secure with #60 hose clamp. Check for clearance around the heat shield and A/C lines.
p. Reattach the IAT sensor harness connector to the IAT sensor.
q. Attach the sponge gasket to the top of the heat shield.
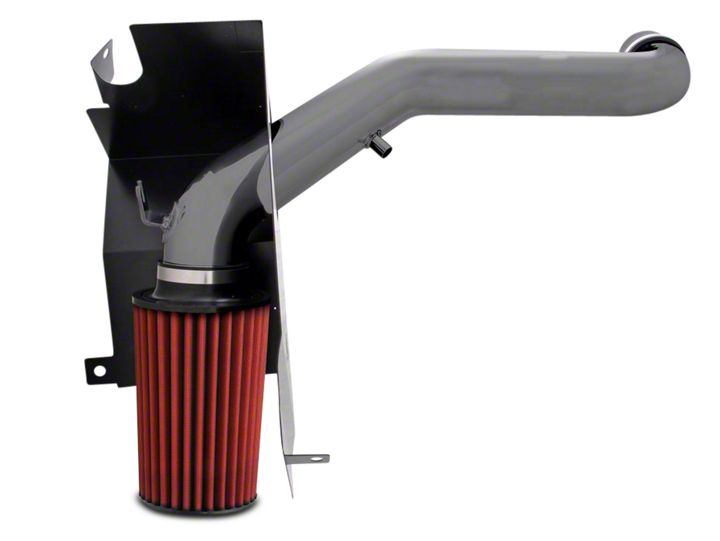
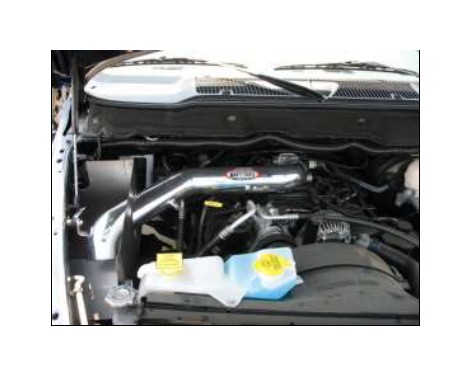
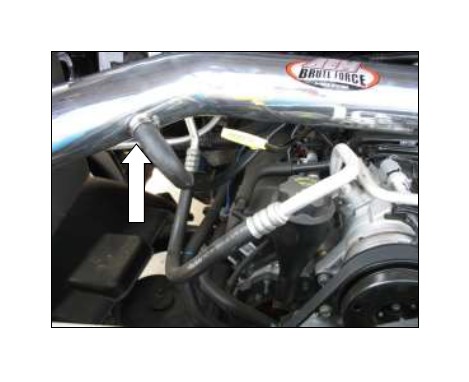
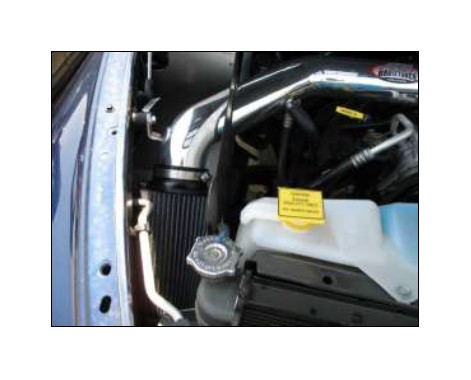
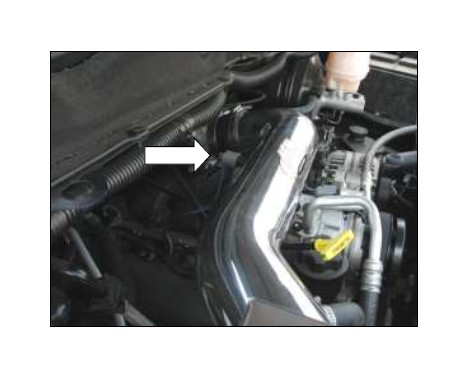
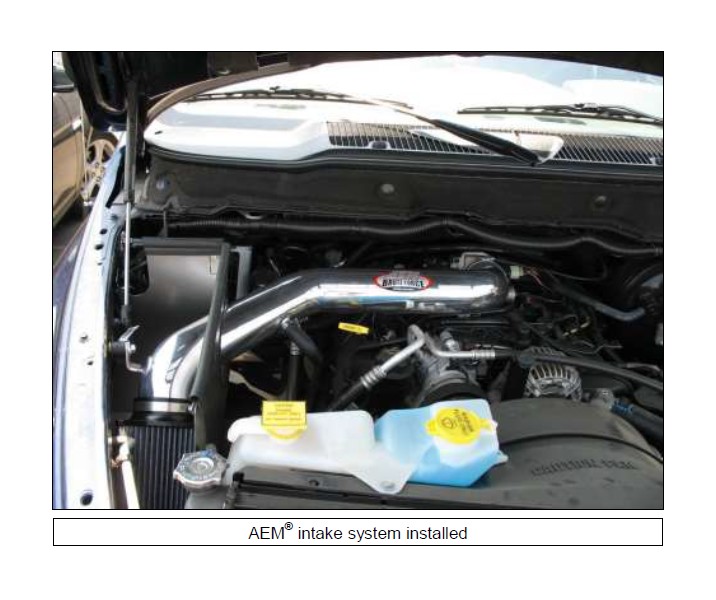
AEM® intake system installed
4. Reassemble Vehicle
a. Fender liner: Install the passenger fender liner and any hardware that was removed in steps 2h. NOTE: Failure to install the fender liner will result in diminished performance and increase the potential for engine damage due to water ingestion in rainy conditions.
b. Position the inlet pipes for the best fitment. Be sure that the pipes or any other components do not contact any part of the vehicle. Tighten the rubber mount, all bolts, and hose clamps.
c. Check for proper hood clearance. Re-adjust pipes if necessary and re-tighten them.
d. Inspect the engine bay for any loose tools and check that all fasteners that were moved or removed are properly tightened.
e. Reconnect negative battery terminal and start engine. Let the vehicle idle for 3 minutes. Perform a final inspection before driving the vehicle.
5. CARB Sticker Placement
a. The C.A.R.B. exemption sticker, (attached), must be visible under the hood so that an emissions inspector can see it when the vehicle is required to be tested for emissions. California requires testing every two years, other states may vary.
6. Service and Maintenance
a. AEM Induction Systems requires cleaning the intake system’s air filter element every 100,000 miles. When used in dusty or off-road environments, our filters will require cleaning more often. We recommend that you visually inspect your filter once every 25,000 miles to determine if the screen is still visible. When the screen is no longer visible some place on the filter element, it is time to clean it. To clean, purchase our Synthetic air filter cleaner, part number 99-0624 and follow the easy instructions.
b. Use window cleaner to clean your powder coated AEM® intake tube.
NOTE: DO NOT USE aluminum polish on powder coated AEM® intake tubes.


