 FREE 1 to 3-Day Delivery on Orders $149+ Details
How to Install Proven Ground Upper Replacement Grille w/ FORD Lettering & LED Lighting (09-14 F-150, Excluding Raptor) on your Ford F-150
Installation Time
60 minutes
Tools Required
- 10mm Wrench or Socket
- T25 Torx Bit
- Electric Screw Gun or Impact Driver
- Plastic or Wood Pry Bar
- Painter's Tape
- Electrical Tape
- 2 feet 18 Gauge Wire and two Splices
- Electrical Splice Crimpers
- Optional: Long flexible stick (to route the wire)
- Optional: Cleaning supplies (to clean under the old grille)
CAUTION: Failure to tape as stated can cause damage to your paint
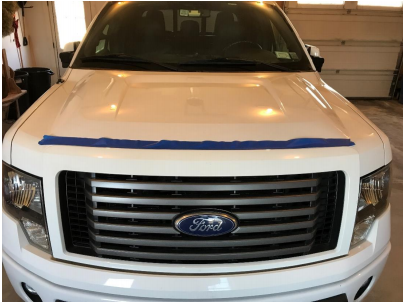
Step 1. Protect vehicle paint. Cover the hood area around the top edge of old grille with tape.
Step 2. Remove 6 nuts. Open the hood and use the 10mm wrench or socket to remove the (6) factory nuts.

NOTE: Nuts are located at the top of the grille
Step 3. Remove 6 Torx Bolts. Locate the 6 - T26 Torx bolts. These are at the bottom of the grille. Remove each bolt.

NOTE: THESE ARE TIGHT. An Impact driver or electric screw driver could be used
Step 4. Detach five clips. Slightly pull up one corner with either a plastic or a wood wedge. CAUTION! These clips are TIGHT and will POP real loud when you release them. Install additional tape as required.
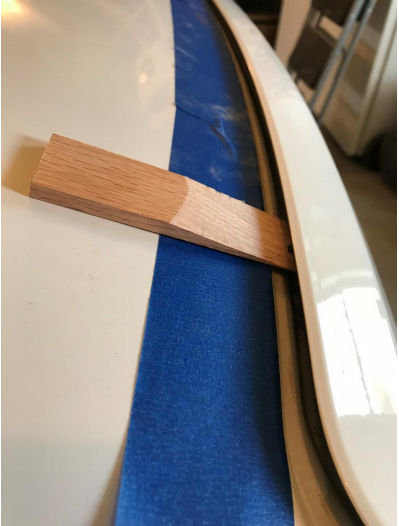
NOTE: You can get these wedges at home improvement stores
Step 5. Cont. popping clips. Work your way across with the wedge, popping each clip. NOTE: It is best to get the wedge as close to the clip and use a twisting motion to pop the clip.
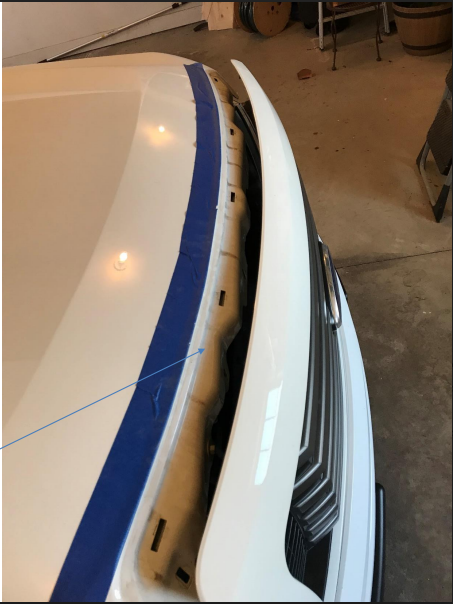
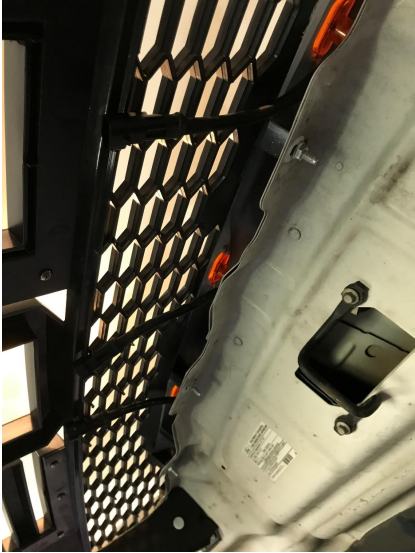
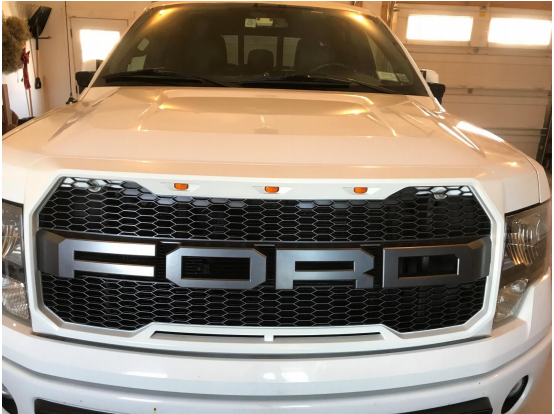
This is what it will look like when completed.
Step 6. Install New grille. Work in reverse order to install the grille. Start with one of the ends, and work your way to the other edge. CAUTION: Make sure the carriage bolts on the top of the grille are in the slots and aligned with the holes in the hood.
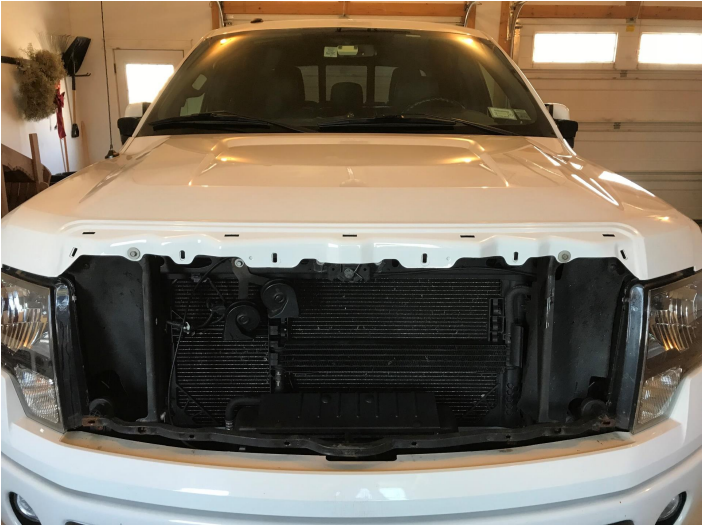
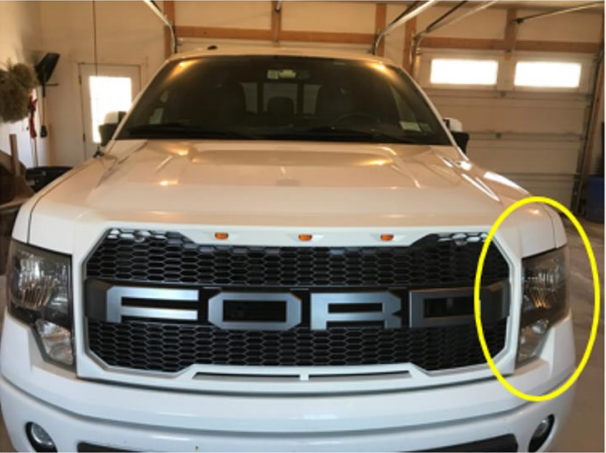
Step 6. Great job! The grille should be removed and look like this
Step 7. Push clips into slots, until they are full engaged.
Step 8. Install the top nuts. Loosely install these 6 nuts. CAUTION: Make sure the grille is centered prior to tightening any nut or bolt.

Step 9. Install the Bottom 6 T25 Torx bolts.
Step 10. Tighten the 6 10mm nuts on the top bolts.
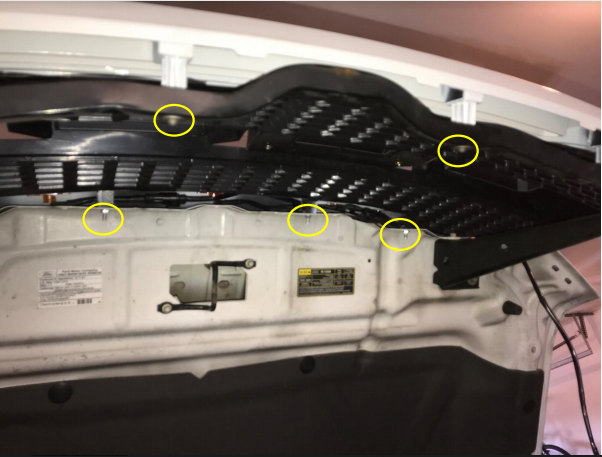
NOTE: Location shown is typical, picture does not show all locations
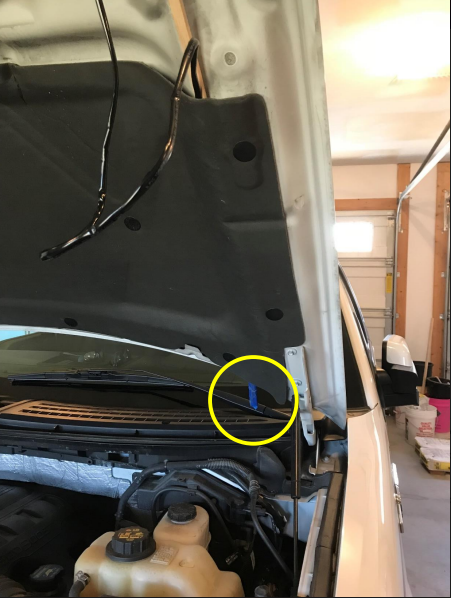
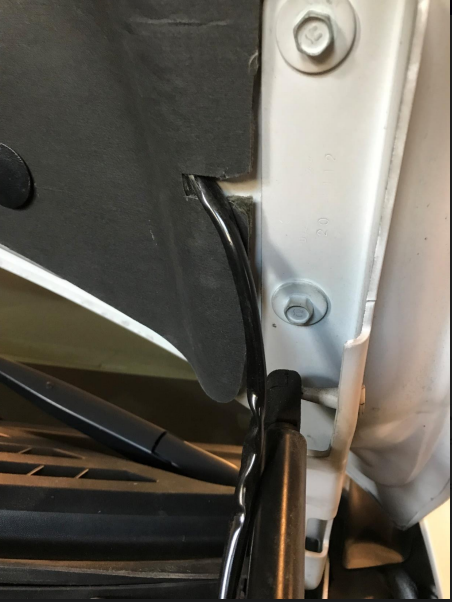
Step 11. Install Wire Harness. Route the wire harness behind the top bolts. There is enough room to tuck in all three light extensions.
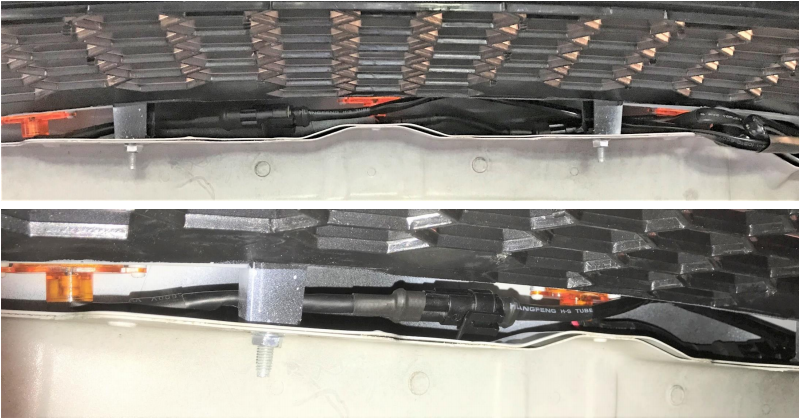
Step 11. Install Wire Harness Cont. Use a 3 to 4 foot section of flexible material Tape the end of the harness to one end.
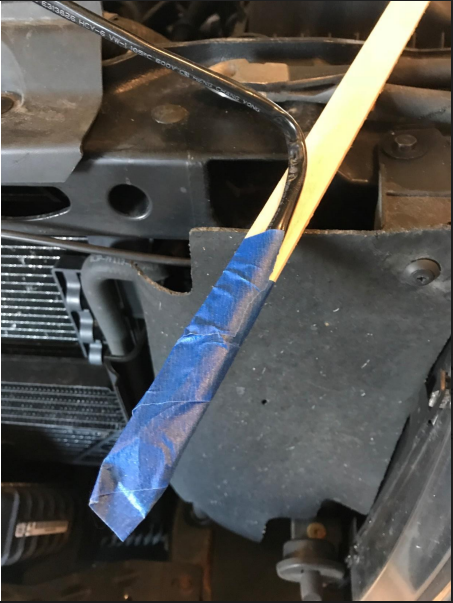
Step 11. Install Wire Harness Cont. Place at the top of the fabric engine covering. Open slightly to make room, and push stick to the bottom of the fabric material.
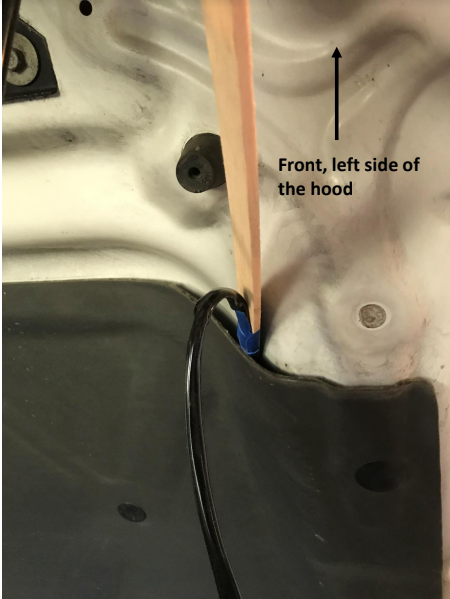
Step 11. Install Wire Harness Cont. This is where the wire will come out. Remove tape, and pull wire harness all the way through. Pull the stick out from the top.
Step 11. Install Wire Harness Cont. Cut a small slit in the fabric for the wire to come through.
Step 12. Splice extension wire. - The yellow/Green wire noted here is the power wire.
Splice into it and run the extension wire behind the air cleaner box to the location of
the wire harness. - Splice the red wire from the harness to the extension wire. - Splice an end connector on the black wire and ground it to the vehicle.
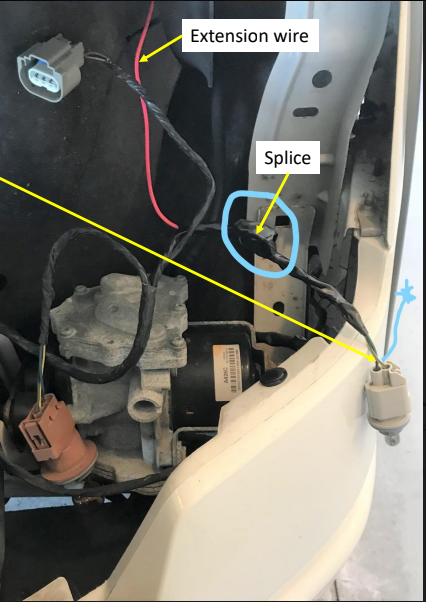
NOTE: This is the drivers side headlight. The small light to the right in the picture is the small running light
Step 13. Re-install left headlight
- Ensure all loose wiring is tied up and secure.
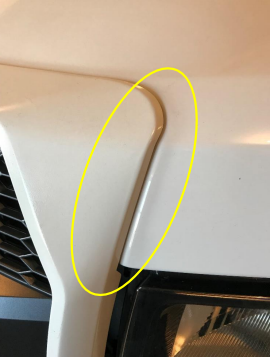
- Ensure there is though enough slack at the hood hinge to allow flexibility.
- Turn on running lights and check the lights.
CONGRATULATIONS THE GRILLE IS INSTALLED
Installation Instructions Written by AmericanTrucks Customer on 4/23/18
