 FREE 1 to 3-Day Delivery on Orders $119+ Details
Talk to a Sales Tech
1-888-706-1096
M-F 8:30A-11P, Sat-Sun 8:30A-9P
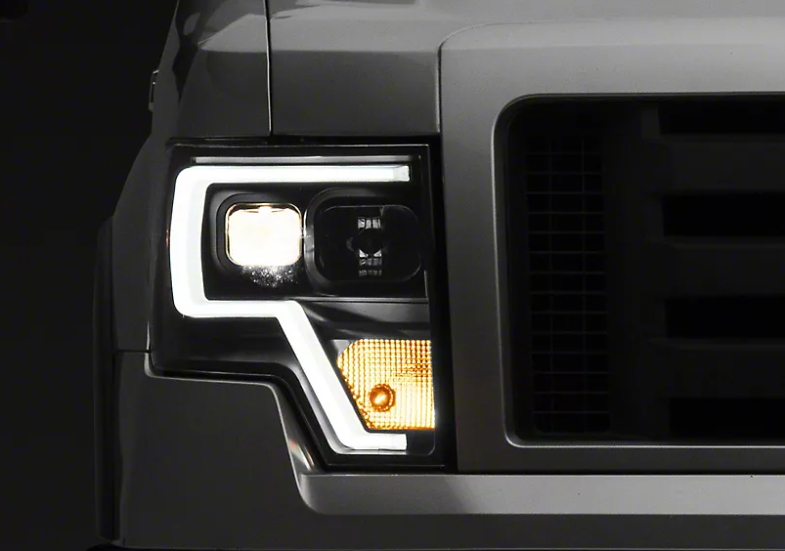
How Can I Tell if I Need a Conversion Kit? LED Lights
Installing an LED conversion kit can be easy, but it all depends on the specific vehicle you’re looking to upgrade and the technology — or the lack thereof — with which the vehicle is already equipped. This, combined with the space constraints of working in and around the light housings, may make for a challenging installation process. It’s a consideration worth making, however. Whether driving by night or through a sheet of rain or snow, your lights are an essential contributor to on-road safety — not just for you, but other drivers as well.
Before you invest time and money, though, ask yourself: “What kind of lighting am I considering upgrading to LED? My headlights, my dome lights, turn signals or tail lights?” The answers and considerations for each differ radically. Read on for the short and simple, and keep going for a quick breakdown of the installation steps.
Headlight Conversion Kits
Headlights usually come with the ballasts, heat sinks and necessary wiring adapters, which means they’re already sold as conversion kits. One of the biggest challenges with a headlight conversion kit is physically ensuring the LED bulb will fit inside the housing. Halogen headlight housings are usually fairly shallow behind the bulb, but the problem is that the average LED headlight has a bulky heatsink built into it. So, you may need to make room behind the bulb in the housing, or just be deliberate with the wire-routing. Some installations require that you physically cut a relief into the back of the headlight housing dust and moisture cap, although this is rare.
Dome Light Conversion Kits
Dome lights are plug-n-play and require no conversion kit or extra parts. They’re a great way to improve interior lighting and allow you to change the color to a pure white output. It’ll be a big improvement over that dull yellow factory output.
Turn Signal Conversion Kits
Typically, if you’re looking to upgrade your turn signals, you’ll first have to buy load resistors. If you don’t, your vehicle is going to think the bulb is out and the blinkers will flicker rapidly. This is because LEDs use so little current to light up.
Tail Light Conversion Kits
Tail lights are like turn signals, but don’t always indicate that a bulb’s gone out. It all depends on how new or old the vehicle is. Older vehicles from the ’90s or earlier, for example, typically don’t experience issues with the “bulb-out” indicator. Newer vehicles, on the other hand, are packed with more advanced features to tell you when it thinks a bulb is out. If you’re unsure if your ride came with this feature or not, you can always unplug one of the tail lights and see if you trip the indicator. If you don’t, you shouldn’t need load resistors. If you do, your vehicle will require load resistors to be wired inline of the LEDs to simulate a properly functioning halogen bulb’s resistance.
Installation Steps
- Determine your headlight bulb type
- Purchase an LED conversion kit from AT.
- Snap a quick photo of your OE light output prior to installation for comparison after
- Unplug the plastic wiring connector from the factory-installed bulbs and remove them
- Store them in a safe space for potential future use
- Install the LED bulbs into the headlight socket, but be careful not to touch the LED with bare fingers
- Gently twist the bulb clockwise to secure it
- Connect the LED ballast wiring — one end goes to the new bulb, and the other to the original wiring harness
- Turn your lights on to check the position of the cut-off — position may need to be adjusted
- Secure the ballasts using plastic zip-ties or double-sided tape
- Take your new LED headlights out for a test drive